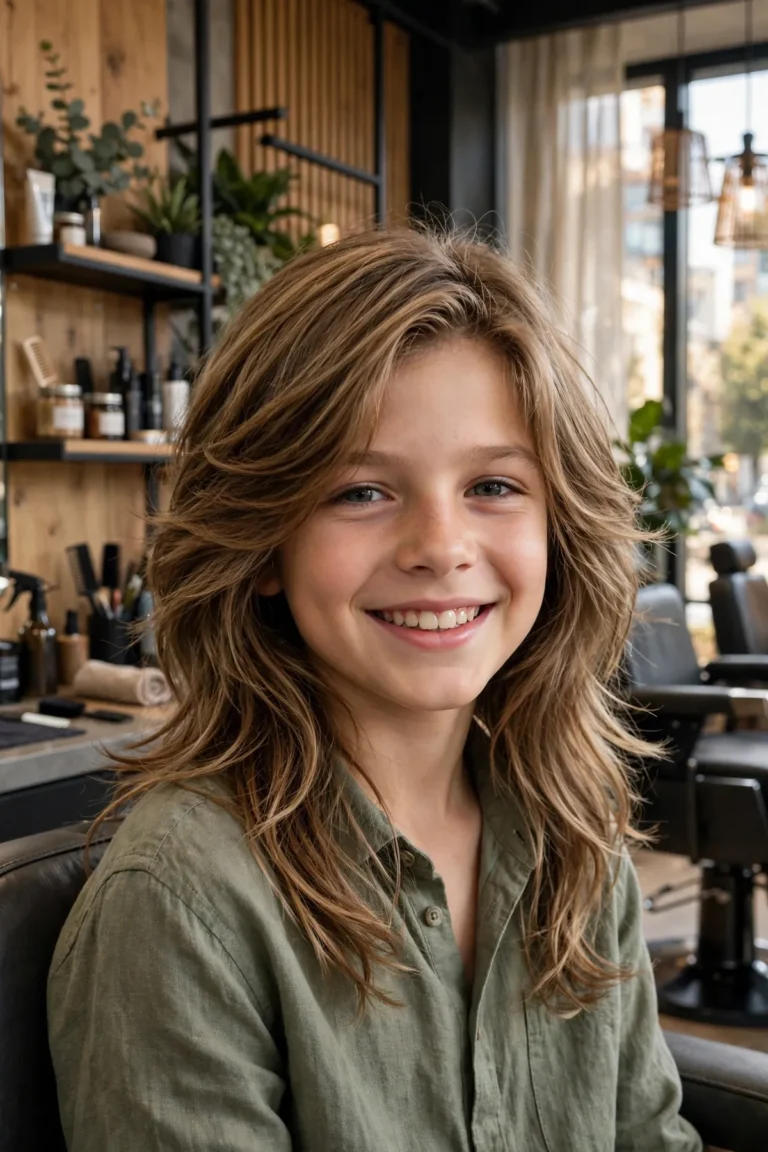
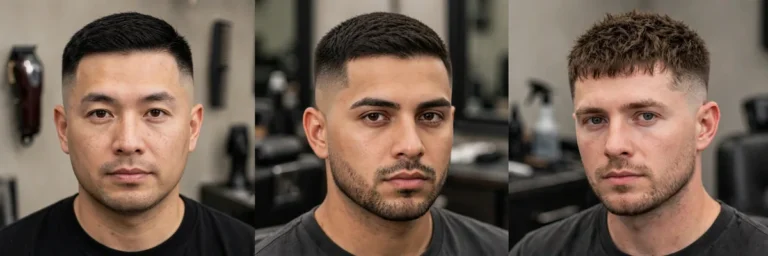
30 Best Mens Haircut Transformations for Men
Reviewed by Daniel Morgan
A mens haircut transformation is the fastest way to change how you look and feel. One good cut can take you from tired and overgrown to sharp and confident in under an hour. No new wardrobe. No gym streak. Just a chair, a skilled barber, and a clear plan. A men’s haircut transformation can reset your whole look in one visit.
This guide shows 30 real haircut transformations for men. Each one has a before-and-after story, a barber script you can read out loud, and a simple styling tip. Whether you want a small refresh or a full mens haircut makeover, you will find a transformation haircut here that fits your hair and your life.
Every transformation below is one of the best haircut transformations a barber can deliver. Pick your favorite, bring this page to your appointment, and your next before and after haircut moment starts with one decision.

Long-to-Short Chops
1. Long Hair to Textured Crop
The before: Heavy hair past the ears, flat on top, and hard to manage each morning. It hides your face and makes you look tired.
The after: A short, choppy textured crop with a clean taper on the sides. Your face opens up, and styling takes two minutes.
Best for: Straight or slightly wavy hair; oval and square faces.
Ask your barber: “Take the top to about 2 inches, textured with point cutting. Taper the sides with a #2 guard blending to a #1 at the neckline.”
Style it: Rub a pea-sized amount of matte clay through damp hair and push it forward loosely.

2. Shoulder-Length Hair to Crew Cut
The before: Long, shapeless hair that falls into your eyes and needs constant tying back. It looks unkempt, not relaxed.
The after: A neat crew cut with a short, tidy top and faded sides. You look sharper, cleaner, and years younger.
Best for: Thick straight hair; round and square faces.
Ask your barber: “Cut the top to about 1 inch, slightly longer at the front. Fade the sides from a #2 down to a #1.”
Style it: Towel dry, add a dab of light pomade, and brush the front slightly up.
3. Man Bun to High Fade
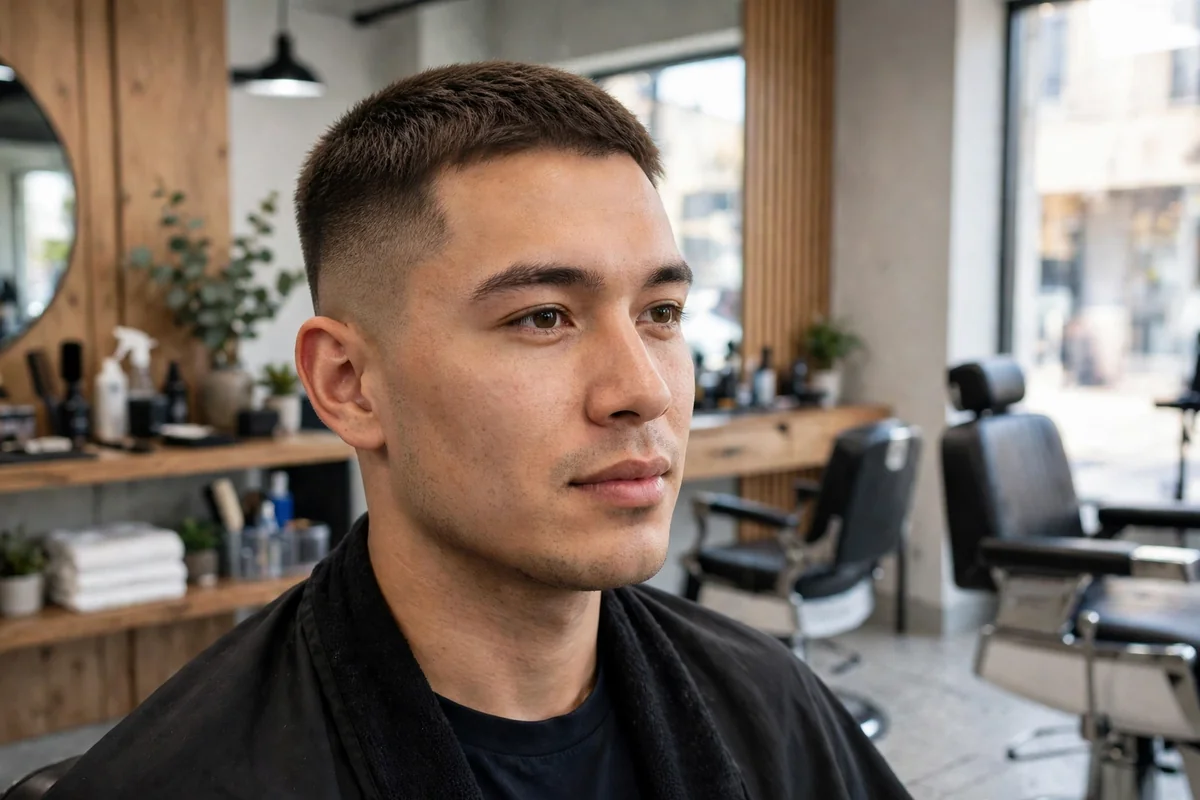
The before: A man bun that has run its course. The hair is dry at the ends, and the bun hides your bone structure.
The after: A bold high fade haircut with a textured top. The contrast is striking, and your jawline finally shows.
Best for: Thick or wavy hair; oval and heart faces.
Ask your barber: “High skin fade on the sides, up to about an inch above the ears. Leave 2 to 3 inches on top, textured.”
Style it: Work sea salt spray into damp hair, then blow dry forward for natural texture.
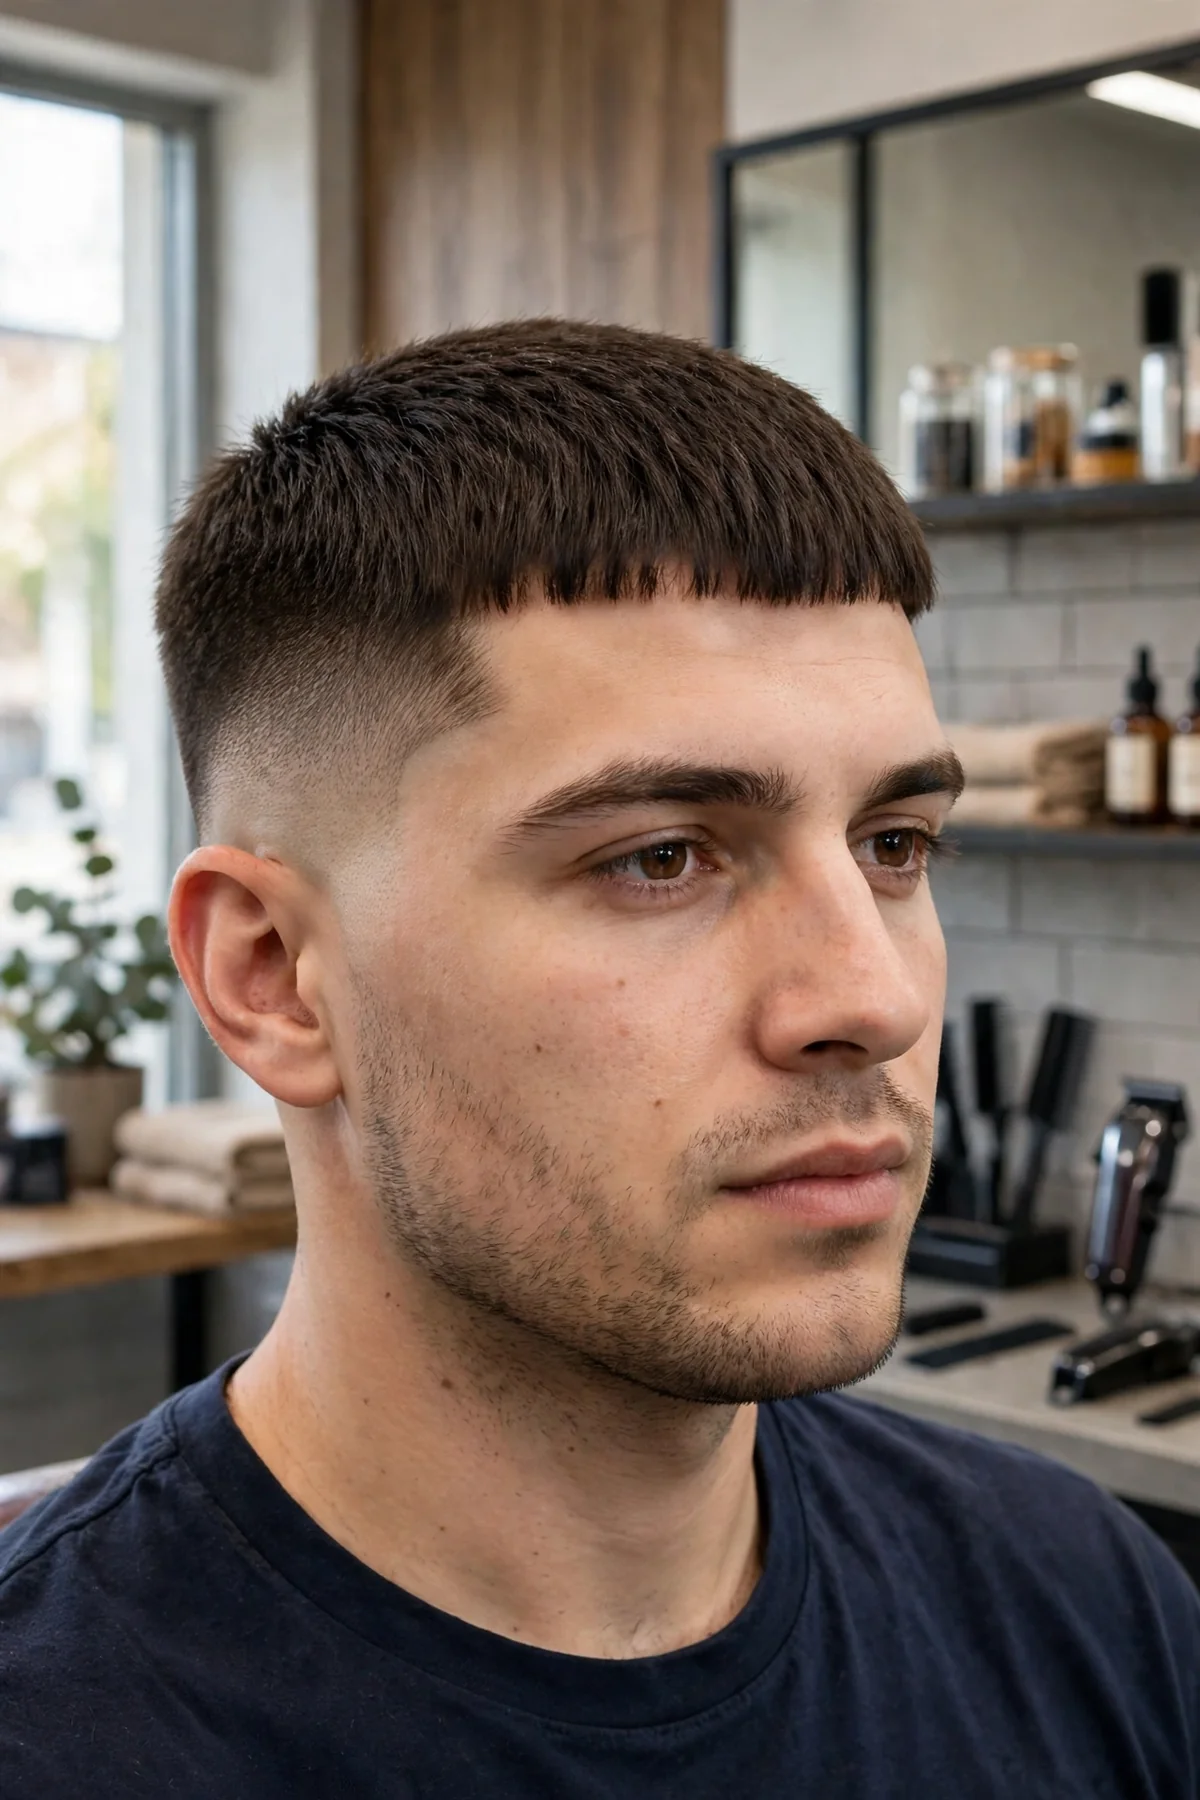
4. Shaggy Overgrown Hair to French Crop
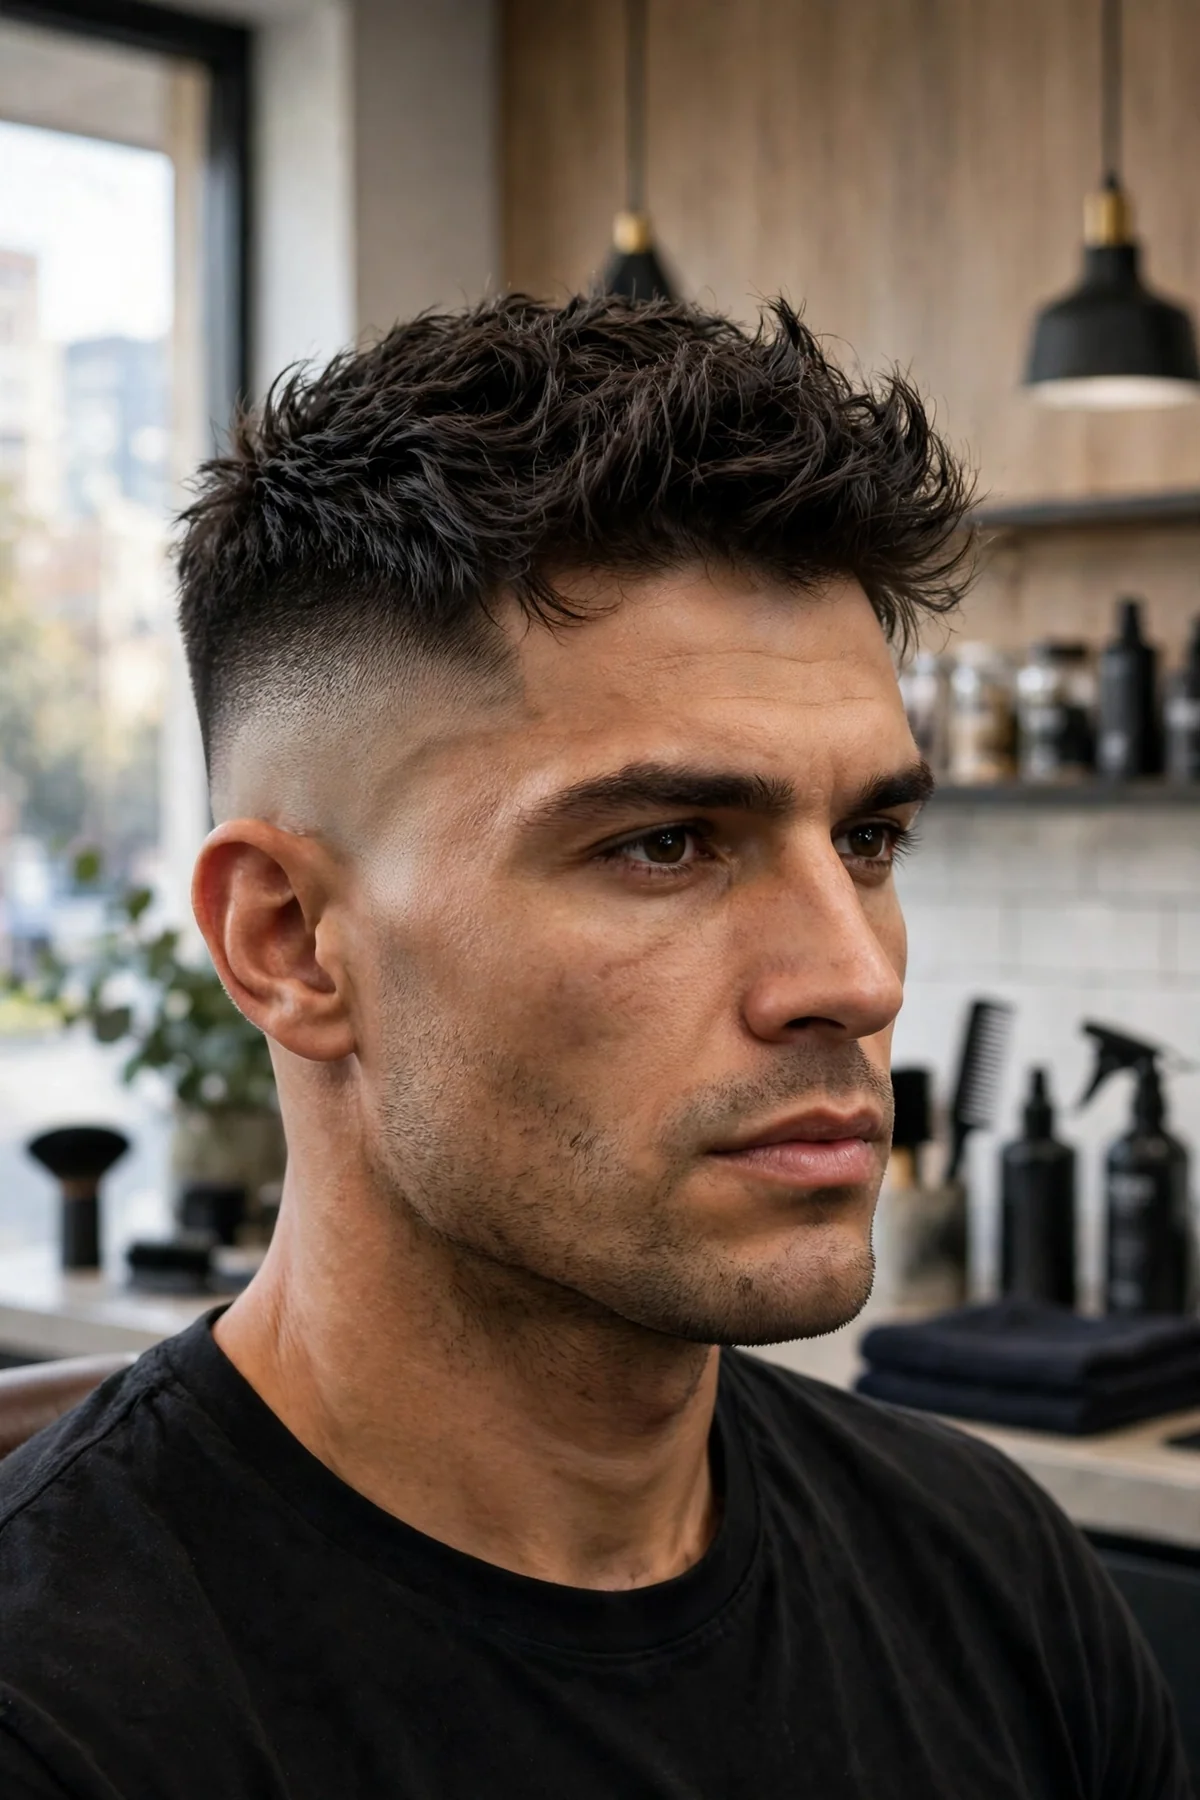
The before: Shaggy layers falling over your forehead and ears, with no clear shape. You look like you forgot your last three appointments.
The after: A crisp French crop haircut with a short blunt fringe and tight sides. Clean, modern, and easy to keep.
Best for: Straight or wavy hair; oblong and oval faces.
Ask your barber: “Short blunt fringe just above the eyebrows, about 1.5 inches on top with texture. Taper the sides with a #1 guard.”
Style it: Push the fringe forward with a little matte paste. No comb needed.
5. Ponytail to Buzz Cut
The before: A long ponytail that takes forever to wash and dry. It drags your whole look down.
The after: A confident buzz haircut that shows your head shape and bone structure. Bold, clean, and freeing.
Best for: Any hair type; oval and square faces.
Ask your barber: “One even length all over with a #2 guard, about a quarter inch. Clean up the neckline and edges.”
Style it: No styling needed. A little scalp moisturizer keeps it looking fresh.

Fade Transformations
6. Overgrown Hair to Skin Fade
The before: Grown-out sides that puff out wide and swallow your head shape. The top has lost its style.
The after: A sharp skin fade that melts from bare skin to a neat top. The whole head looks sculpted.
Best for: Thick or coarse hair; round and square faces.
Ask your barber: “Skin fade starting low at the temples, blending up to 2 inches on top. Keep the top textured.”
Style it: Apply matte clay to the top and style it forward or slightly to the side.

7. Uniform Cut to Mid Fade with Quiff
The before: One flat length all over, like a helmet. No shape, no movement, no style.
The after: A mid fade with a lifted quiff at the front. Height on top balances the clean sides.
Best for: Straight or wavy hair; round and heart faces.
Ask your barber: “Mid fade with a #1 at the bottom blending to a #3. Leave 3 inches at the front for the quiff.”
Style it: Blow dry the front upward with a round brush, then set it with medium-hold pomade.

8. Heavy Sides to Clean Taper Fade
The before: Heavy, blocky sides that make your head look wide. The top flops over without direction.
The after: A smooth taper haircut that gradually shortens at the edges. Classic, neat, and office-safe.
Best for: Straight or wavy hair; all face shapes.
Ask your barber: “Taper the sides from a #3 down to a #1 around the ears and neckline. Keep 2 to 3 inches on top.”
Style it: Side part it with a comb and a small amount of light-hold cream.
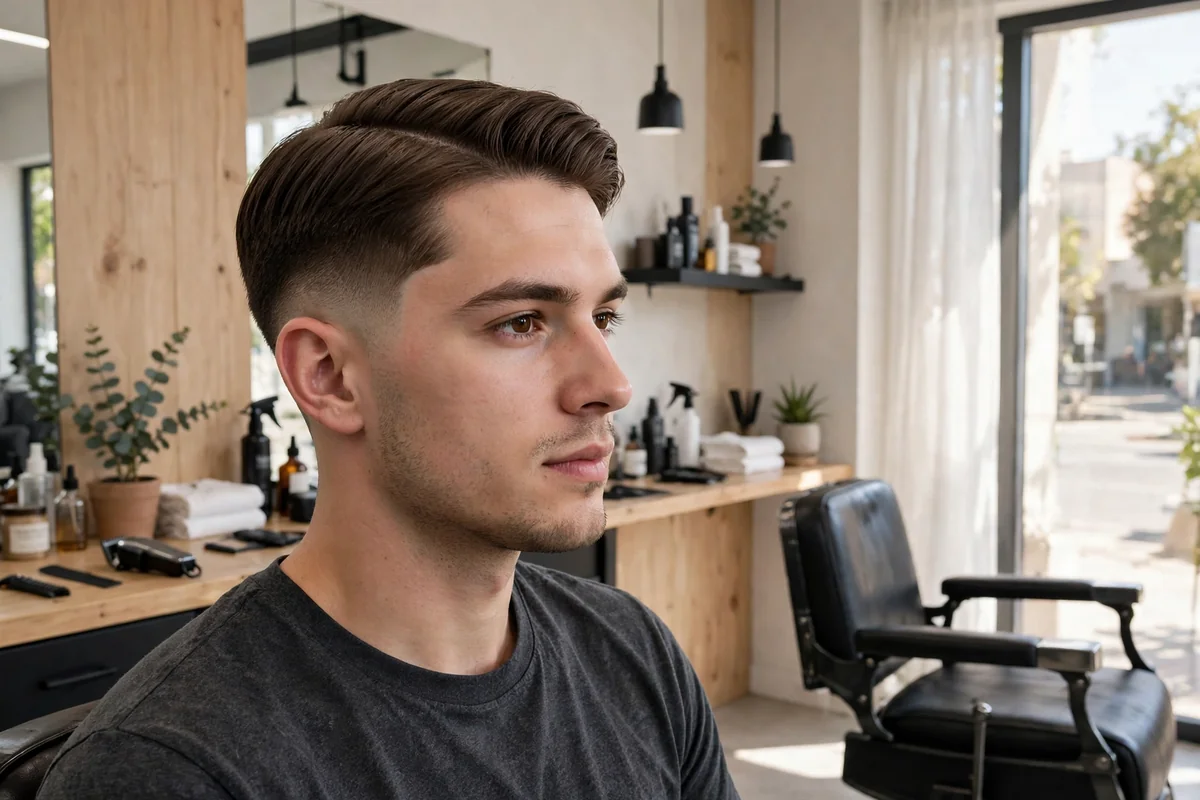
9. Boxy Flat Top to Drop Fade
The before: A boxy, square flat top with harsh corners and no softness. It looks stiff and dated.
The after: A drop fade that curves down behind the ear, with a softer, textured top. Modern shape, same bold attitude.
Best for: Thick or coily hair; square and oval faces.
Ask your barber: “Drop fade that dips behind the ear, down to skin at the neckline. Keep the top about 1.5 inches, textured.”
Style it: Use a sponge or pick to shape the top, then finish with a light moisturizer.

10. Messy Grown-Out Hair to Burst Fade
The before: Messy grown-out hair with no plan. It looks accidental rather than styled.
The after: A burst fade that arcs around the ear, leaving a longer mohawk-style top. Edgy, but still wearable daily.
Best for: Wavy or curly hair; oval and round faces.
Ask your barber: “Burst fade around the ears, fading to skin. Leave 3 to 4 inches on top, longer toward the front.”
Style it: Scrunch curl cream into the top and let it air dry for natural movement.

Texture Transformations
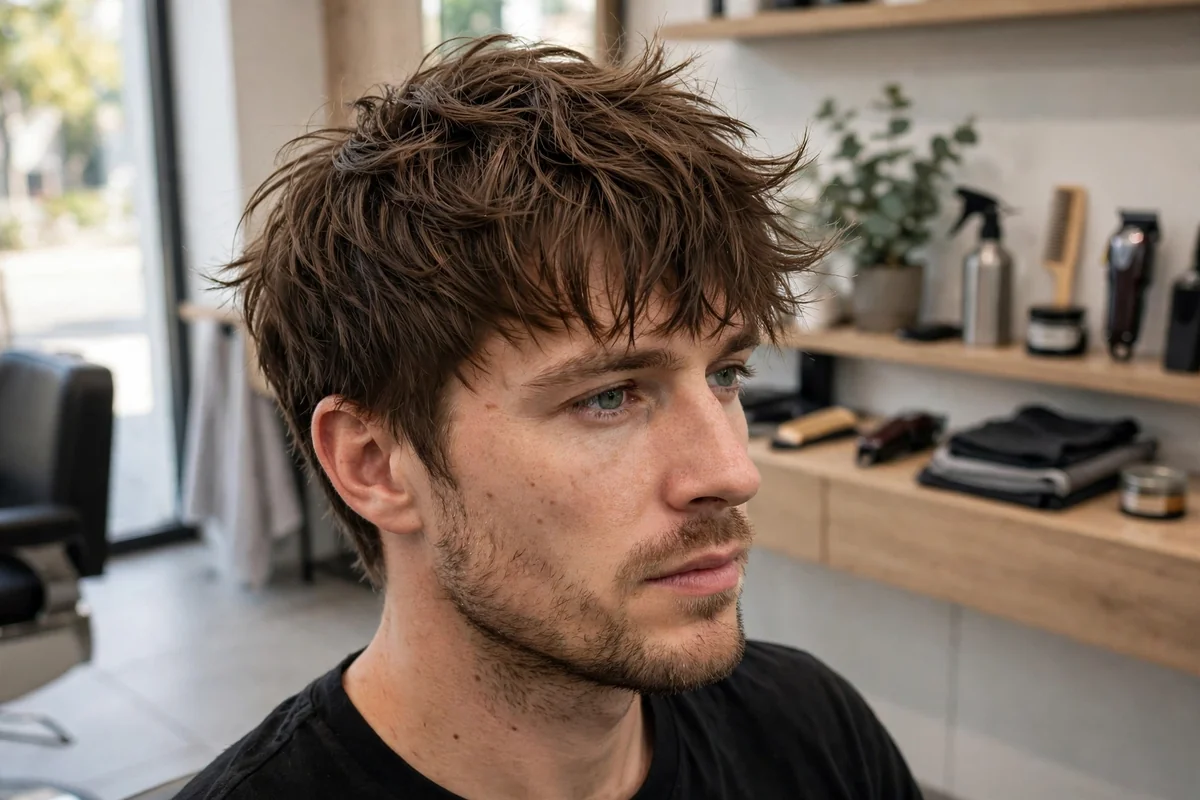
11. Flat Straight Hair to Textured Fringe
The before: Flat, limp straight hair that lies dead against your head. No volume, no character.
The after: A choppy textured fringe with movement and lift. The same hair suddenly looks full of life.
Best for: Fine or medium straight hair; oblong and oval faces.
Ask your barber: “Point-cut the top to 2 to 2.5 inches for texture. Short fringe, slightly uneven. Taper the sides with a #2 guard.”
Style it: Add texture powder at the roots, then tousle the fringe forward with your fingers.
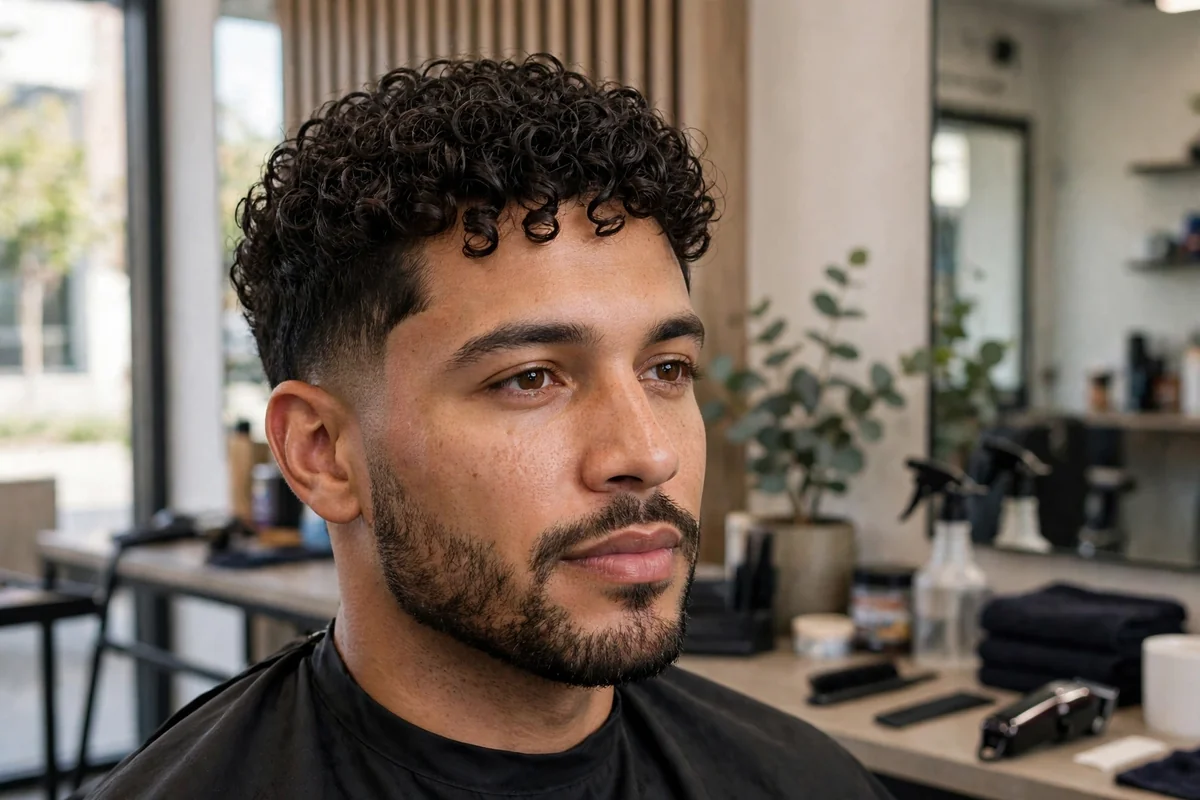
12. Frizzy Hair to Defined Curls
The before: A frizzy cloud with no curl pattern. It grows outward, not downward, and fights every comb.
The after: Defined, springy curls with a shaped silhouette. Your natural texture becomes the star.
Best for: Curly or coily hair; oval and heart faces.
Ask your barber: “Cut curls dry, shaping the silhouette, not the length. Leave 3 to 4 inches on top and taper the sides.”
Style it: Apply curl cream to soaking wet hair, scrunch upward, and do not touch it while it dries.
13. Puffy Hair to Controlled Waves
The before: Puffy hair that balloons out at the sides and looks bigger every humid day. It hides your real wave pattern.
The after: Controlled waves that lie close to the head with a clean outline. Sleek, not puffy.
Best for: Wavy or thick hair; square and round faces.
Ask your barber: “Take weight out of the sides with thinning shears, keep 2 to 3 inches on top. Blend the edges with a #2 guard.”
Style it: Brush waves into place while damp, then set with a light wave pomade.

14. Thin Flat Hair to Voluminous Blowout
The before: Thin hair plastered to the scalp, showing skin through the top. It makes you look older than you are.
The after: A layered blowout with lift at the roots and movement through the top. Thicker-looking instantly.
Best for: Fine or thinning hair; oval and oblong faces.
Ask your barber: “Short layers through the top, about 2 to 3 inches, to build volume. Keep the sides tight with a #2 taper.”
Style it: Blow dry with a round brush, lifting roots upward, and finish with volumizing powder.
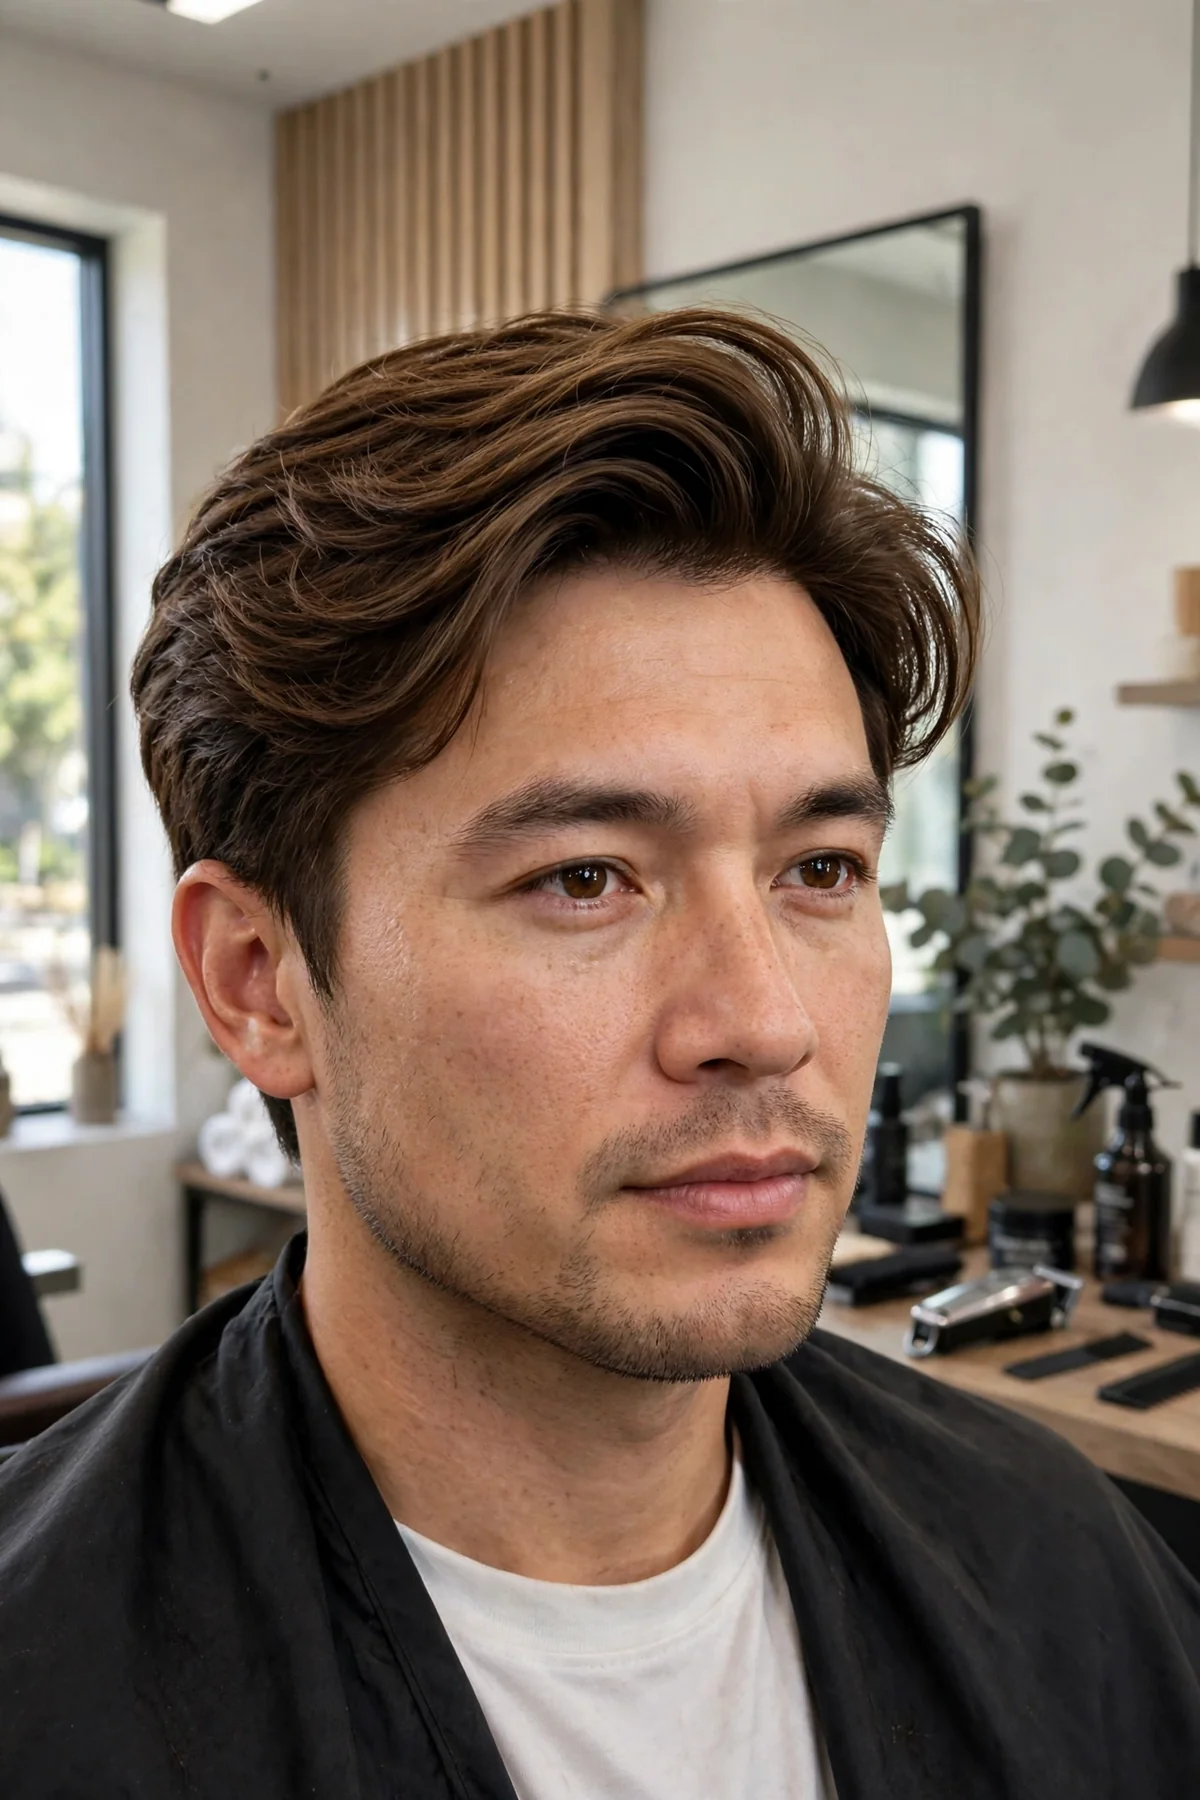
15. Straight Heavy Hair to Wavy Flow
The before: Heavy straight hair that hangs like a curtain and never moves. It feels like a helmet in summer.
The after: A relaxed flow haircut with soft layers and natural swing. Effortless and modern.
Best for: Medium to thick straight or wavy hair; oval and square faces.
Ask your barber: “Long layers through the top, 4 to 5 inches, with the back tapered lightly. No hard lines.”
Style it: Let it air dry with a little sea salt spray, then shake it out loosely.

Classic-to-Modern Updates
16. Dated Side Part to Modern Swept Fringe
The before: A stiff, greasy side part that has not changed in a decade. It ages you before you speak.
The after: A soft swept fringe with texture and a natural part. Same man, ten years fresher.
Best for: Straight or wavy hair; square and oval faces.
Ask your barber: “Textured top at 2.5 to 3 inches, swept to one side. Taper the sides with a #2 guard.”
Style it: Sweep the fringe across with matte paste, keeping it loose and touchable.
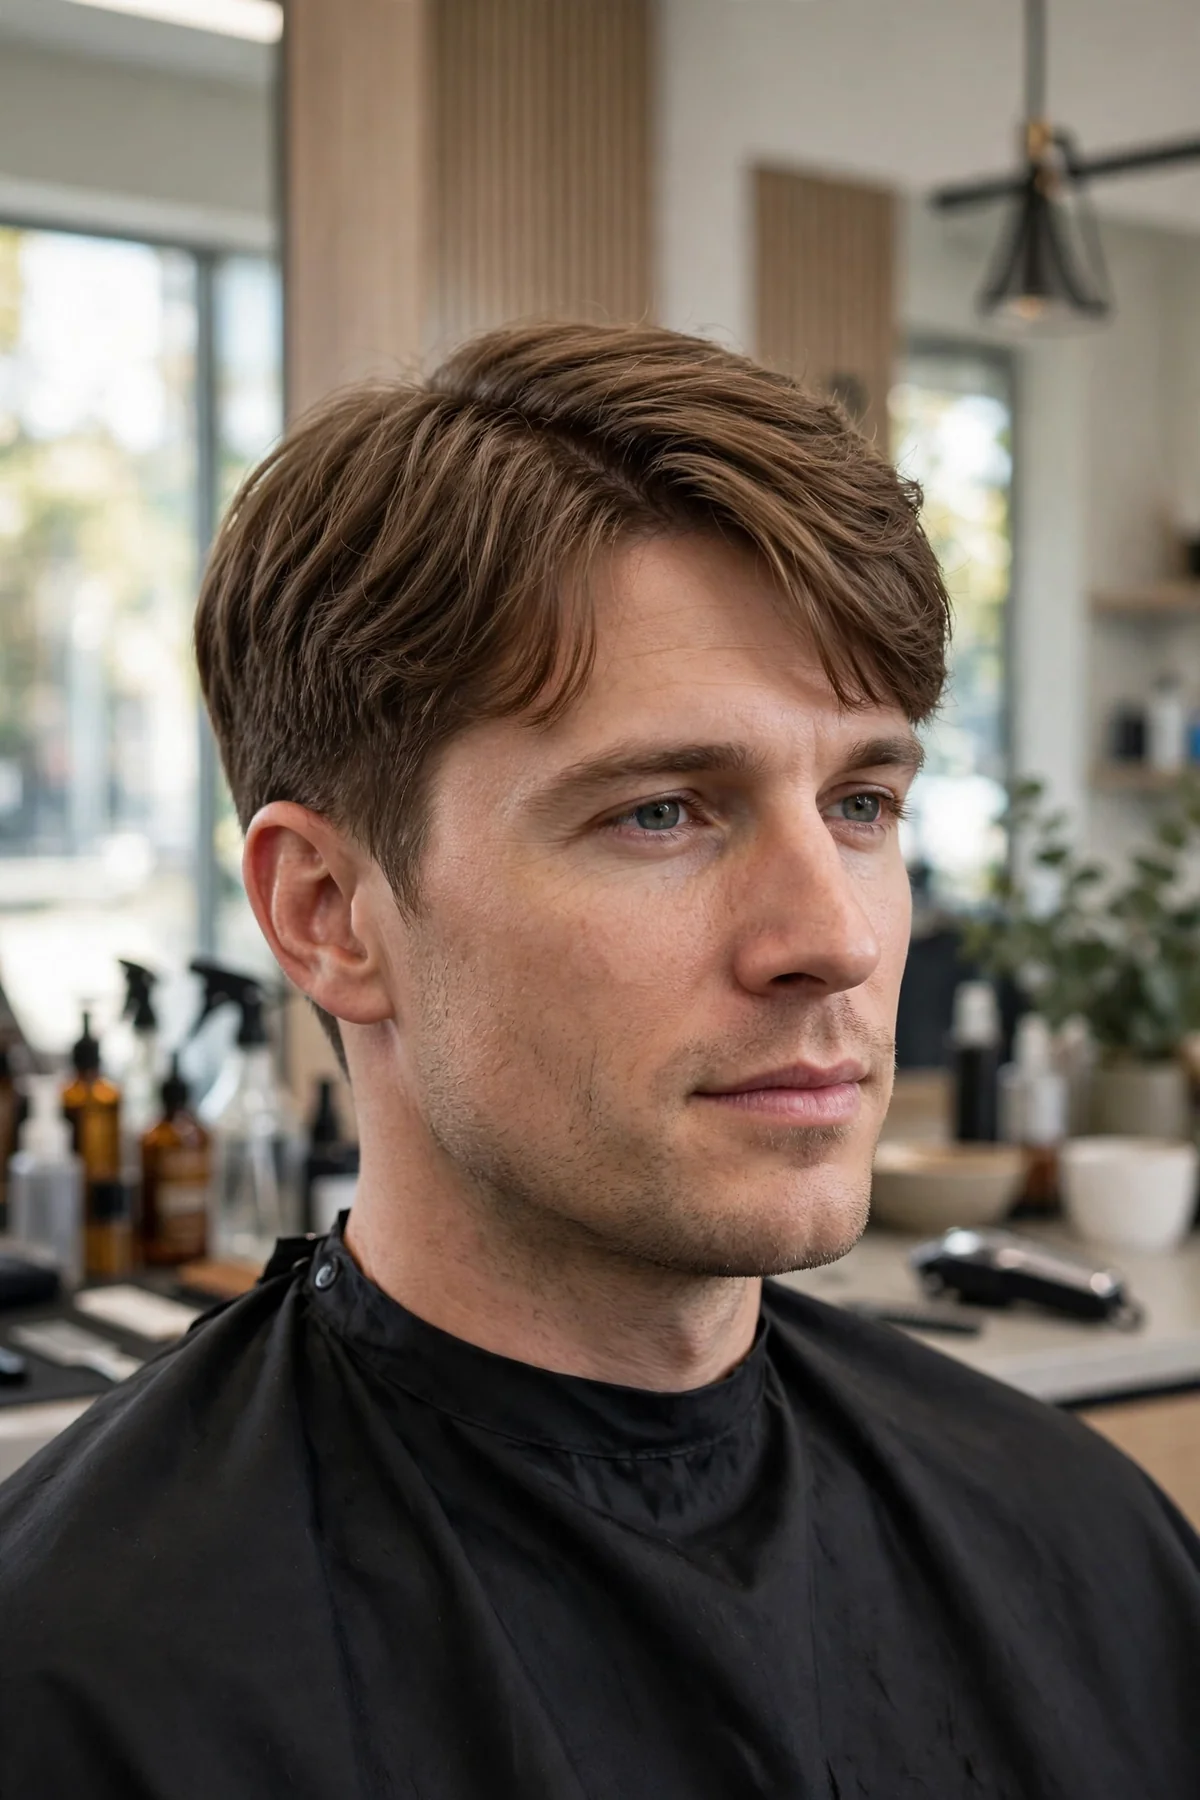
17. Old Comb Over to Slicked Pompadour
The before: A flat comb over trying to hide thinning spots. It draws more eyes to the problem, not less.
The after: A confident slicked pompadour with height and shine. It owns the hair you have.
Best for: Medium to thick hair; oval and heart faces.
Ask your barber: “Keep 3 to 4 inches on top, graduated back. Taper the sides short with a #1 guard.”
Style it: Blow dry the top back and up, then smooth it with a medium-shine pomade.

18. Stiff Flat Top to Soft Textured Crop
The before: A rigid flat top held up with heavy gel. It looks like a helmet and feels worse.
The after: A soft textured crop haircut with a natural finish. Modern, relaxed, and easy to live with.
Best for: Thick straight hair; square and round faces.
Ask your barber: “Choppy textured top at 1.5 to 2 inches. Fade the sides from a #2 to a #1.”
Style it: Tousle with matte clay and leave the edges rough. Perfection is not the goal.

19. Outgrown Middle Part to Curtain Flow
The before: An outgrown middle part with heavy, shapeless ends. It looks like a grown-out accident.
The after: A clean curtain flow with face-framing layers and a neat outline. Soft, stylish, and intentional.
Best for: Straight or wavy medium hair; oval and heart faces.
Ask your barber: “Face-framing layers at 4 to 5 inches, center part. Light taper at the sides and back.”
Style it: Part it in the middle while damp, add light cream, and let it fall naturally.

20. Grown-Out Buzz to Ivy League
The before: A buzz cut grown past its prime, fuzzy at the edges and uneven on top. Neither short nor styled.
The after: A polished Ivy League cut with a short side part and tapered sides. Smart, clean, and grown-up.
Best for: Straight or wavy hair; oval and square faces.
Ask your barber: “Top at 1 to 1.5 inches with a short side part. Taper the sides with a #2 blending to a #1.”
Style it: Comb a neat side part with light pomade. Keep it simple and sharp.

Bold Resets
21. Dreadlocks to Short Taper
The before: Heavy, matted dreadlocks that take hours to wash and weigh on your neck. You are ready for a reset.
The after: A fresh short taper with a clean shape and a neat lineup. Light, sharp, and brand new.
Best for: Coily or curly hair; oval and square faces.
Ask your barber: “Cut the top to about 1 inch with a sponge finish. Taper the sides from a #2 to a #1, with a clean lineup.”
Style it: Use a sponge to twist the top, then moisturize daily to keep it healthy.

22. Mullet to Taper Fade
The before: A mullet with a long tail at the back and short business at the front. Fun once, tired now.
The after: A clean taper fade with a textured top. The party is over, and the upgrade shows.
Best for: Straight or wavy hair; oval and heart faces.
Ask your barber: “Remove the tail completely. Taper fade the sides from a #2 to a #1, top at 2 to 3 inches textured.”
Style it: Push the top forward with matte paste for a casual, modern finish.

23. Damaged Bleached Hair to Fresh Buzz Cut
The before: Bleached, brittle hair that snaps when you comb it. The color is patchy, and the ends are fried.
The after: A fresh buzz cut that removes all the damage at once. Healthy hair grows back from a clean start.
Best for: Any hair type; oval and square faces.
Ask your barber: “One even length all over with a #1 guard, about an eighth of an inch. Tidy the neckline.”
Style it: Nothing to style. Use conditioner on the scalp while the healthy hair grows in.

24. Patchy Hair and Beard to Sharp Line-Up and Fade
The before: Patchy hair with a scraggly, uneven beard. The two fight each other, and neither wins.
The after: A sharp lineup and fade, with the beard shaped to match. The whole head and face finally work as one look.
Best for: Coarse or curly hair; square and round faces.
Ask your barber: “Crisp lineup at the forehead, fade the sides to skin. Shape the beard with clean cheek lines and a tapered neck.”
Style it: Apply beard oil daily, and brush the beard downward to keep the shape.

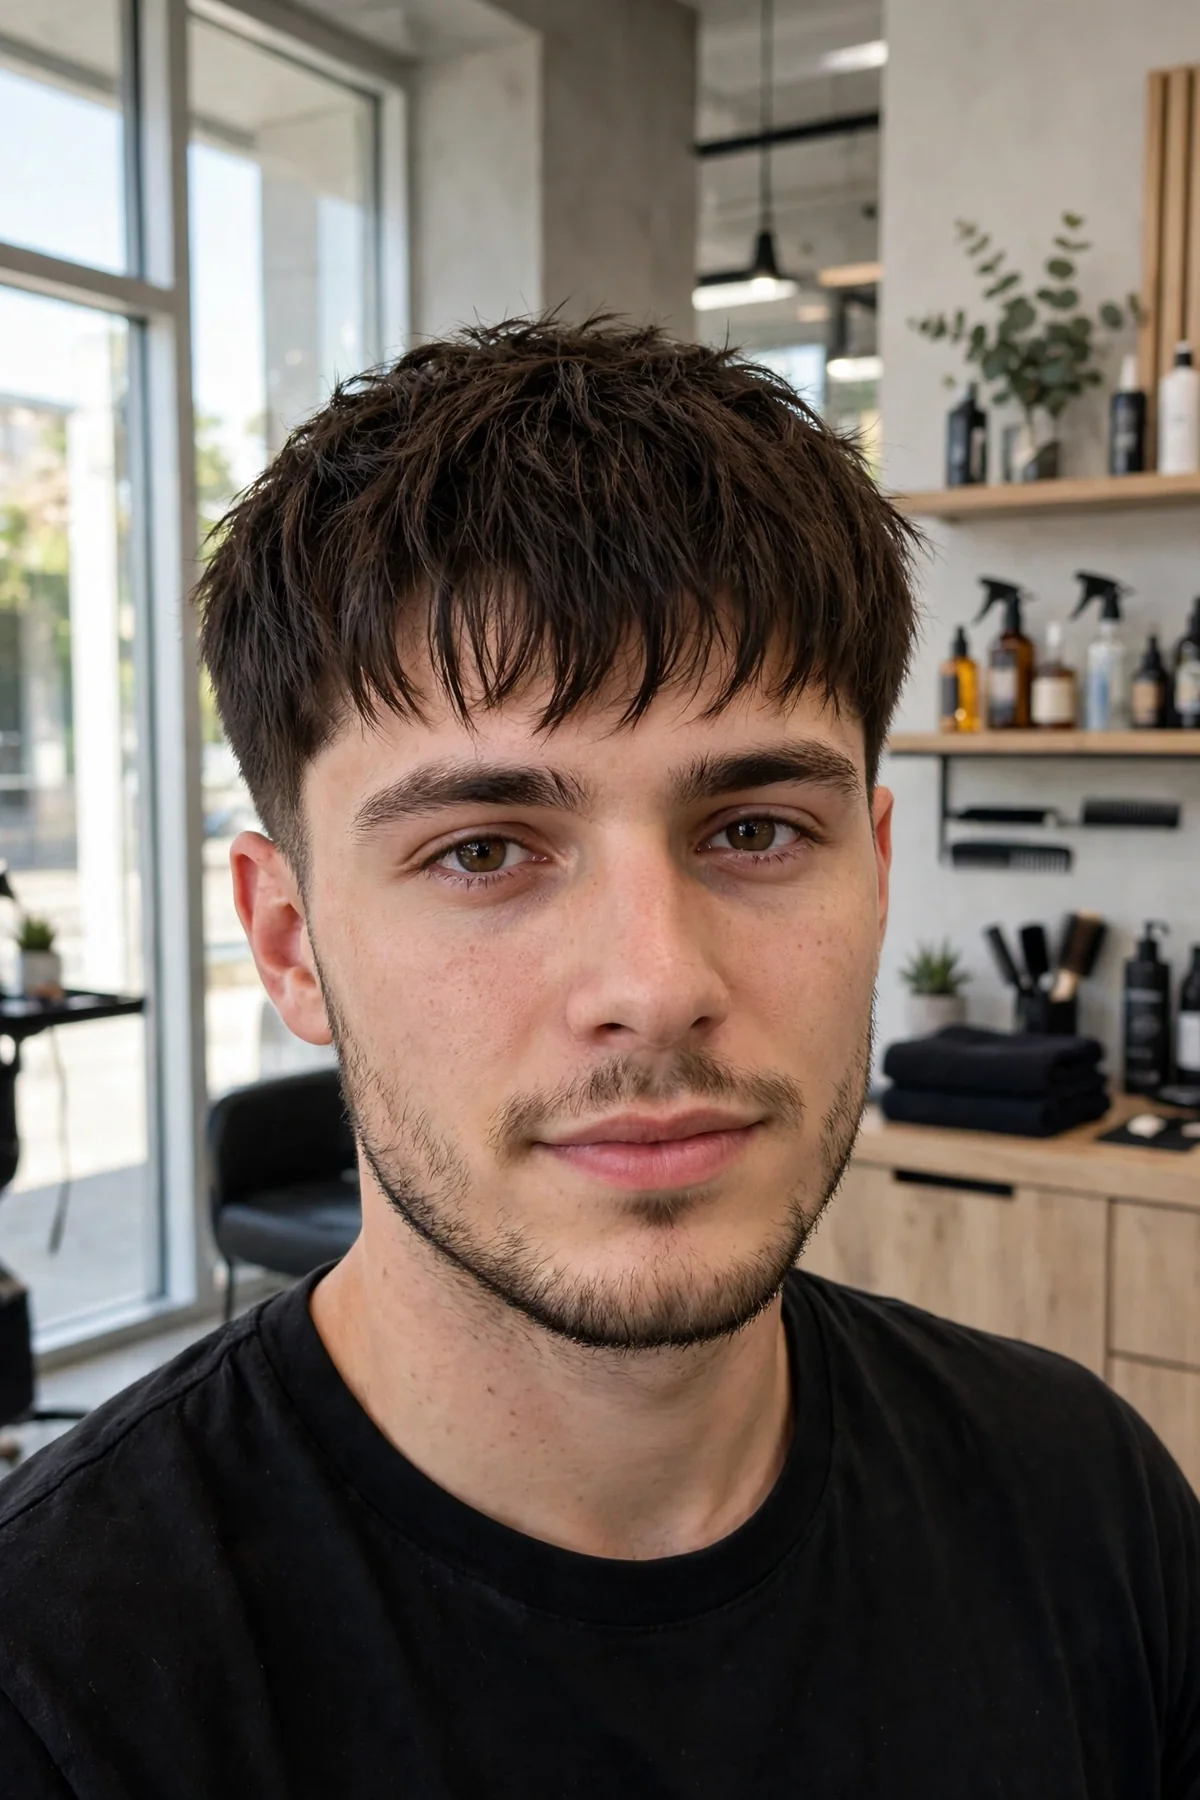
25. Receding Hairline to Textured Fringe Crop
The before: A receding hairline you keep trying to cover with long, thin strands. The cover-up draws more attention than the hairline.
The after: A textured fringe crop worn forward, which softens the hairline and frames the face. Confident, not hiding.
Best for: Fine or thinning hair; oval and square faces.
Ask your barber: “Fringe worn forward at 1.5 to 2 inches, heavily textured. Taper the sides with a #1 guard.”
Style it: Push the fringe forward with texture powder. Keep it messy on purpose.
Life-Stage Transformations
26. Salt-and-Pepper Grey Blend Transformation
The before: Harsh grey roots against dyed dark hair, or a flat, dull grey that looks washed out. Neither looks natural.
The after: A blended salt-and-pepper finish with soft, natural-looking grey woven through. Distinguished, not dyed.
Best for: Straight or wavy greying hair; oval and square faces.
Ask your barber: “Blend the grey with subtle lowlights, no harsh lines. Keep the cut at 2 to 3 inches on top with a #2 taper.”
Style it: Use a silver shampoo once a week to keep the grey bright, not yellow.

27. Tired Dad Hair to Sharp Taper
The before: The classic tired dad cut: grown out, shapeless, and styled with whatever towel was nearest. Life got busy.
The after: A sharp taper with a neat top that still takes only three minutes. Dad, but dangerous.
Best for: Straight or wavy hair; round and square faces.
Ask your barber: “Taper the sides from a #2 to a #1. Top at 2 inches, textured so it styles itself.”
Style it: One scoop of matte paste, tousle, and walk out the door.

28. First Big Chop After Growing It Out
The before: Months of growth with split ends and a shape that quit long ago. You grew it out. Now you are done.
The after: A liberating big chop to a clean, short style that suits your face. The relief is instant.
Best for: Any hair type; all face shapes.
Ask your barber: “Take it to 2 inches on top with texture, taper the sides with a #2 guard. Keep the neckline clean.”
Style it: Celebrate the easy mornings. A little matte clay is all you need.

29. Wedding-Ready Transformation
The before: Everyday hair that looks fine in a mirror but flat in photos. Your wedding deserves better.
The after: A polished, camera-ready cut with clean edges and a style that holds all day. You look like the main event.
Best for: Straight or wavy hair; oval and square faces.
Ask your barber: “Book a trial cut two weeks before. On the day, a #2 taper, 2 to 3 inches on top, styled with medium-hold pomade.”
Style it: Use a stronger-hold product on the day, and bring a pocket comb for touch-ups.

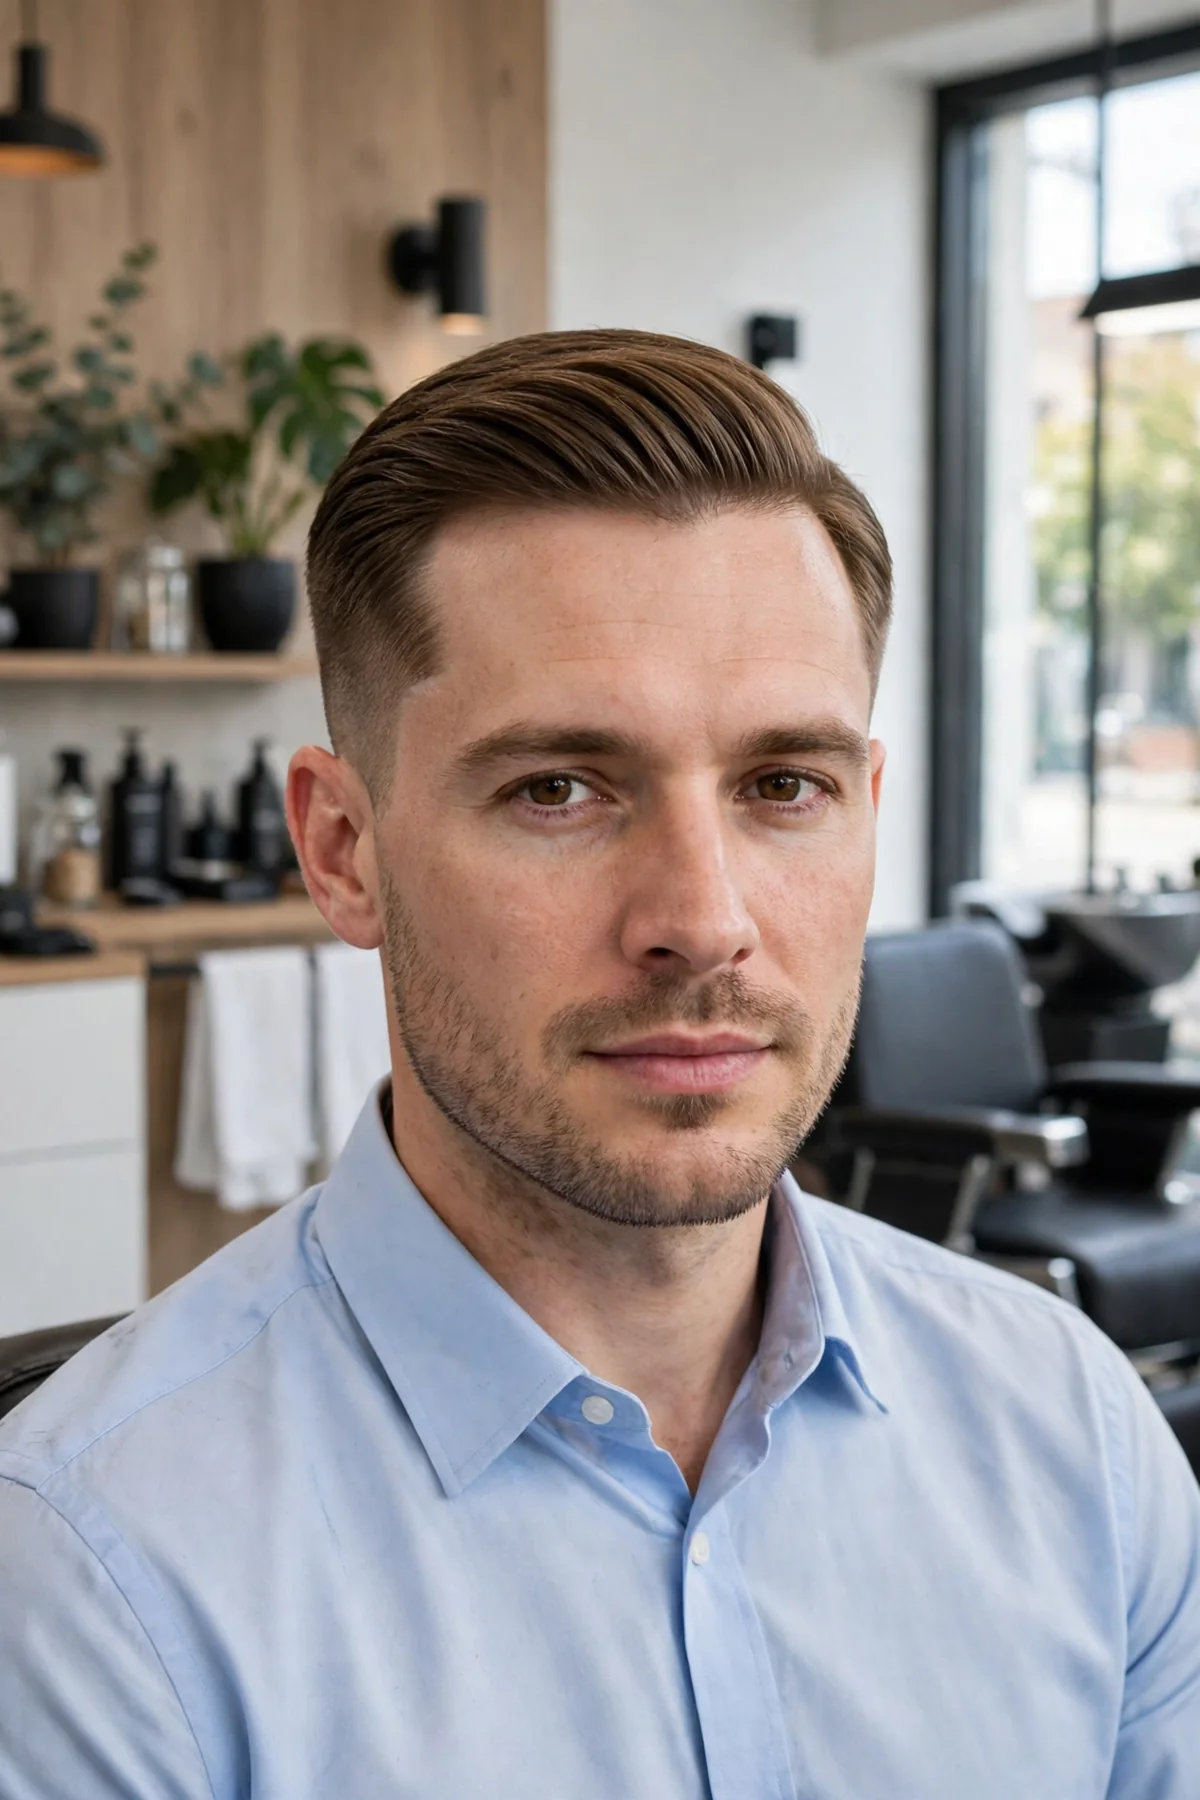
30. Fresh-Start Job Interview Cut
The before: Scruffy, overgrown hair that says “I stopped trying.” Interviewers notice before you speak.
The after: A crisp, professional cut that says reliable and sharp. It is the cheapest confidence boost you can buy.
Best for: Straight or wavy hair; all face shapes.
Ask your barber: “Neat taper from a #3 to a #1, top at 2 inches with a natural side part. Nothing extreme.”
Style it: Comb a clean side part with light cream. Look polished, not stiff.
How to Style Your New Cut
Your transformation does not end in the barber chair. The first week decides whether the cut looks great or grows out awkwardly. Follow this routine, and your new style will settle beautifully.
- Wash less, rinse more. Shampoo two or three times a week, not daily. Rinse with water on other days so natural oils protect the hair.
- Style on damp hair. Apply product while hair is slightly damp, not soaking wet. This gives even coverage and better hold.
- Use less product than you think. Start with a pea-sized amount. You can always add more, but too much looks greasy fast.
- Learn your new part. Your old part may not work with the new cut. Try parting it where the barber showed you.
- Blow dry for volume. If your cut needs lift, blow dry upward at the roots for 60 seconds. It makes a big difference.
- Book your trim before you leave. Set the next appointment while the cut is fresh, so you never slide back to overgrown.
A good hairstyle is a daily habit. Small, steady effort keeps a transformation sharp for weeks.
Pick the Right Transformation for Your Face Shape
Not every transformation suits every face. Use this quick picker to shortlist the cuts that flatter your shape best.
| Face Shape | Best Transformation Types |
|---|---|
| Oval | Almost any transformation; try textured crops, fades, and curtain flow |
| Round | Height on top with short sides; quiffs, high fades, and pompadours |
| Square | Softened edges; textured crops, tapers, and swept fringes |
| Oblong | Shorter tops with fringe; French crops and fringe crops that shorten the face |
| Heart | Volume at the jaw, soft sides; curtain flow, textured fringe, and mid fades |
If you are unsure of your shape, ask your barber. A good barber spots it in seconds. For more options, browse our guide to mens haircuts.
What to Tell Your Barber: Transformation Consultation Checklist
A great transformation starts with a great conversation. Bring this checklist so nothing gets lost.
- Bring 3 photos: one of the exact cut you want, one of a similar cut on your hair type, and one of a style you hate. The “no” photo matters most.
- Show your current routine: tell your barber how long you spend on hair each morning. Be honest. A 20-minute style fails on a 2-minute guy.
- Agree a grow-out plan: ask how the cut will look in 3 weeks and 6 weeks. A good transformation grows out gracefully.
- Talk maintenance honestly: say how often you will really visit. Every 2 weeks, or every 6? The cut should match your real life.
- Coordinate the beard: your beard and haircut must match in length and edge sharpness. Ask the barber to shape both together.
- Mention past disasters: tell them what went wrong before. It stops history from repeating itself.
Barbers love a client who knows what they want. Clear photos and honest answers beat vague words like “just tidy it up.” The classic definition of a haircut covers the cut itself, but the consultation is what makes it a transformation.
Transformation Cost and Trim Schedule
Prices vary by city and barber, but this table gives realistic US ranges so you can plan your budget.
| Transformation Type | Typical US Price | Trim Every |
|---|---|---|
| Long-to-short chop | $35–$65 | 4–5 weeks |
| Skin or drop fade | $30–$55 | 2–3 weeks |
| Texture or curl transformation | $40–$70 | 4–6 weeks |
| Classic-to-modern update | $30–$60 | 3–4 weeks |
| Bold reset (buzz, mullet removal) | $25–$50 | 2–4 weeks |
| Grey blend or color work | $60–$120 | 4–6 weeks |
| Wedding or event cut | $40–$80 | Trial + day-of |
Fades need the most upkeep, since a grown-out fade loses its edge fast. Longer textured cuts forgive a missed week. For curly transformations, a curly fade pairs defined curls with clean, easy sides.
7 Mistakes That Ruin a Haircut Transformation
- Showing one blurry photo. One low-quality photo leaves too much to guess. Bring clear photos from several angles.
- Copying a cut from a different hair type. A style made for thick wavy hair will not behave the same on fine straight hair. Match the cut to your texture.
- Going too short in one jump. Cutting 8 inches at once shocks most people. Go halfway first, then shorter next visit.
- Skipping the consultation. Saying “do something different” is not a plan. Talk first, cut second.
- Ignoring your daily routine. A high-maintenance style on a low-maintenance guy fails by day three. Pick a cut your real mornings can handle.
- Forgetting the beard. A fresh cut with a wild beard looks unfinished. Shape both in the same visit.
- Judging the cut on day one. Fresh cuts look sharper than they feel. Give it a week to settle before you decide.
Mens Haircut Transformation FAQs
What is a mens haircut transformation?
A mens haircut transformation is a big, deliberate change from your current style to a clearly different one. It changes the length, shape, or texture in a way people notice right away.
How do I ask my barber for a transformation cut?
Bring clear photos of the cut you want, plus one of a style you dislike. Use the barber scripts in this guide, with guard numbers and lengths.
How much does a haircut transformation cost?
Most transformations cost $25 to $70 in the US. Color or grey blending costs more, usually $60 to $120. Fades need trims every 2 to 3 weeks.
Will a transformation suit my face shape?
Yes, if you pick the right one. Use the face-shape picker above, and ask your barber to confirm before cutting.
How long does it take for a transformation cut to settle?
Most cuts settle within one week. The first wash softens harsh lines, and your hair learns its new direction.
How often should I trim after a transformation?
Fades need a trim every 2 to 3 weeks to stay sharp. Longer textured cuts last 4 to 6 weeks. Book your next visit before you leave the shop.
Conclusion
A great transformation is part courage, part planning. Pick a style that fits your hair and life, bring clear photos, and trust a barber who listens. Your best look is one appointment away.
📌 Pin now, read later — save these transformations for your next barbershop visit!

Reviewed by Daniel Morgan
Daniel Morgan is the Founder and Editorial Director of Barber’s Groom. He oversees the editorial review of the guides on this site, checking each one for accuracy, clarity, and practical value before it reaches readers.