30 Best Toddler Girl Haircuts with Face Framing Layers for a Sweet, Fresh Look
Reviewed by Daniel Morgan
Looking for toddler girl haircuts with face framing layers that look sweet, soft, and easy to manage? You are in the right place. Face framing layers add gentle shape around her cheeks and chin. They soften the front of the hair without taking length away.
This guide shares 30 toddler girl haircuts with face framing layers. Every style is made for real little girls. School mornings. Playdates. Birthday photos. Each one comes with a simple script you can read to your stylist, so you leave the salon with exactly the cut you pictured.
A toddler girl haircut with face framing layers works on almost every hair type. Fine hair looks fuller. Thick hair feels lighter. Straight hair gains shape. Curls get a soft frame that keeps them neat. And the layers grow out so gently that you never face a harsh awkward stage.
Face framing layers for toddler girls are also one of the kindest first cuts you can pick. The front pieces stay long enough to tuck back. They never poke her eyes. And they need almost no styling in the morning, which every parent of a busy toddler will love.
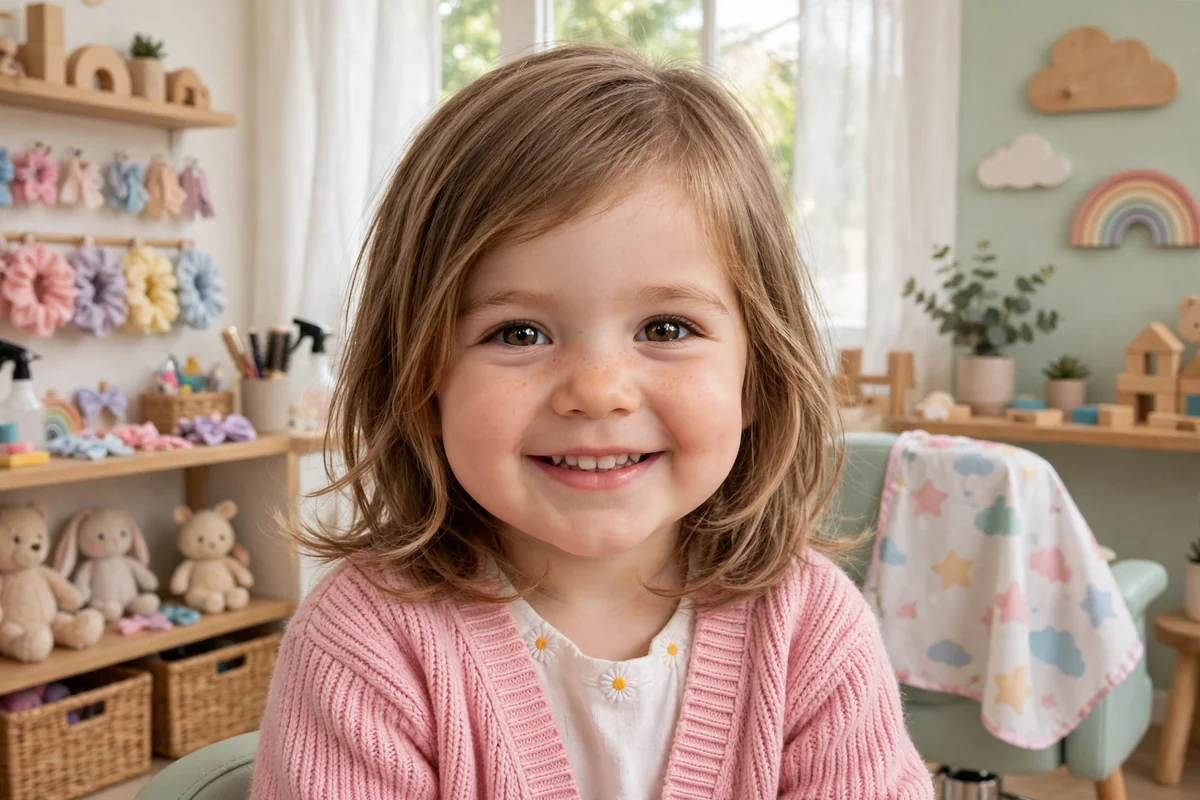
What Are Face Framing Layers?
Face framing layers are short pieces of hair cut around the front of the face. They start near the cheekbone, chin, or jaw. The rest of the hair stays longer behind them.
Think of them as a soft frame for her face. The layers draw the eye to her smile and her eyes. They add movement to hair that might otherwise hang flat. And they make even a simple cut look styled.
The key word is soft. Toddler layers are never choppy or harsh. A good stylist cuts them with light, feathered ends. The pieces blend into the rest of the hair. You can see the shape, but you cannot see hard lines.
Face framing layers are not the same as a full layered cut. A full layered cut thins and shapes hair all over the head. Face framing layers only shape the front. The back stays full and simple, which is perfect for a little girl.
Most stylists cut toddler face framing layers dry or nearly dry. Dry hair shows its true length. Wet hair shrinks as it dries, which can make layers end up shorter than planned. A dry cut keeps the result safe and true.
Face Framing Layers vs Bangs vs Full Layers
Parents often mix up these three cuts. They look alike at first glance. But they behave very differently on a toddler. Here is the simple way to tell them apart.
Face framing layers start at the sides of the face and fall down past the chin. They frame the face from the sides. They never cover the forehead. Your little girl can see clearly all day.
Bangs sit across the forehead. They need trims every few weeks to stay out of her eyes. Toddler girl haircuts with micro bangs are a sweet choice if you love a fringe, but bangs are higher care than layers.
Full layers run through the whole head of hair. They add lift and movement everywhere. They suit thick hair best. On fine toddler hair, full layers can make the ends look thin, so many stylists skip them for little girls.
Face framing layers sit in the happy middle. You get shape and softness. You keep the length and the fullness. And you trim them far less often than bangs.
If you want a cut that looks styled with zero morning effort, face framing layers win. If you want a bold, playful look, bangs win. If her hair is very thick and heavy, full layers may help. Most toddler girls do best with the face framing choice.
Where Should the Layers Start? A Simple Picker
Where the layers start changes the whole look. The start point is the shortest piece near her face. Pick it to match her face shape and her hair type.
Cheekbone start. The shortest piece ends near her cheekbones. This lifts the face and shows off her smile. It suits round faces and long hair best. It also works well on fine hair, since it adds shape without removing bulk.
Chin start. The shortest piece ends at her chin. This is the safest first choice. It suits almost every face shape. It frames the face clearly but stays long enough to tuck behind her ears.
Jaw start. The shortest piece ends at her jawline. This gives a soft, grown-up shape. It suits thick hair and longer cuts best. It is also the easiest to grow out, since the pieces are already long.
Not sure which to pick? Start at the chin. A chin start is gentle and forgiving. You can always ask for a cheekbone start next time if you want more shape. You can never add length back once it is cut.
Ask your stylist to show you the start point before cutting. A good stylist will hold up the strand and point to where it will end. That one check prevents most surprises.
Quick-Pick Table: All 30 Styles at a Glance
| # | Style | Best Length | Best Hair Type | Care Level |
|---|---|---|---|---|
| 1 | Classic Cheekbone Face Framing Layers | Medium to long | All types | Low |
| 2 | Chin-Length Face Framing Bob | Short | Straight, wavy | Low |
| 3 | Soft Jaw-Length Face Framing Layers | Medium | All types | Low |
| 4 | Center-Part Face Framing Layers | Medium to long | Straight, wavy | Low |
| 5 | Side-Part Face Framing Layers | Medium | All types | Low |
| 6 | Face Framing A-Line Bob | Short | Straight, fine | Low |
| 7 | Face Framing French Bob | Short | Straight, wavy | Low |
| 8 | Face Framing Stacked Bob | Short | Fine, straight | Medium |
| 9 | Face Framing Blunt Bob | Short | Thick, straight | Low |
| 10 | Face Framing Lob (Long Bob) | Medium | All types | Low |
| 11 | Long Hair with Cheekbone Layers | Long | All types | Low |
| 12 | Long Hair with Curtain Face Framing | Long | Straight, wavy | Low |
| 13 | Long Layers with Face Framing Ends | Long | Thick, wavy | Low |
| 14 | Face Framing Layers with Soft Waves | Medium to long | Wavy | Low |
| 15 | Face Framing Layers with a Low Ponytail | Medium to long | All types | Low |
| 16 | Face Framing Layers for Fine Hair | Medium | Fine | Low |
| 17 | Face Framing Layers for Thick Hair | Medium to long | Thick | Low |
| 18 | Face Framing Layers for Straight Hair | Medium | Straight | Low |
| 19 | Face Framing Layers for Wavy Hair | Medium to long | Wavy | Low |
| 20 | Face Framing Layers for Curly Hair | Medium to long | Curly | Medium |
| 21 | Face Framing Layers with Two Mini Braids | Medium to long | All types | Medium |
| 22 | Face Framing Layers with a High Ponytail | Medium to long | All types | Low |
| 23 | Face Framing Layers with a Top Knot | Medium to long | All types | Low |
| 24 | Face Framing Layers with a Half-Up Bow | Medium to long | All types | Medium |
| 25 | Face Framing Layers with Cute Clips | Short to medium | All types | Low |
| 26 | Face Framing Layers for Birthday Photos | Medium to long | All types | Medium |
| 27 | Face Framing Layers for School Picture Day | Medium | All types | Low |
| 28 | Face Framing Layers with a Side Sweep | Medium | Straight, wavy | Low |
| 29 | Face Framing Layers with a Middle Part and Curls | Medium to long | Curly, wavy | Medium |
| 30 | Face Framing Layers for Easy Grow-Out | Medium to long | All types | Low |
Pick by Length, Hair Type, and Face Shape
By length. Short hair suits bobs with face framing layers. The shape is clear and the care is low. Medium hair is the most flexible length. It works with every start point. Long hair shows off cheekbone and curtain layers best, since the pieces have room to fall.
By hair type. Fine hair needs light, whisper-thin layers. Ask for layers you can feel, not see. Thick hair needs layers that remove weight at the front. Straight hair shows the layer shape most clearly. Wavy hair blends layers in softly. Curly hair needs layers cut curl by curl, never straight across.
By face shape. Round faces look lovely with cheekbone layers that add length. Long faces suit chin-length layers that add width. Heart-shaped faces love jaw-length pieces that balance a wider forehead. Oval faces can wear any start point. When in doubt, ask the stylist what suits her face.
A toddler girl layered haircut should always suit her real life first. If she hates clips, skip styles that need them. If she swims a lot, pick a cut that dries well on its own. The best style is the one she will happily wear every day.
30 Best Toddler Girl Haircuts with Face Framing Layers
Here they are. Thirty sweet, practical styles, each with a stylist script you can use word for word. Save your favorites and show the photos to your stylist at the visit.
Classic Face Framing for Everyday
1. Classic Cheekbone Face Framing Layers
What it is: Soft layers that start at the cheekbones and fall past the chin. The back stays one gentle length. It is the classic face framing toddler haircut, and it suits nearly every little girl.
Best for: Round faces, long hair, and first-time layers. It also suits fine hair, since the layers add shape without thinning the ends.
Ask your stylist: “Please give her soft face framing layers that start at her cheekbones. Keep the back long. Make the ends light and feathery, not choppy.”
Style it: Brush the front pieces forward and let them fall on their own. A tiny drop of leave-in cream keeps flyaways smooth.
Trim note: Trim every 10 to 12 weeks. The cheekbone pieces grow out softly, so there is no rush.
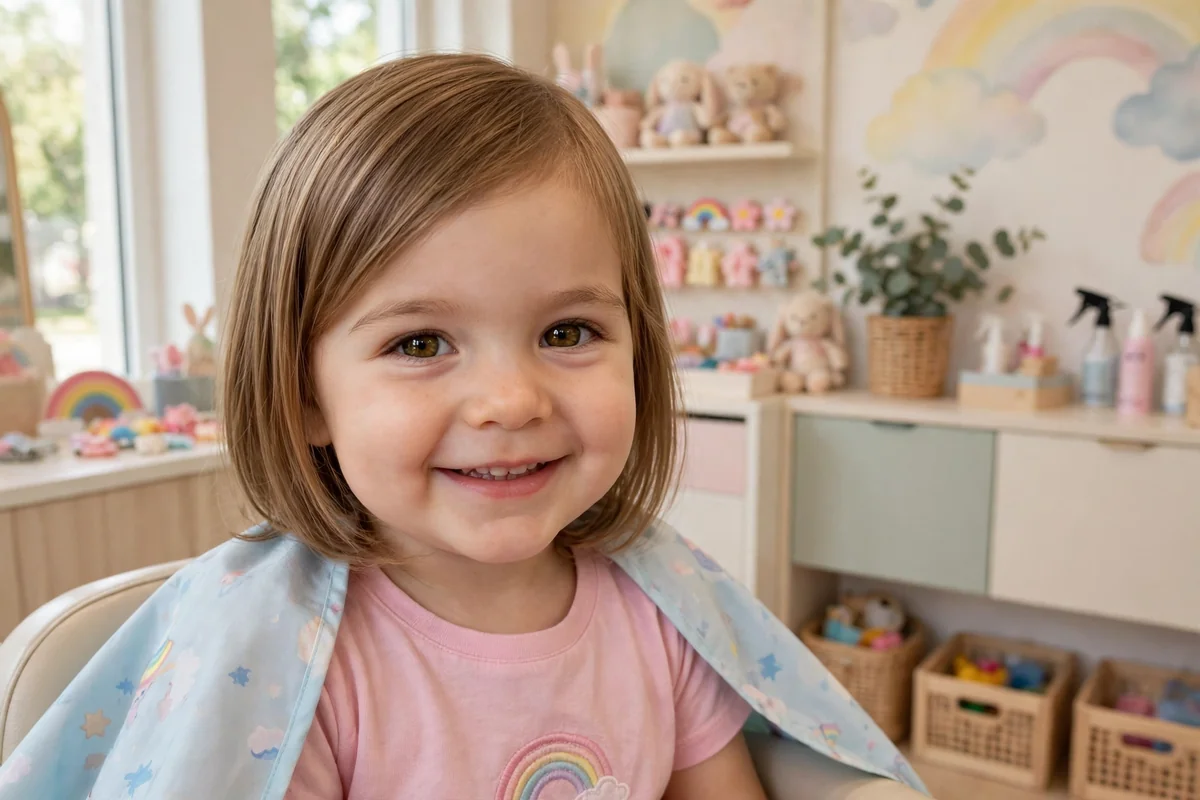
2. Chin-Length Face Framing Bob
What it is: A neat bob that ends at the chin, with face framing layers that shape the front. It is tidy, sweet, and very easy to wash and brush.
Best for: Busy school mornings and straight or wavy hair. It also suits little girls who hate long hair in their face.
Ask your stylist: “Please cut a chin-length bob with soft face framing layers at the front. Keep the ends blunt but soft, not sharp.”
Style it: Part it in the middle or on the side. Let it air dry. The shape does the work for you.
Trim note: Trim every 8 to 10 weeks to hold the chin length.
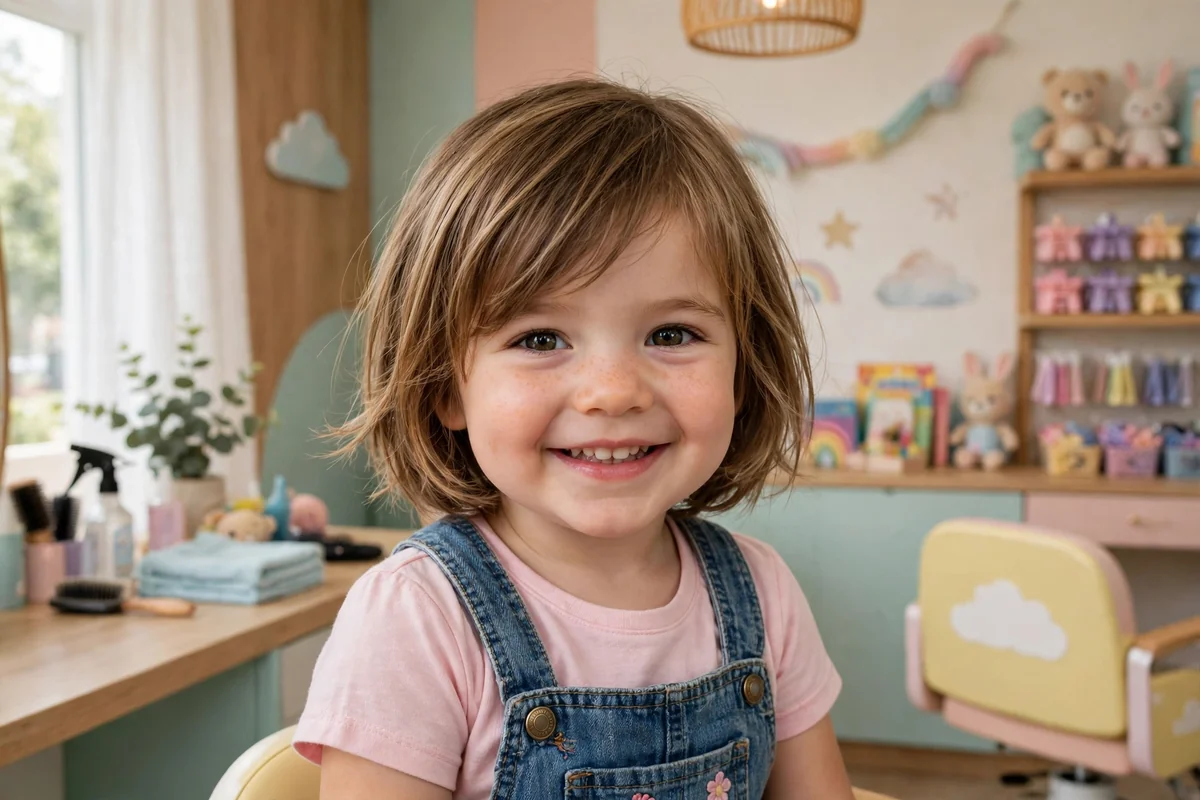
3. Soft Jaw-Length Face Framing Layers
What it is: Layers that start near the jaw and blend down into medium-length hair. The look is gentle and grown-up, but still very much a little girl’s cut.
Best for: Thick hair and medium lengths. It also suits girls who want shape without losing length.
Ask your stylist: “Please start the face framing layers at her jawline. Blend them softly into the rest of her hair. Keep the overall length at her shoulders.”
Style it: Tuck the front pieces behind her ears for playtime. Let them fall free for photos.
Trim note: Trim every 10 to 12 weeks. Jaw-length layers grow out the most gently of all.
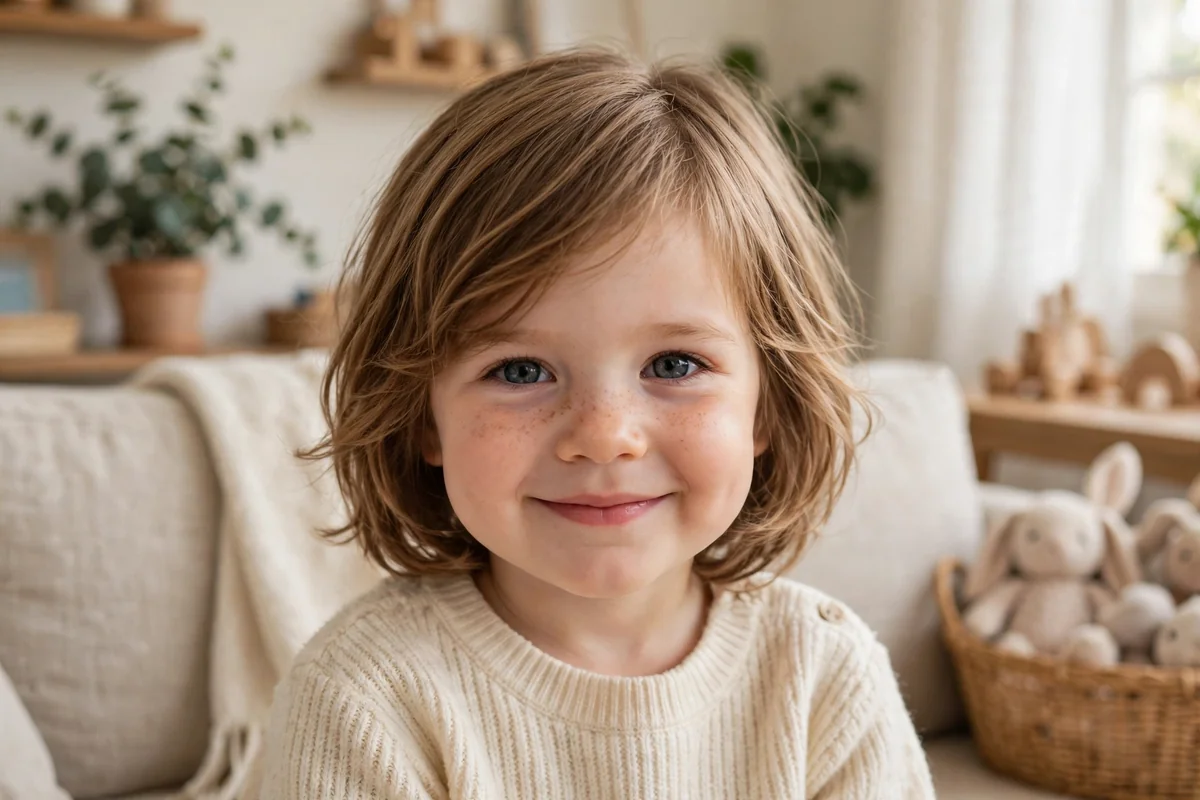
4. Center-Part Face Framing Layers
What it is: A center part with matching layers on both sides of the face. The two sides mirror each other, which gives a neat, balanced look.
Best for: Straight and wavy hair. It also suits oval faces and girls who like a tidy, even style.
Ask your stylist: “Please part her hair in the middle and cut matching face framing layers on both sides, starting at her chin. Keep both sides even.”
Style it: Brush each side forward, then let it fall. A center part needs no clips to look neat.
Trim note: Trim every 10 weeks. Check that both sides still match as they grow.
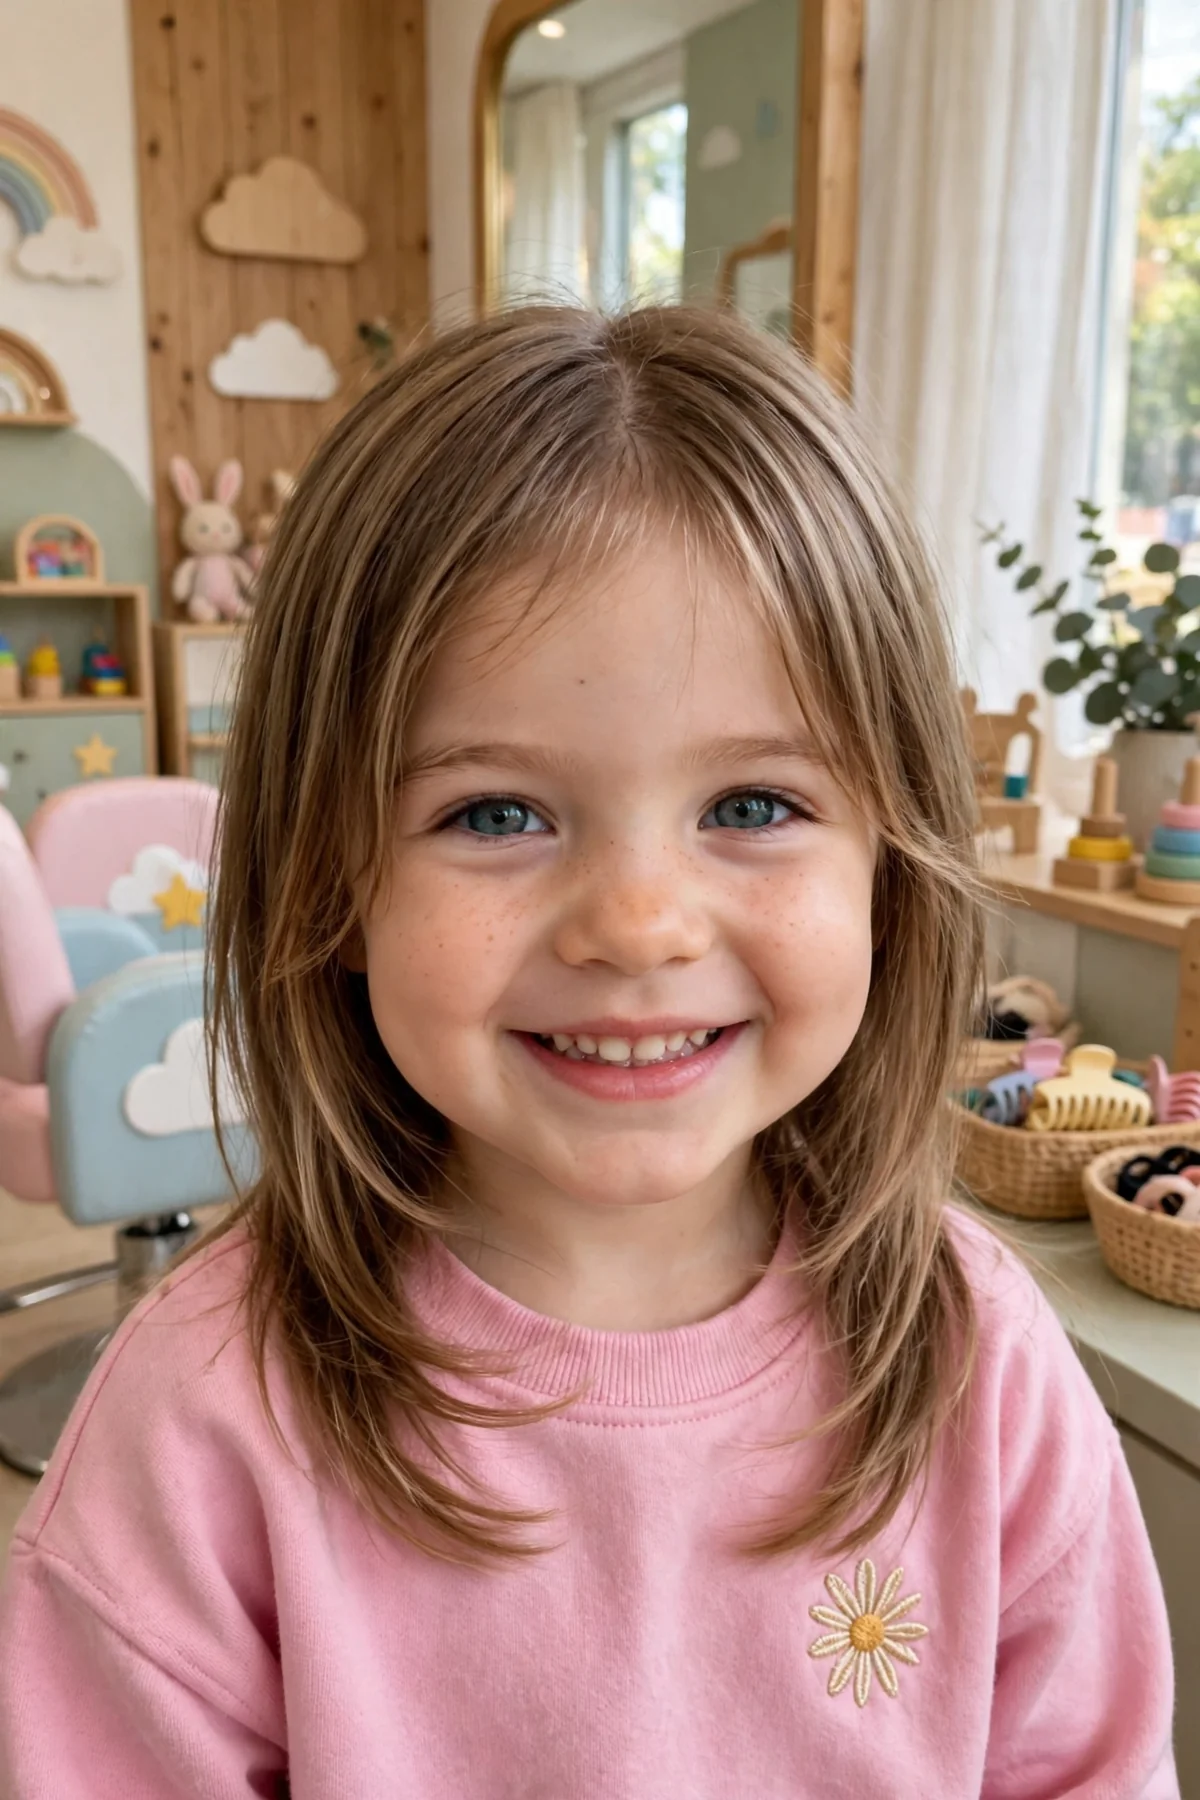
5. Side-Part Face Framing Layers
What it is: A deep side part with longer layers sweeping across one side. It adds a soft, playful sweep to an everyday cut.
Best for: Girls with a natural side part and medium hair. It also suits thick hair, since the sweep moves weight to one side.
Ask your stylist: “Please part her hair on the side and cut face framing layers that sweep softly to one side. Start them at her cheekbones.”
Style it: Sweep the front pieces to the side with your fingers. One small clip holds the sweep for school.
Trim note: Trim every 10 weeks. The sweep grows out into a soft side fringe.
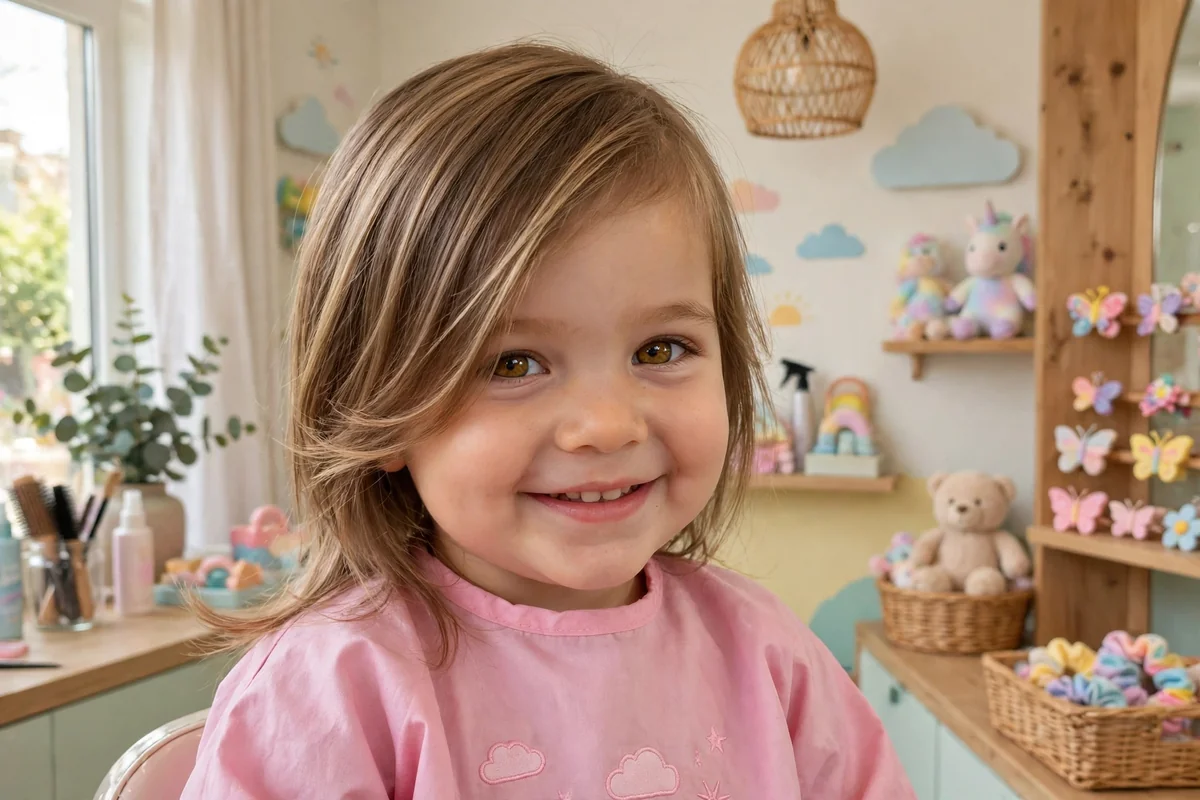
Bobs with Face Framing Layers
6. Face Framing A-Line Bob
What it is: A bob that is shorter at the back and longer at the front. The front pieces frame the face like a soft curtain. It looks neat from every angle.
Best for: Fine and straight hair. The shape gives fullness at the back and softness at the front.
Ask your stylist: “Please cut an A-line bob, shorter at the back and longer at the front, with face framing layers that end near her chin.”
Style it: Let it air dry and brush it smooth. The A-line shape holds itself well.
Trim note: Trim every 8 weeks to keep the A-line shape clear.
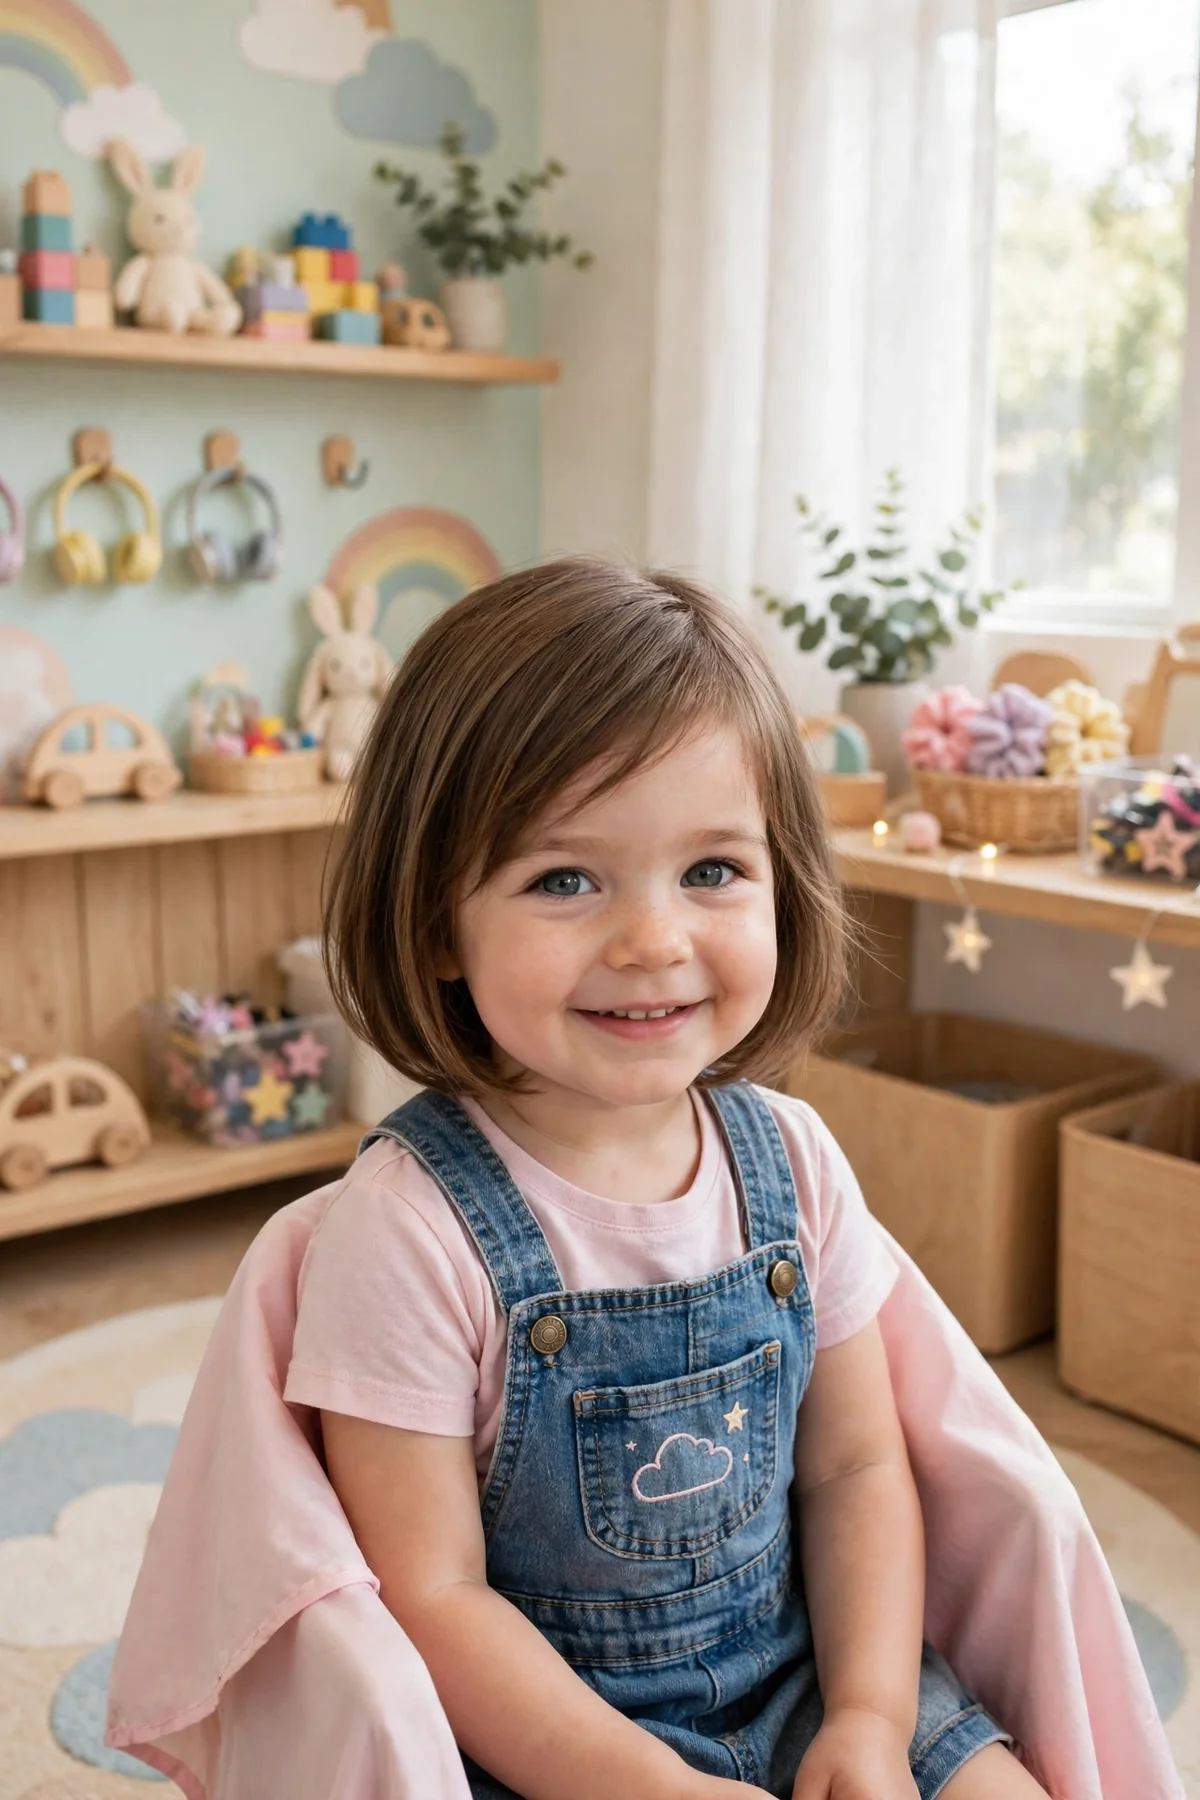
7. Face Framing French Bob
What it is: A short, chic bob that ends near the ears or jaw, with soft face framing pieces. It is playful, light, and full of charm.
Best for: Straight and wavy hair, and girls who love a short, easy cut. It also suits fine hair, since short hair looks thicker.
Ask your stylist: “Please cut a short French bob with soft face framing layers. Keep it light and playful, not stiff.”
Style it: Ruffle the ends with your fingers. No brush needed on most days.
Trim note: Trim every 6 to 8 weeks. Short bobs lose their shape faster.
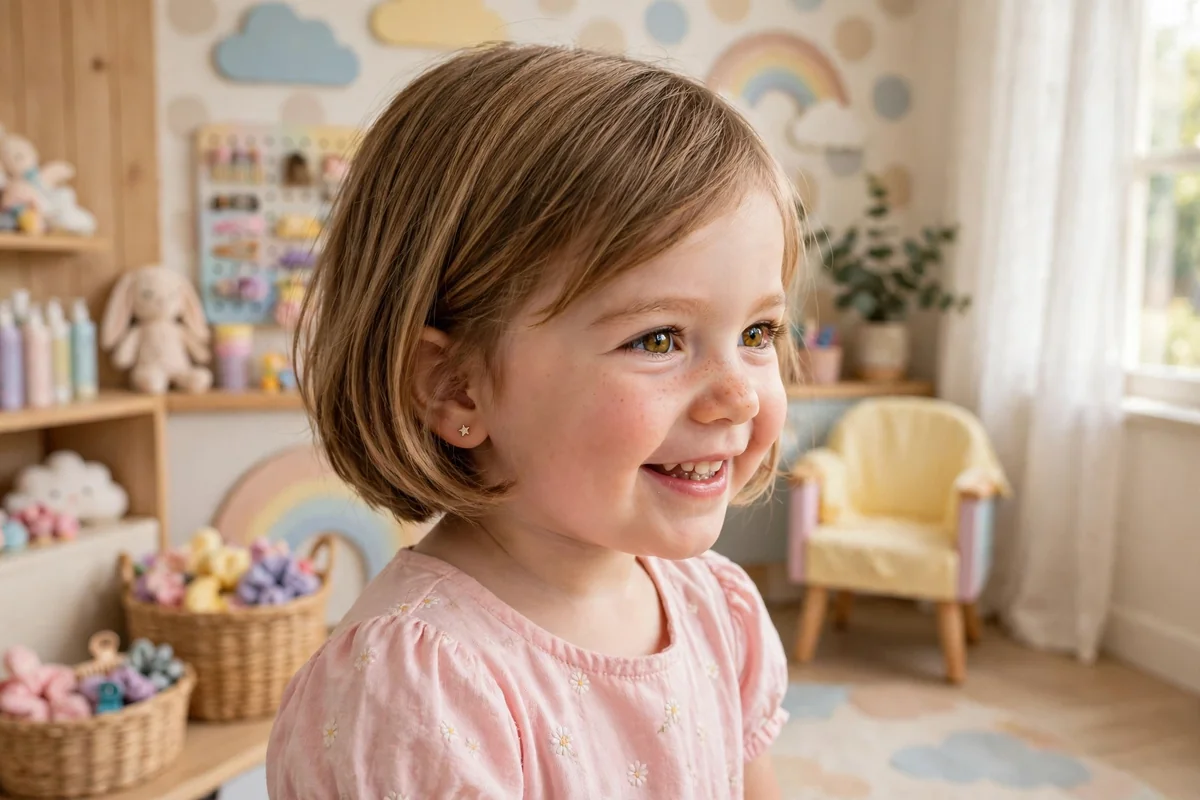
8. Face Framing Stacked Bob
What it is: A bob with gentle stacked layers at the back and face framing pieces at the front. The back has lift, and the front stays soft.
Best for: Fine, straight hair that needs volume. It also suits girls who want a bob with a bit more shape.
Ask your stylist: “Please cut a softly stacked bob with face framing layers at the front. Keep the stacking gentle, not steep.”
Style it: Brush it smooth and let the back layers lift on their own. A round brush adds bounce for photos.
Trim note: Trim every 8 weeks to hold the stacked shape.
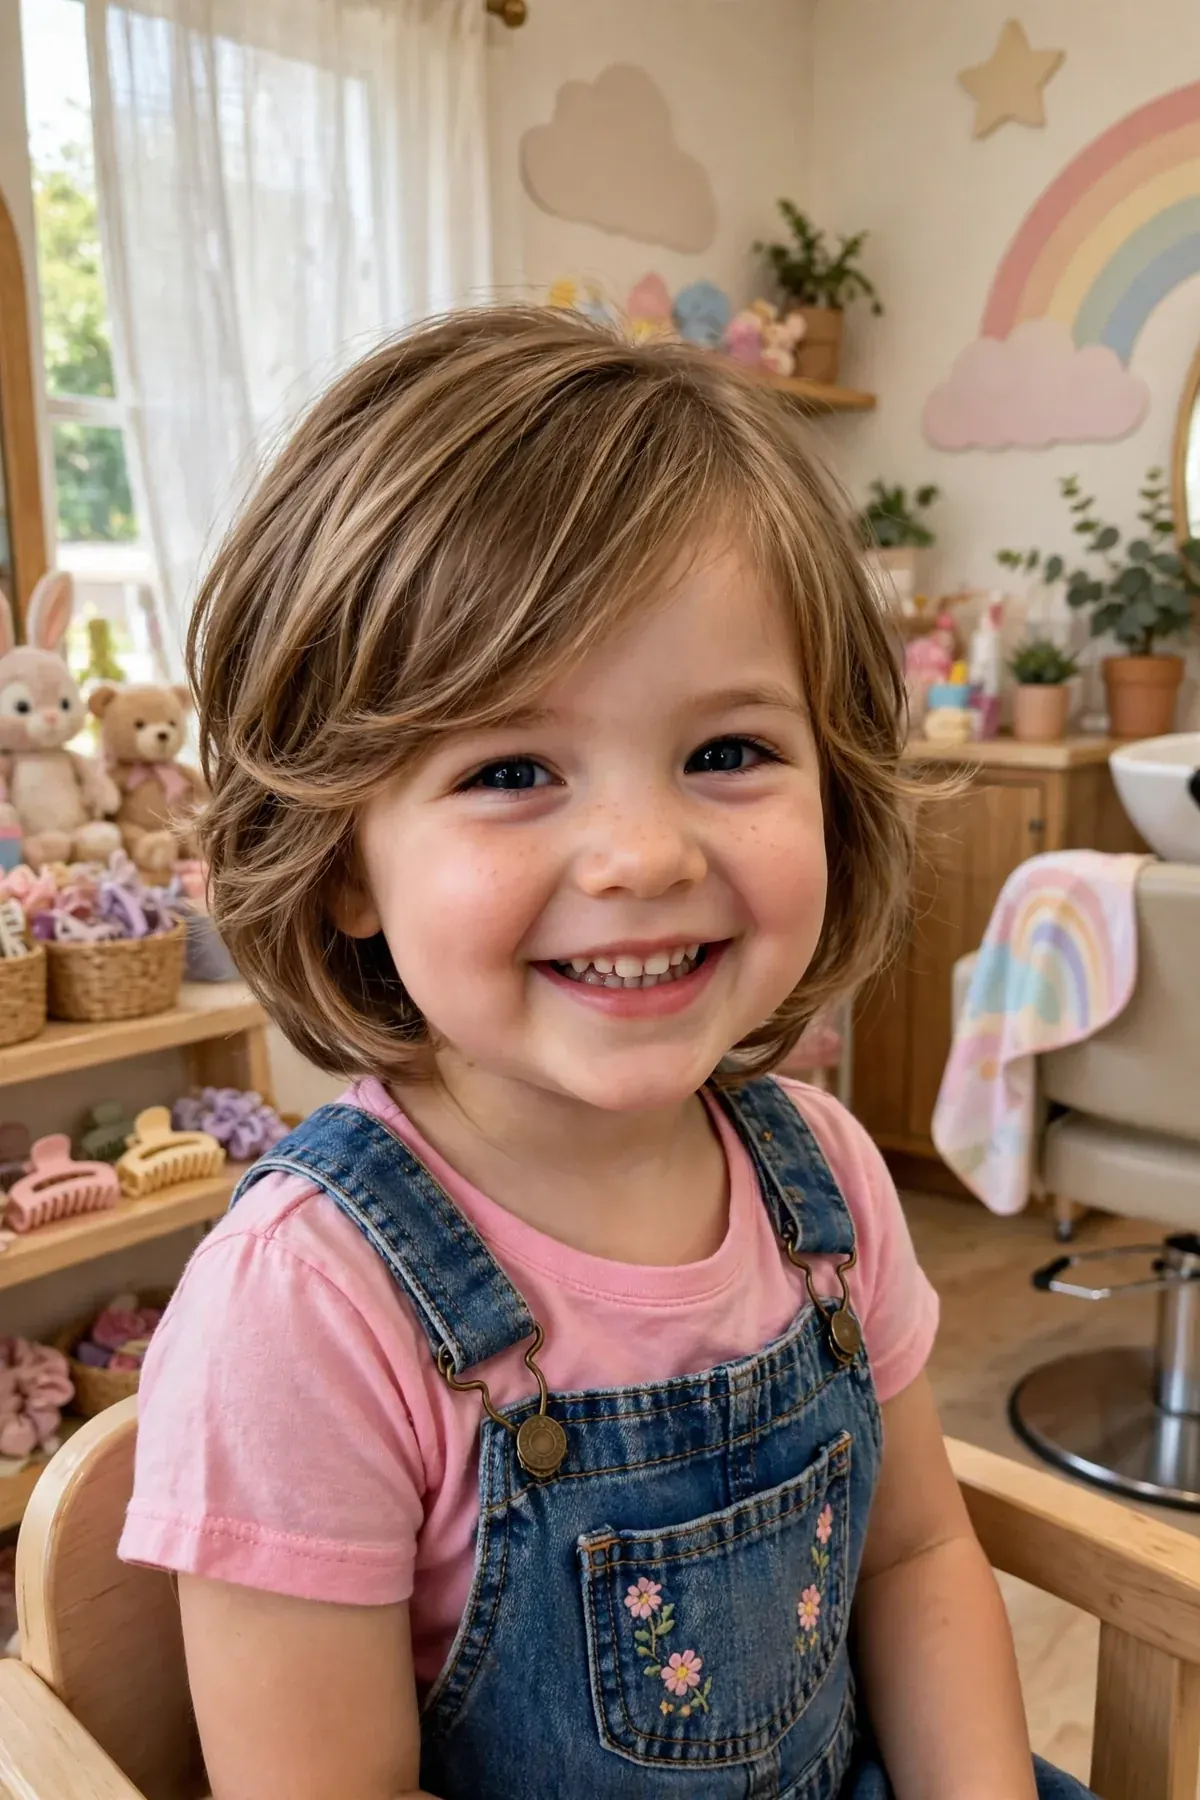
9. Face Framing Blunt Bob
What it is: A bob with one clean, even edge, softened by face framing layers at the front. The blunt ends look thick and healthy.
Best for: Thick, straight hair. The blunt cut shows off fullness, and the layers keep the front soft. If you like blunt ends, toddler girl haircuts with blunt bangs pair well with this shape.
Ask your stylist: “Please cut a blunt bob with soft face framing layers at the front. Keep the bottom edge clean and even.”
Style it: Brush it straight and smooth. The blunt ends need almost no styling.
Trim note: Trim every 8 to 10 weeks to keep the edge neat.
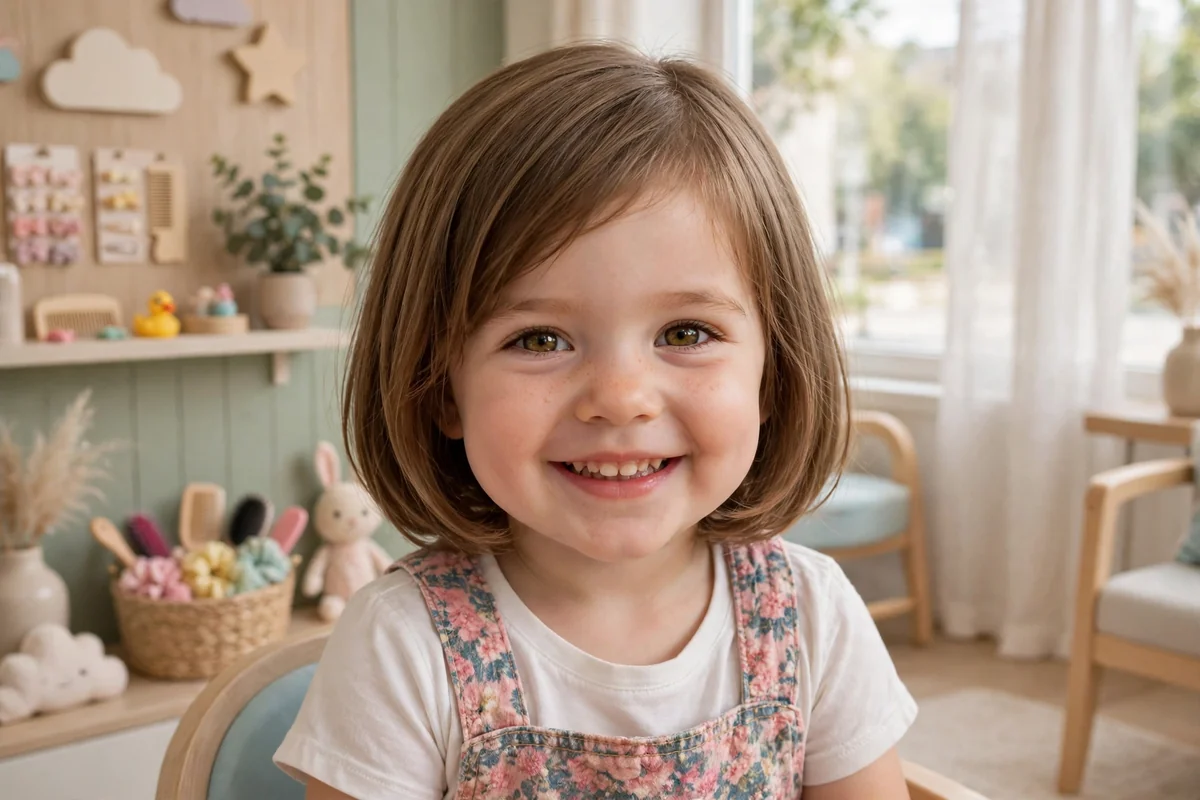
10. Face Framing Lob (Long Bob)
What it is: A long bob that ends near the shoulders, with face framing layers that soften the front. It is the best of both worlds: bob neatness with longer-hair freedom.
Best for: Every hair type. It also suits girls who are growing their hair out but still want shape. Toddler girl layered bob haircuts show more ways to wear this length.
Ask your stylist: “Please cut a long bob to her shoulders with face framing layers starting at her chin. Keep the ends soft.”
Style it: Wear it down, or pull it into a low ponytail with the layers left loose.
Trim note: Trim every 10 weeks. The lob grows out gracefully.
Long Hair with Face Framing Layers
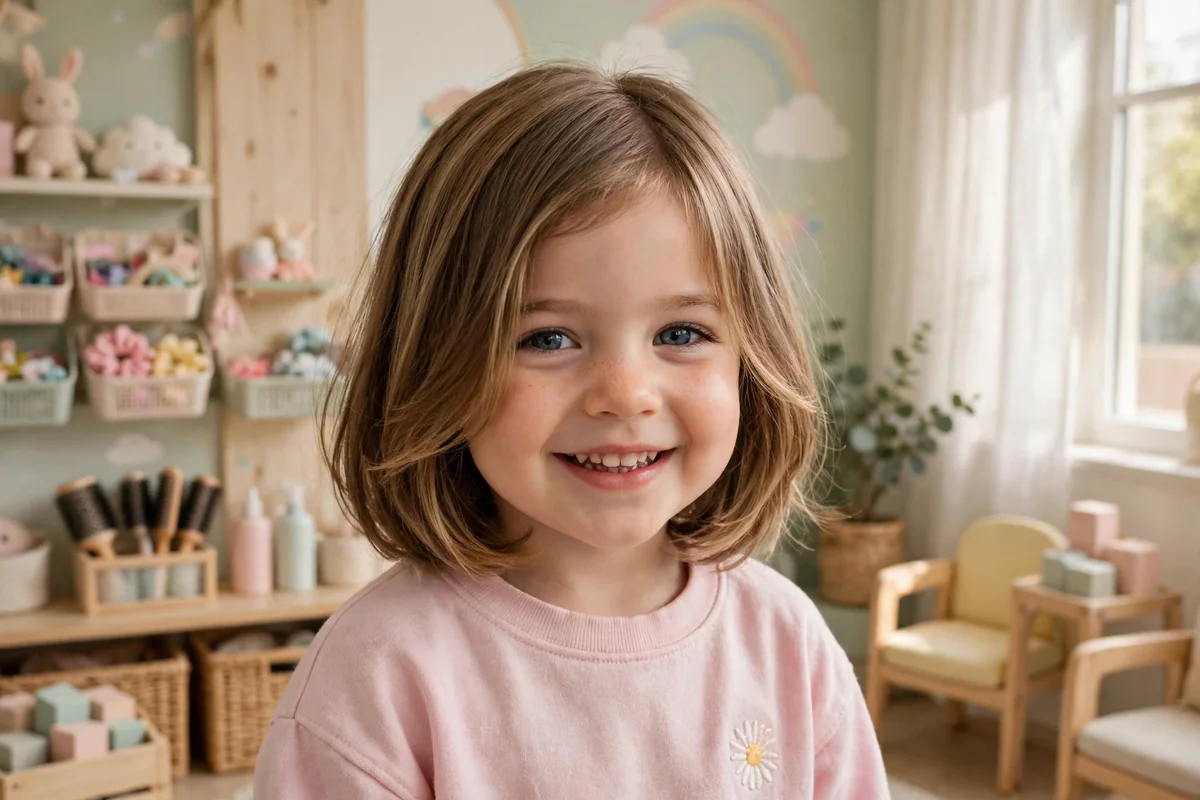
11. Long Hair with Cheekbone Layers
What it is: Long hair kept past the shoulders, with cheekbone layers that open up the face. The length stays, but the front gains light and movement.
Best for: Girls who love long hair and parents who want shape without a big cut. It also suits round faces, since the layers add length to the look.
Ask your stylist: “Please keep her length and add soft face framing layers starting at her cheekbones. Do not cut the back short.”
Style it: Brush the layers forward and let them fall. They frame her smile in photos.
Trim note: Trim every 12 weeks. Long hair with cheekbone layers needs the fewest visits.
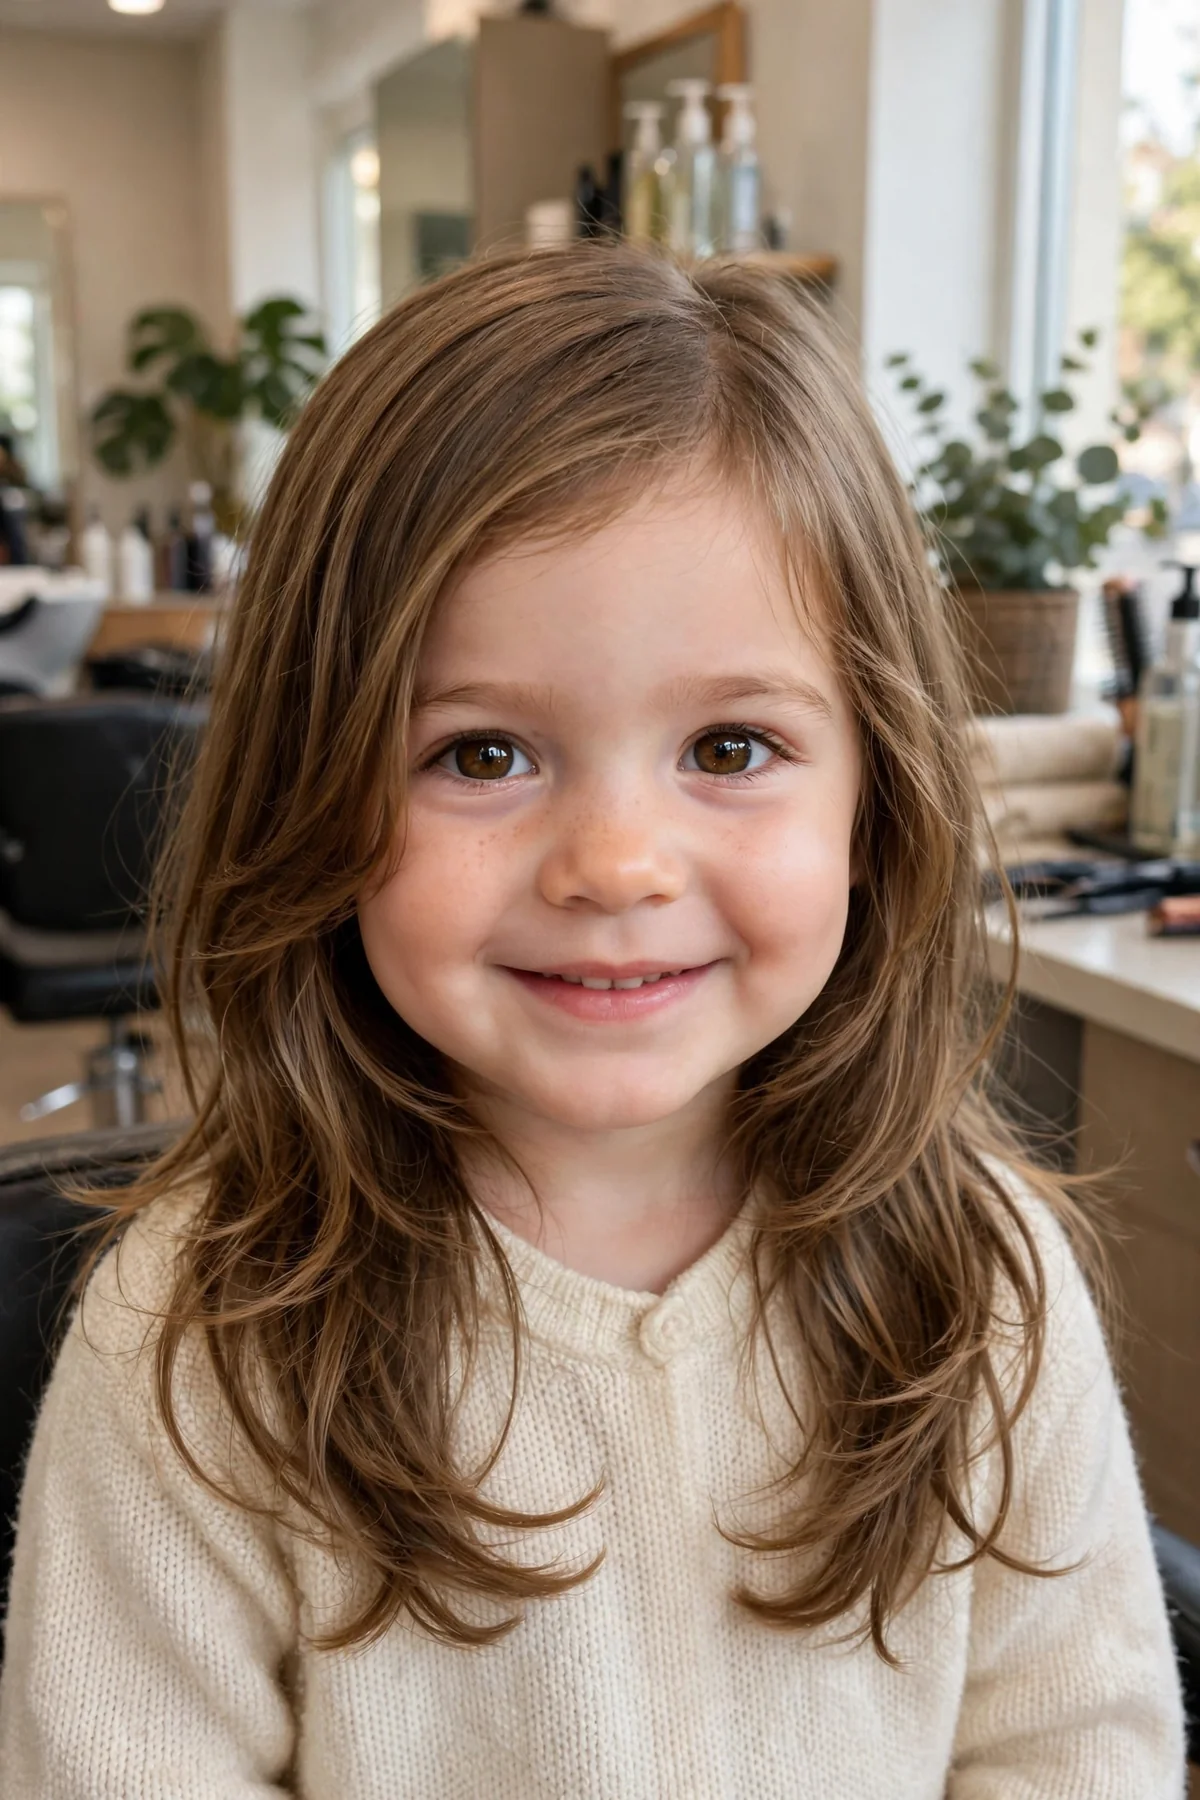
12. Long Hair with Curtain Face Framing
What it is: A center part with curtain-like layers that fall on both sides of the face. The pieces part like curtains and frame her eyes softly.
Best for: Straight and wavy long hair. It also suits girls who like a soft, pretty look with no bangs.
Ask your stylist: “Please give her curtain face framing layers with a center part, starting at her cheekbones. Keep both sides even and soft.”
Style it: Part in the middle and let the curtains fall. A quick brush is all it needs.
Trim note: Trim every 10 to 12 weeks. Curtain layers grow out into a soft side sweep.
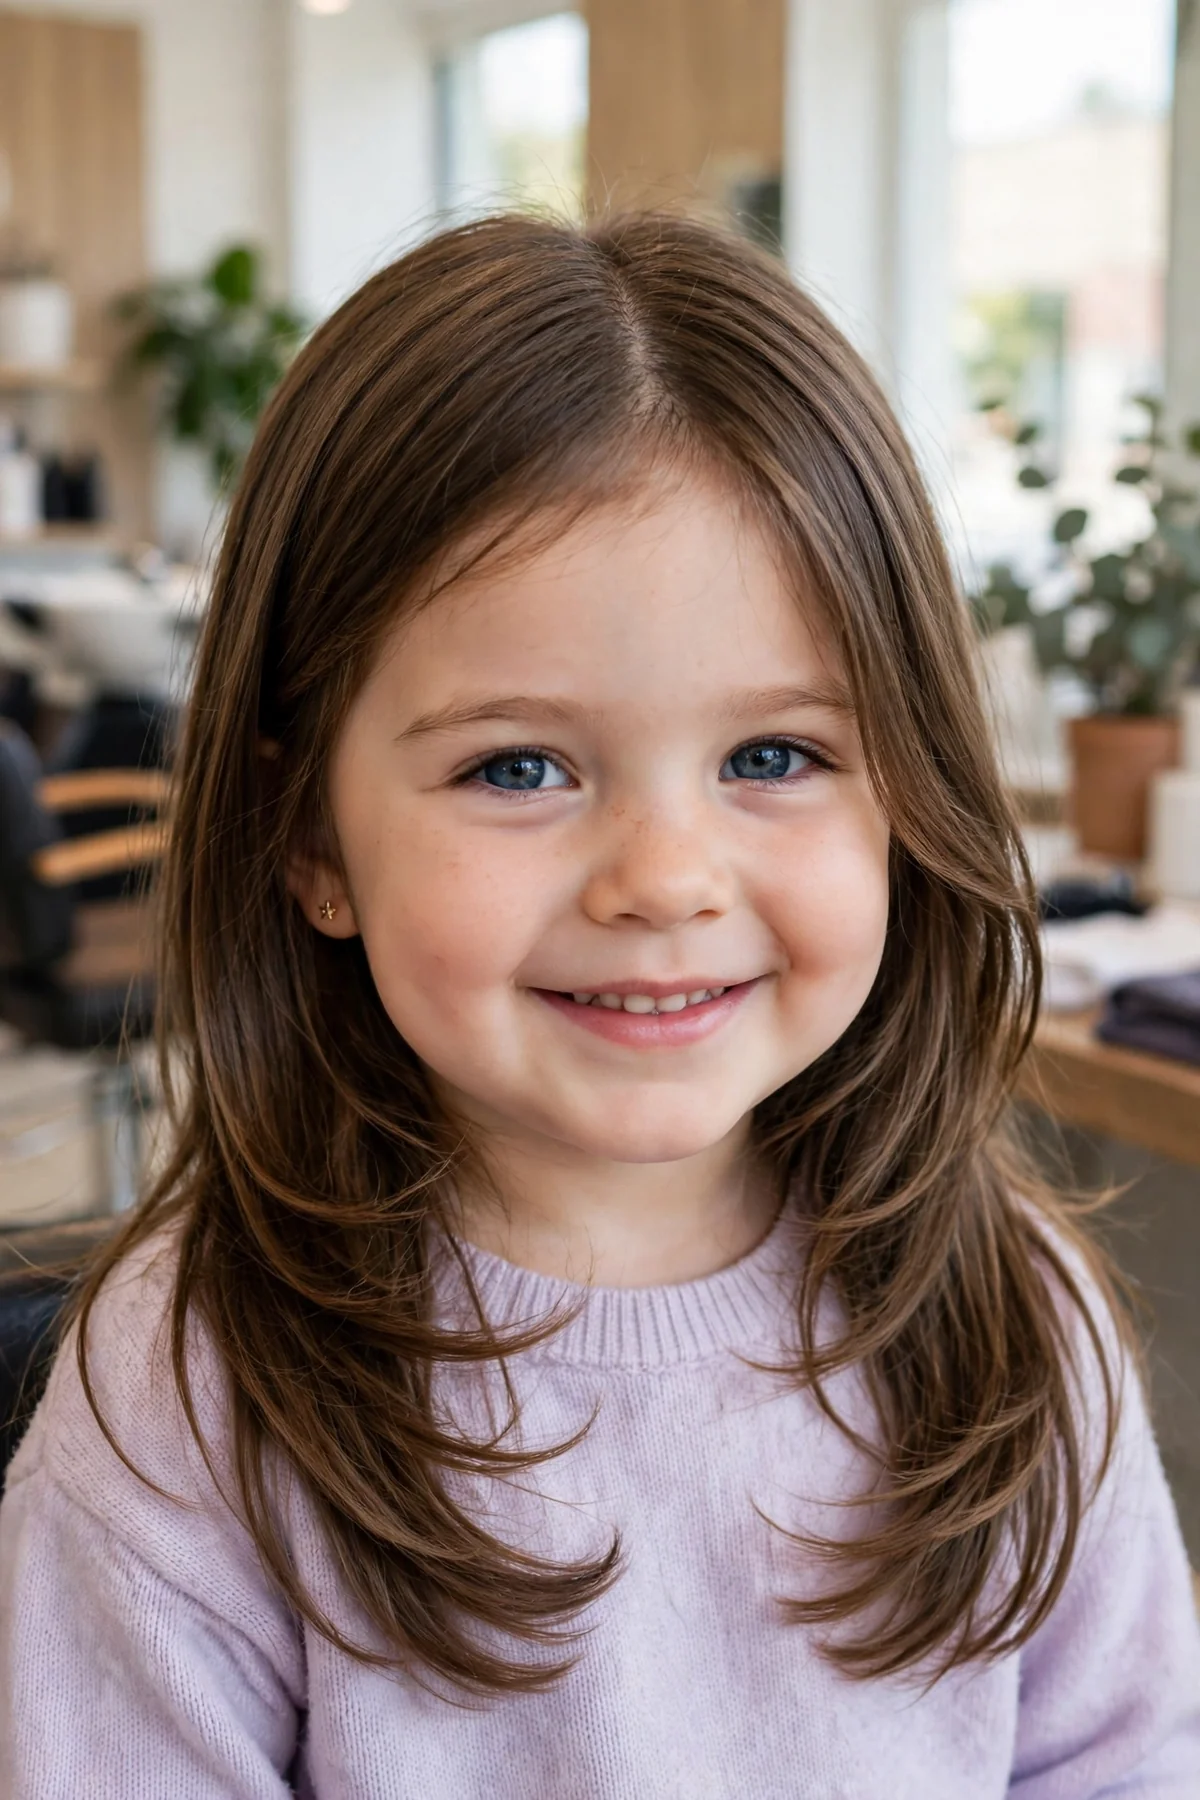
13. Long Layers with Face Framing Ends
What it is: Long layers through the hair, with the face framing pieces ending softly near the chin. The ends move and bounce instead of hanging heavy.
Best for: Thick and wavy hair. The layers remove weight and stop the hair from looking flat.
Ask your stylist: “Please add long layers through her hair and soft face framing pieces at the front. Keep the ends light, not blunt.”
Style it: Scrunch the ends with a little leave-in cream. The layers bring out natural movement.
Trim note: Trim every 12 weeks to keep the ends healthy.
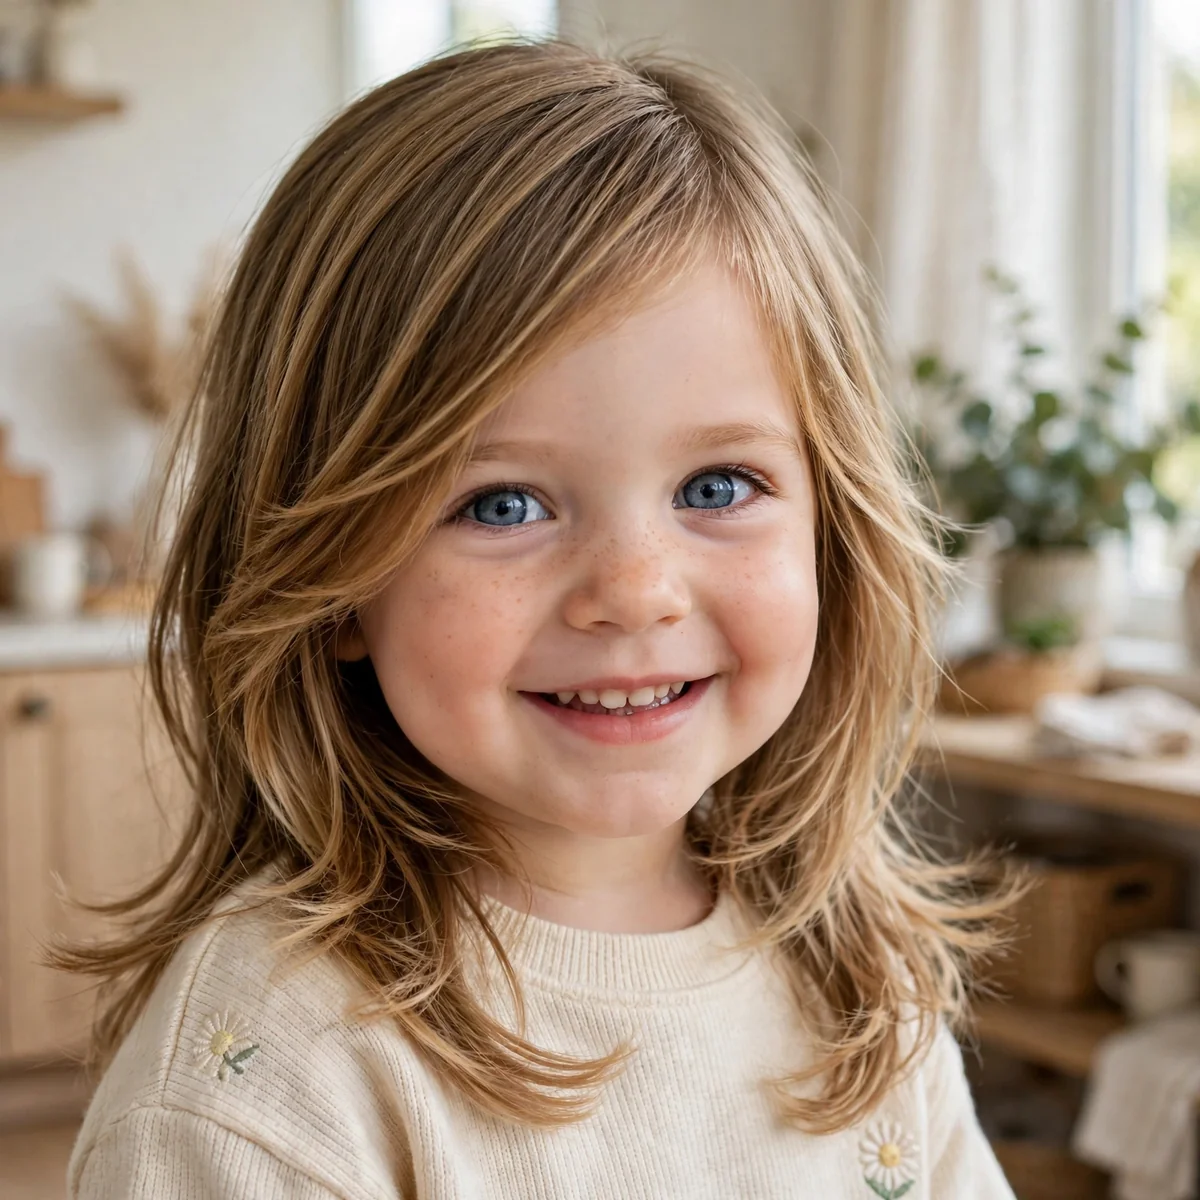
14. Face Framing Layers with Soft Waves
What it is: Natural soft waves shaped by face framing layers. The waves start near the cheeks and give the whole cut a gentle, beachy feel.
Best for: Wavy hair, medium to long lengths. It also suits girls whose hair waves on its own after washing.
Ask your stylist: “Please cut face framing layers that work with her natural waves. Start them at her chin and keep the waves soft.”
Style it: Let it air dry and scrunch the waves lightly. No heat needed.
Trim note: Trim every 10 to 12 weeks. Waves hide growth well.
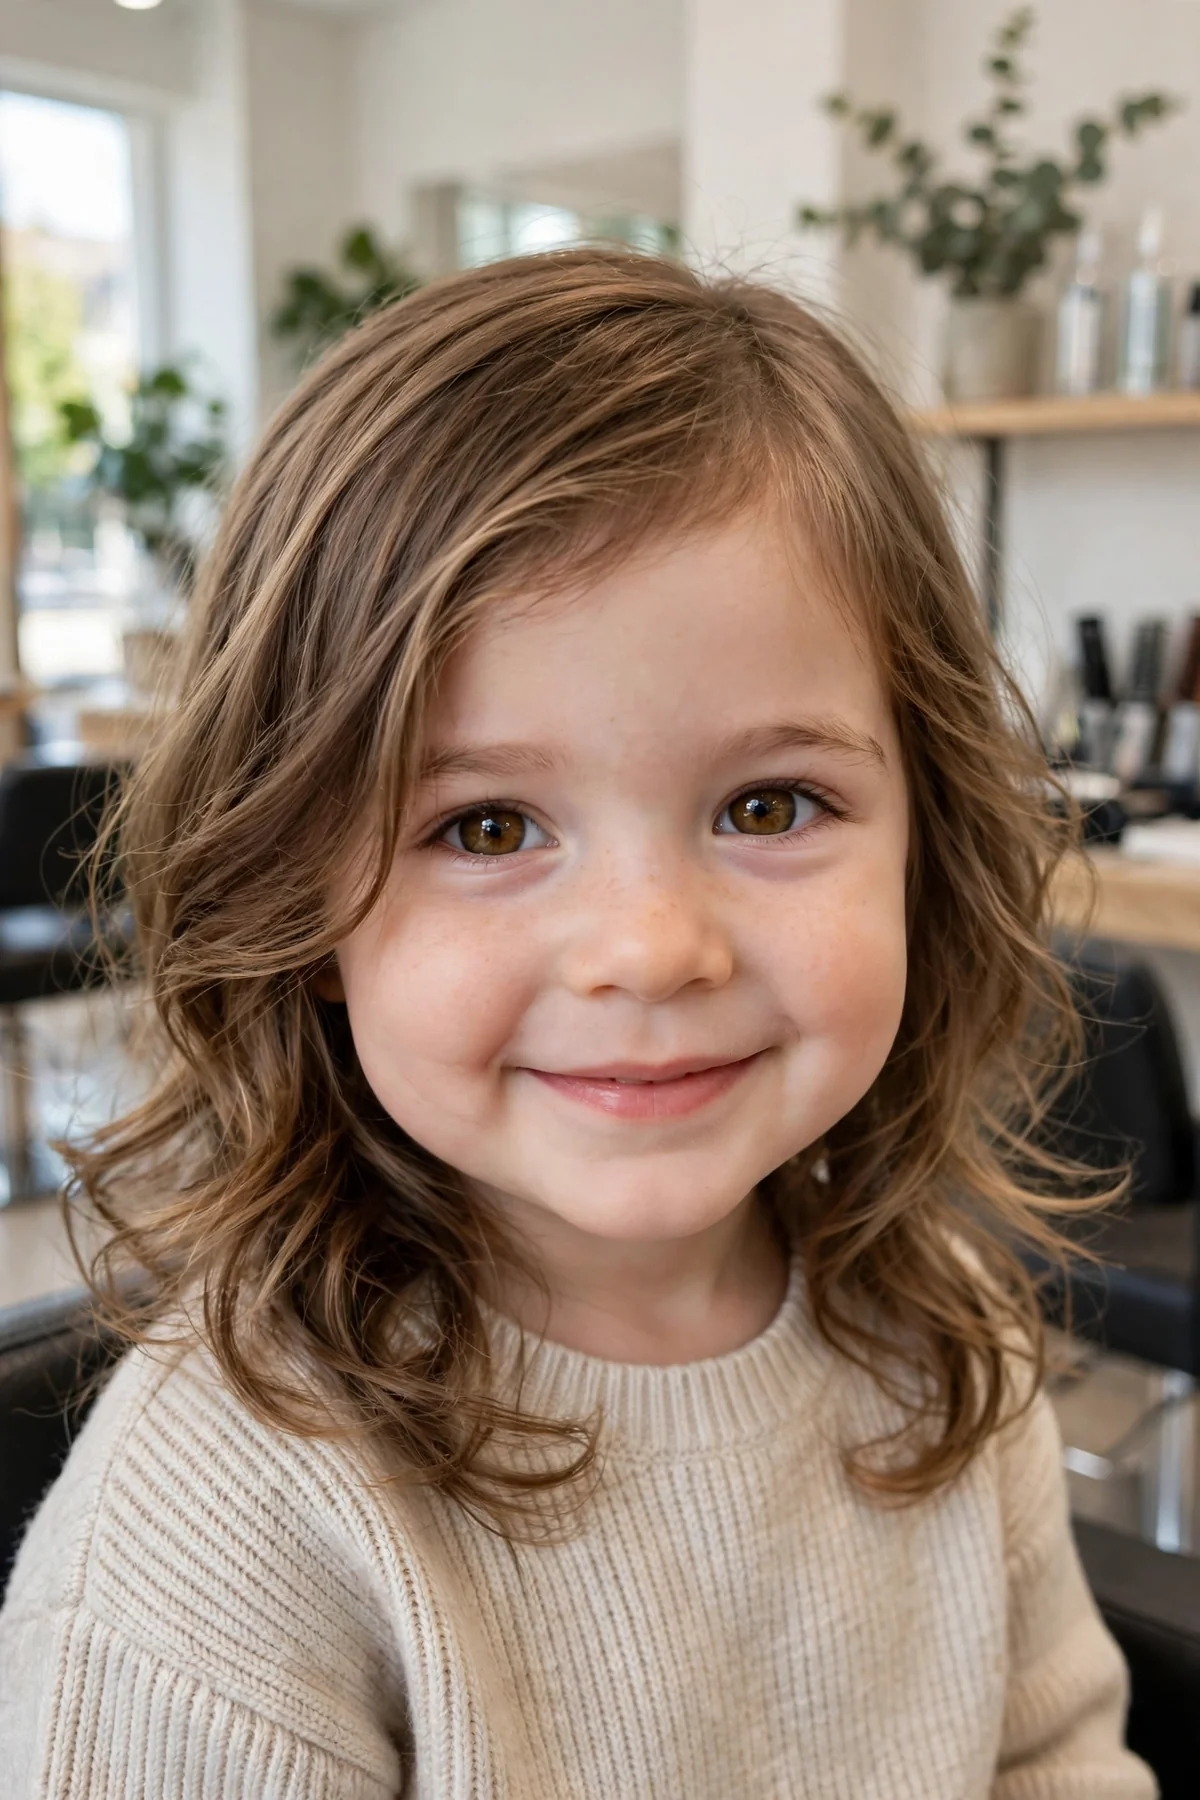
15. Face Framing Layers with a Low Ponytail
What it is: A low ponytail with loose face framing pieces left out at the front. It is neat for school but still soft and pretty.
Best for: Active girls and school days. The ponytail keeps hair back, and the layers keep the look soft. Toddler girl shoulder length haircuts also work well in a low ponytail.
Ask your stylist: “Please cut face framing layers that look good when her hair is in a low ponytail. Start them at her chin.”
Style it: Pull the hair into a low ponytail and pull out two soft pieces at the front. Done in one minute.
Trim note: Trim every 10 weeks. The loose pieces need to stay above her chin.
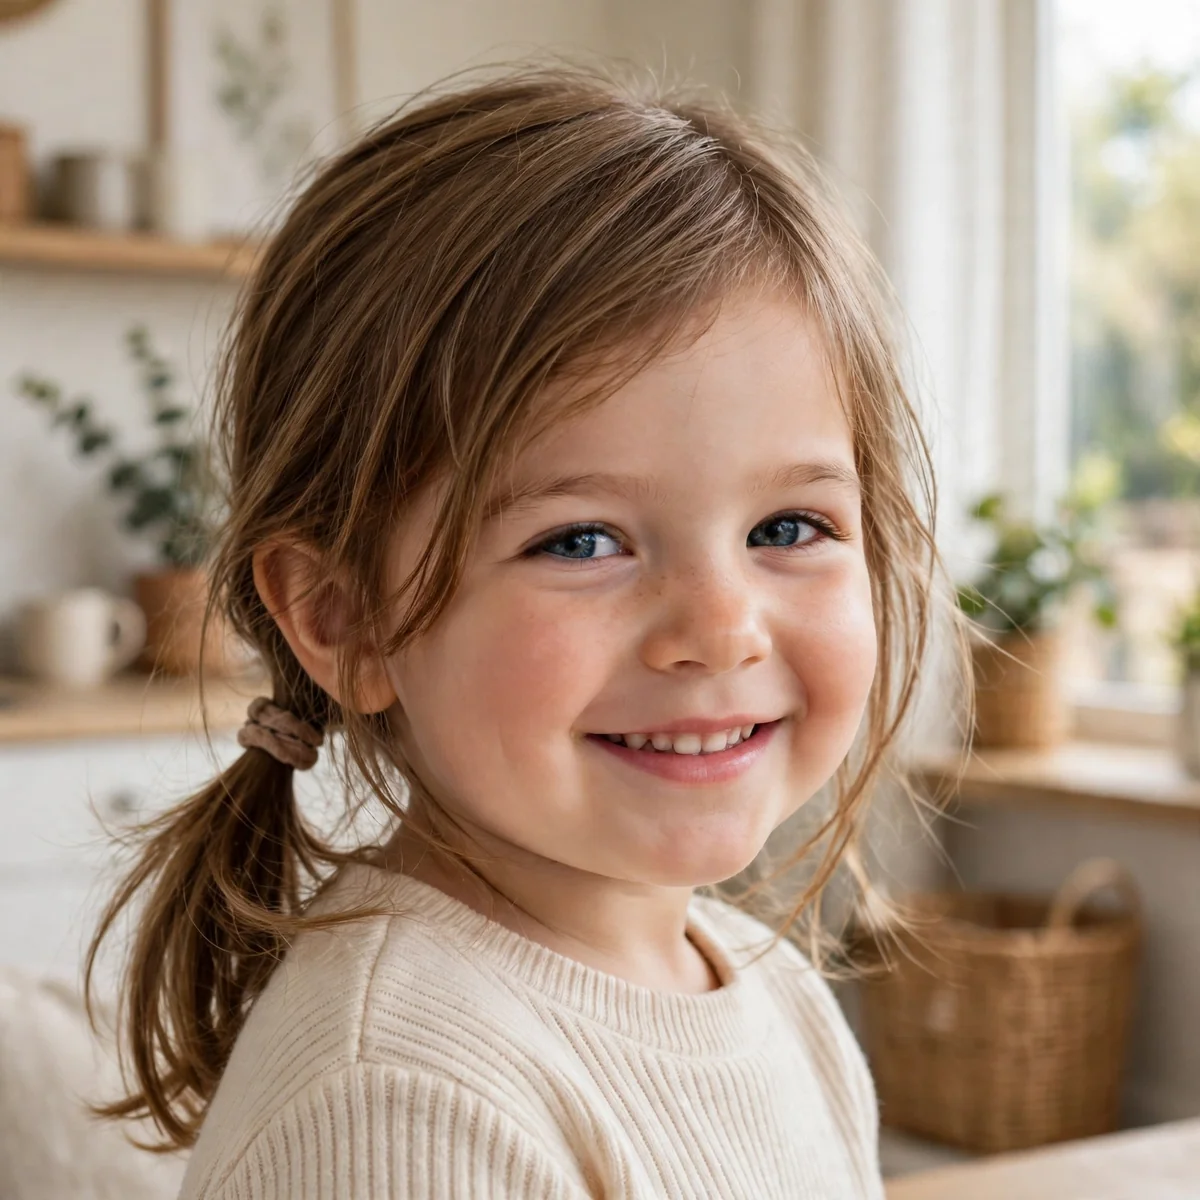
Face Framing Layers by Hair Texture
16. Face Framing Layers for Fine Hair
What it is: Whisper-light layers on fine hair. The pieces are so soft you feel them more than you see them. They add shape without making the ends look thin.
Best for: Fine, thin hair. It is the safest layered cut for little girls with delicate hair.
Ask your stylist: “Please add very light face framing layers for her fine hair. Keep them whisper-thin and do not remove much bulk.”
Style it: Brush it smooth and let it fall. Fine hair with light layers needs no product.
Trim note: Trim every 12 weeks. Fine hair shows split ends fast, so do not wait too long.
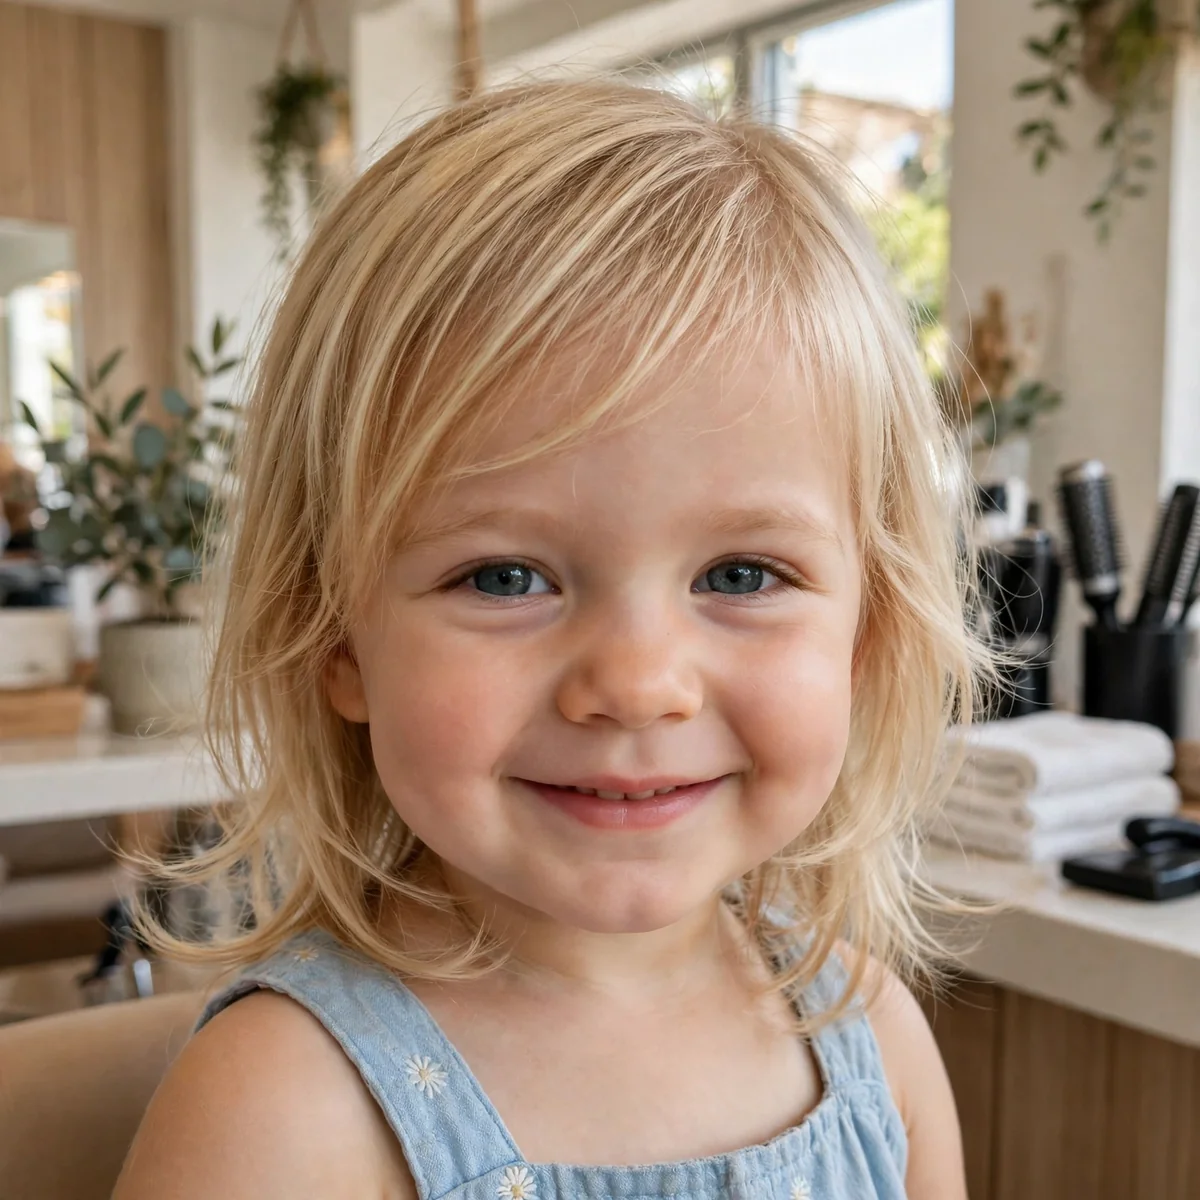
17. Face Framing Layers for Thick Hair
What it is: Layers that take weight out of the front of thick hair. The hair feels lighter, dries faster, and sits neatly instead of puffing out.
Best for: Thick, heavy hair. It also suits girls whose hair takes forever to dry.
Ask your stylist: “Please thin the front with face framing layers so her thick hair feels lighter. Start at her chin and blend well.”
Style it: Brush it smooth while it is damp. The layers help thick hair dry in shape.
Trim note: Trim every 10 weeks. Thick hair grows fast and the shape fills in quickly.
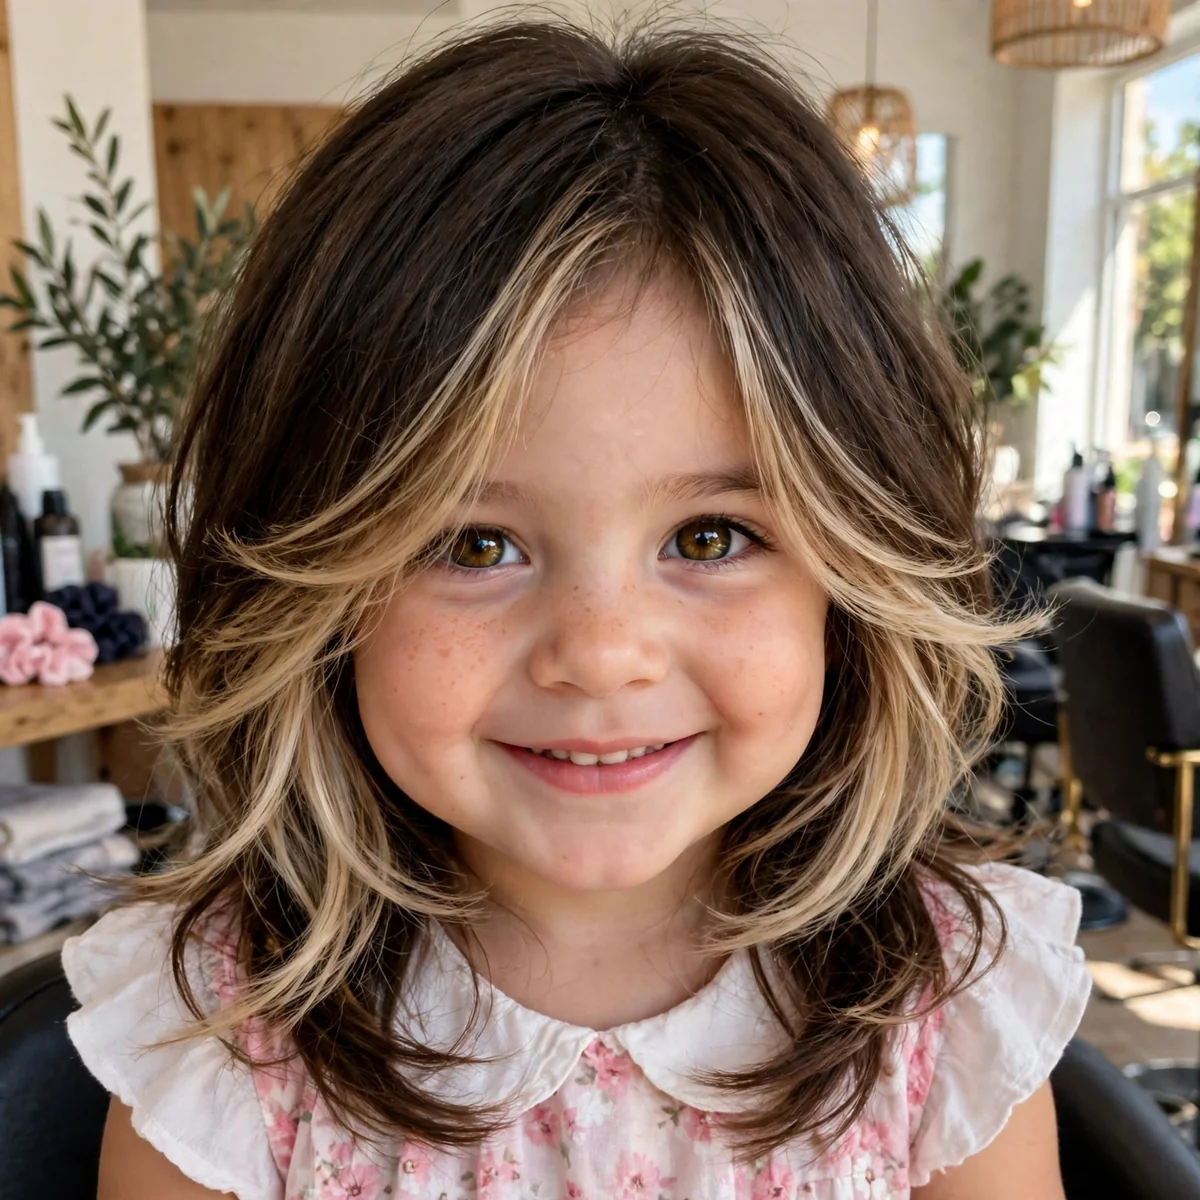
18. Face Framing Layers for Straight Hair
What it is: Clean, smooth layers on straight hair. The layer lines show clearly, which gives the cut a neat, polished look.
Best for: Straight hair of any thickness. It also suits girls who like a tidy, sleek style.
Ask your stylist: “Please cut smooth face framing layers on her straight hair. Make the ends soft so the lines are gentle.”
Style it: Brush it straight and smooth. Straight hair shows the layers best with no extra work.
Trim note: Trim every 10 weeks. Straight hair shows uneven growth more than wavy hair.
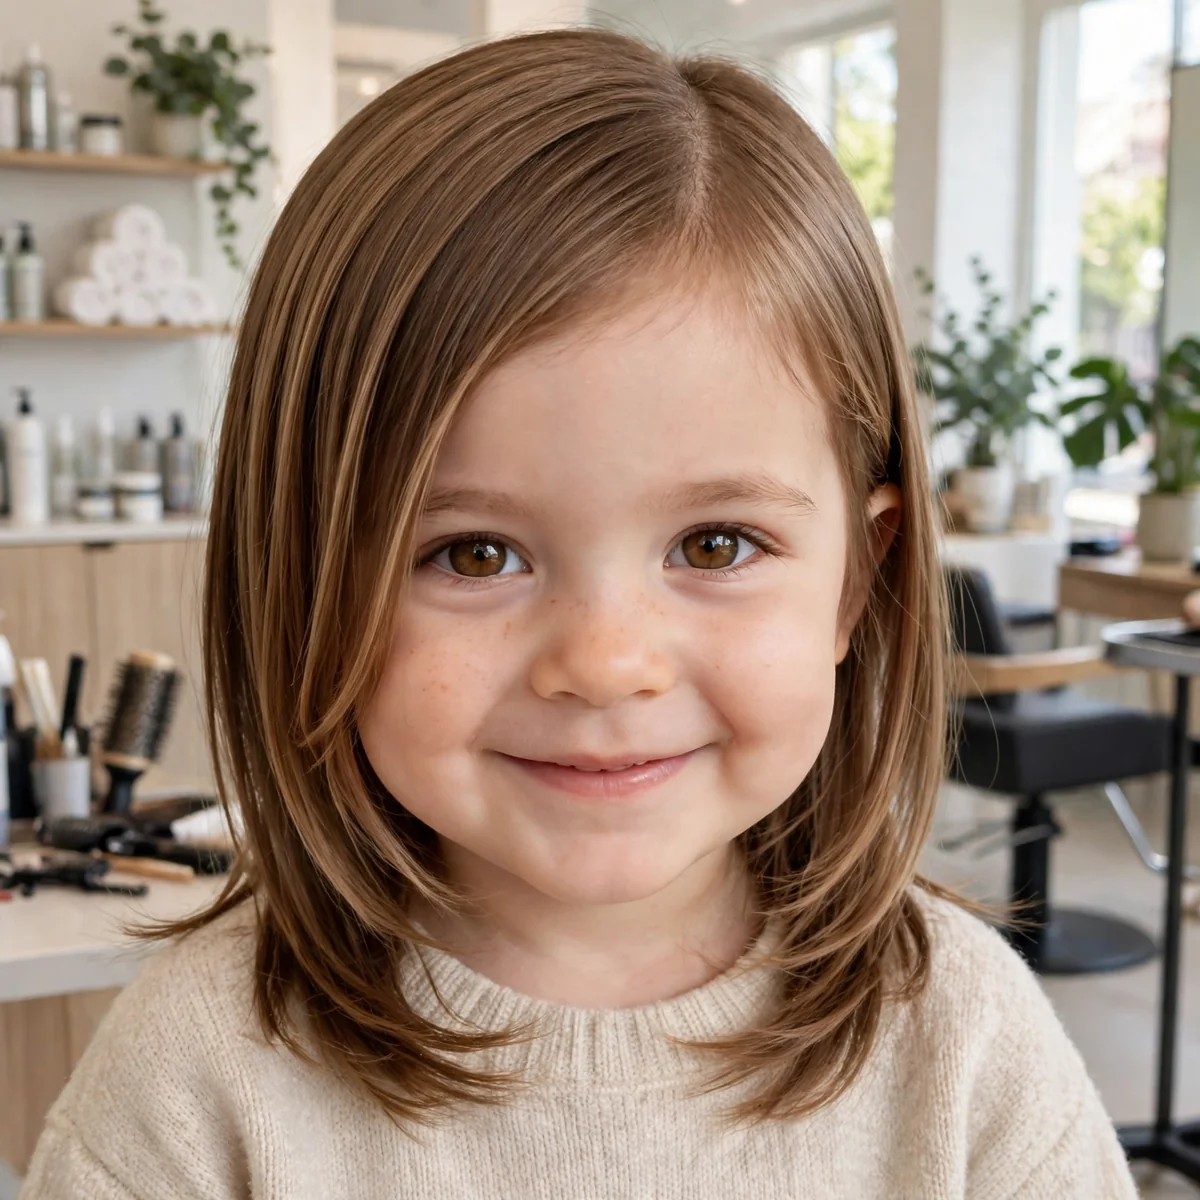
19. Face Framing Layers for Wavy Hair
What it is: Layers that follow the natural wave pattern. The waves blend the layers in, so the cut looks soft and never harsh.
Best for: Wavy hair, medium to long lengths. It also suits girls whose waves change with the weather.
Ask your stylist: “Please cut face framing layers that follow her natural waves. Cut them dry so you can see the wave pattern.”
Style it: Scrunch with a little leave-in cream and let it air dry. The waves do the styling.
Trim note: Trim every 12 weeks. Wavy hair hides new growth well.
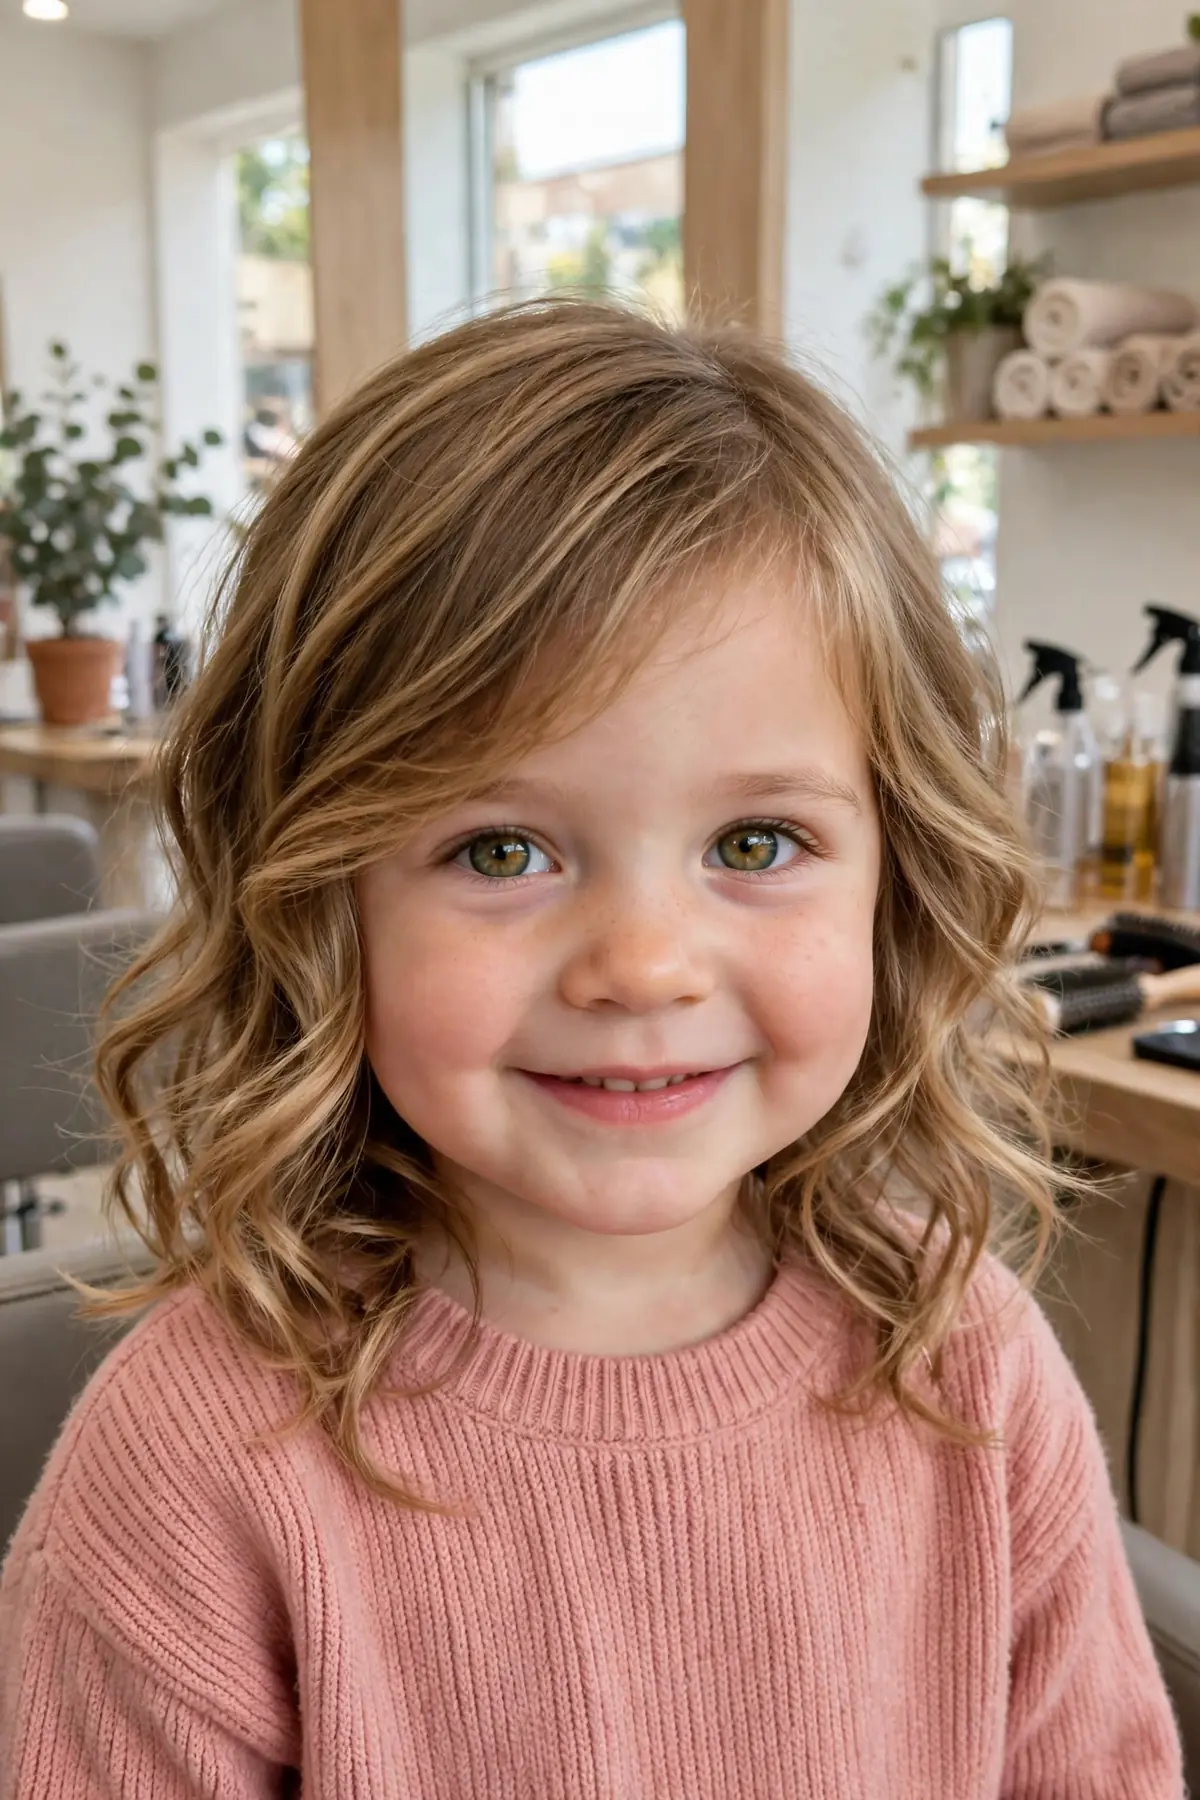
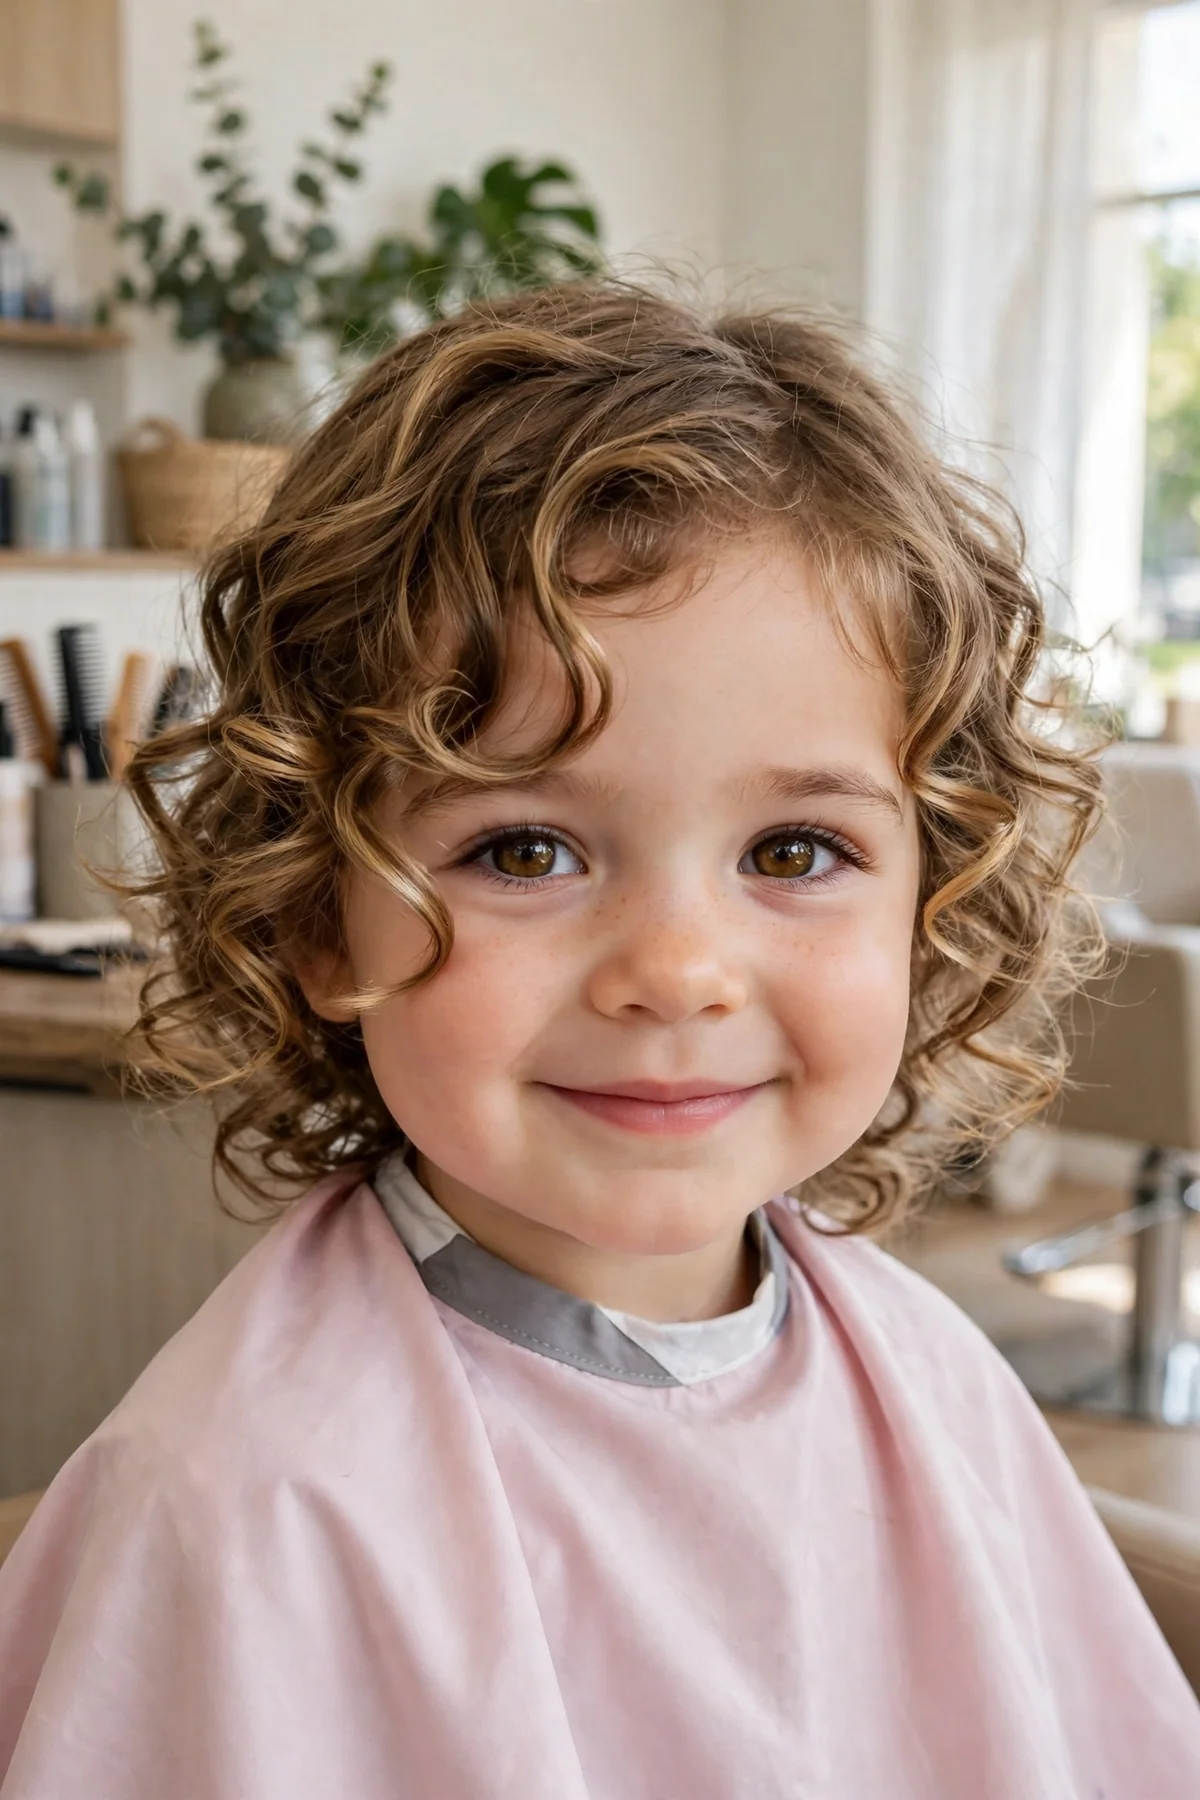
20. Face Framing Layers for Curly Hair
What it is: Layers cut curl by curl, so each curl frames her face in its own soft ring. The curls sit neatly instead of bunching at the front.
Best for: Curly hair. It also suits girls whose curls puff out at the sides. Toddler girl wavy bob haircuts show another way to shape curls and waves.
Ask your stylist: “Please cut her face framing layers curl by curl while her hair is dry. Do not cut straight across. Keep the curls long enough to spring up.”
Style it: Wet the curls lightly, add a little curl cream, and let them dry on their own. Never brush dry curls.
Trim note: Trim every 12 weeks. Curly layers spring up as they dry, so a dry cut matters most here.
Playful Face Framing: Braids, Ponytails, and Clips
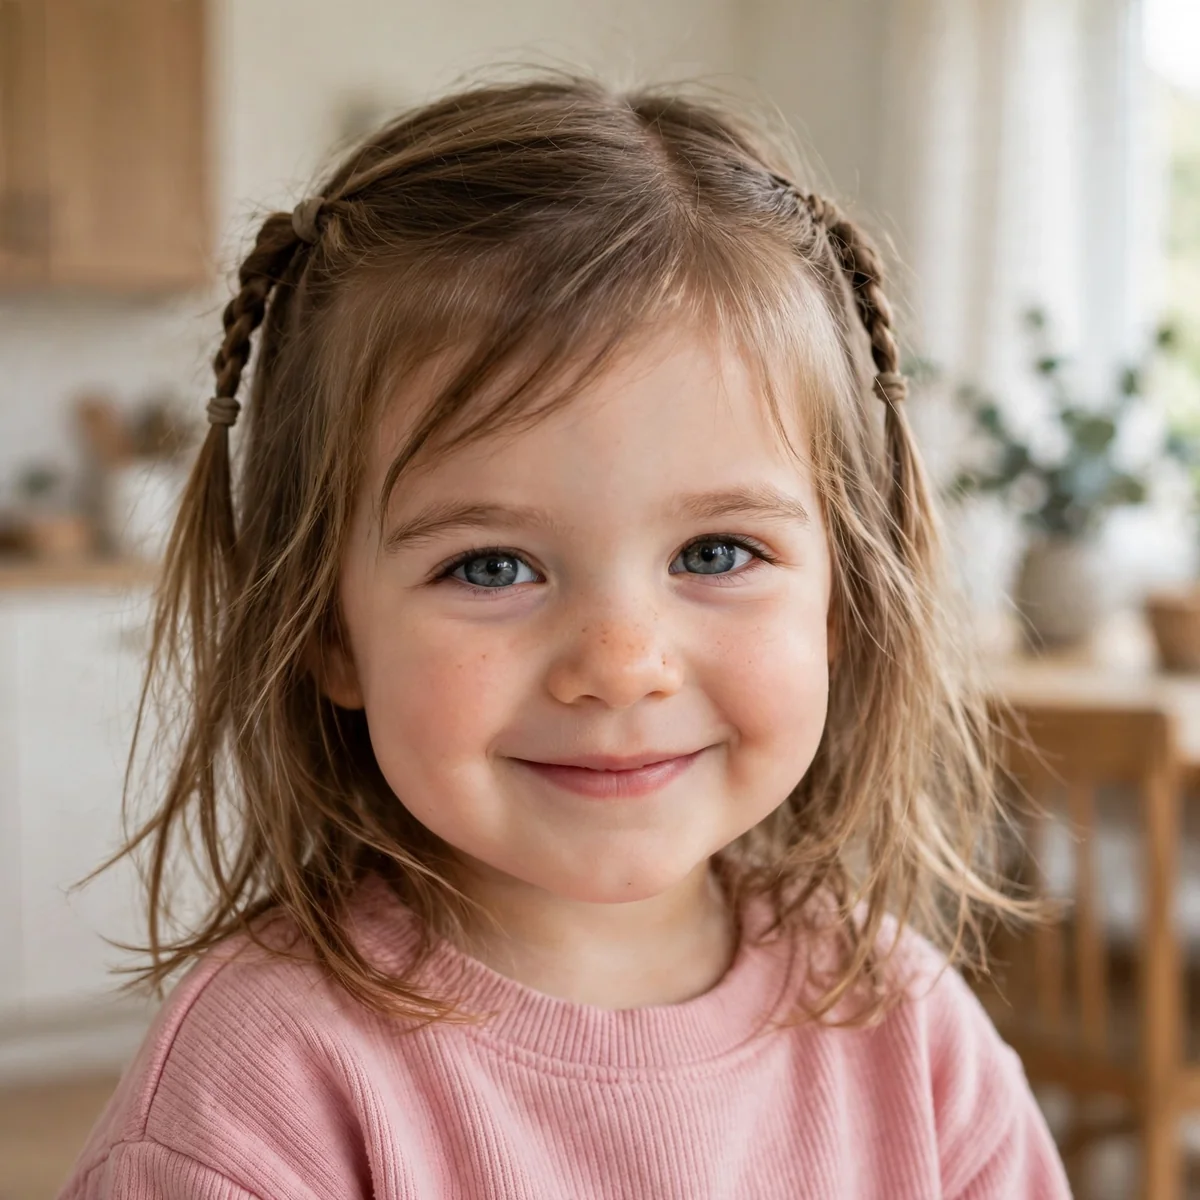
21. Face Framing Layers with Two Mini Braids
What it is: Two tiny braids at the front, with loose face framing layers falling beside them. It is sweet, playful, and stays put through a whole day of play.
Best for: Medium to long hair and girls who love braids. It also suits school days and family outings.
Ask your stylist: “Please cut face framing layers that work with two small front braids. Keep the layers long enough to braid and to leave loose.”
Style it: Braid two small sections at the front and tie them with soft bands. Leave the layers loose around her cheeks.
Trim note: Trim every 10 weeks. Keep the braided pieces long enough to hold a band.
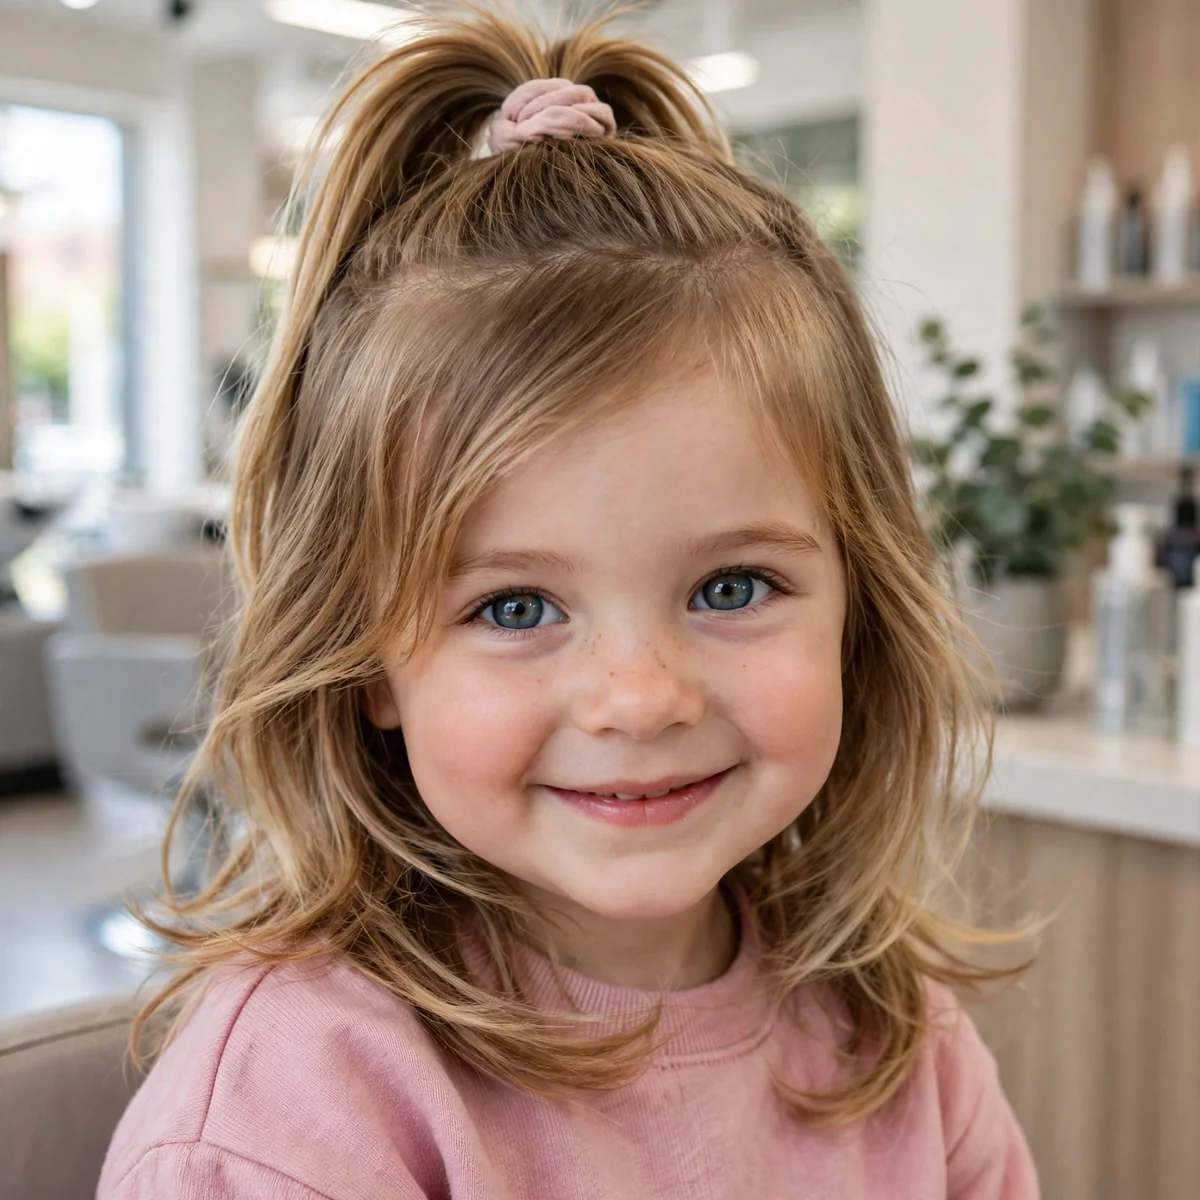
22. Face Framing Layers with a High Ponytail
What it is: A high, bouncy ponytail with soft face framing pieces left loose at the front. It looks fun and sporty, and it keeps hair out of her face.
Best for: Active girls and warm days. It also suits medium to long hair.
Ask your stylist: “Please cut face framing layers that look sweet with a high ponytail. Start them at her cheekbones.”
Style it: Pull the hair high and leave two soft pieces out at the front. A soft band keeps it comfy.
Trim note: Trim every 10 weeks. The loose pieces should stay clear of her eyes.
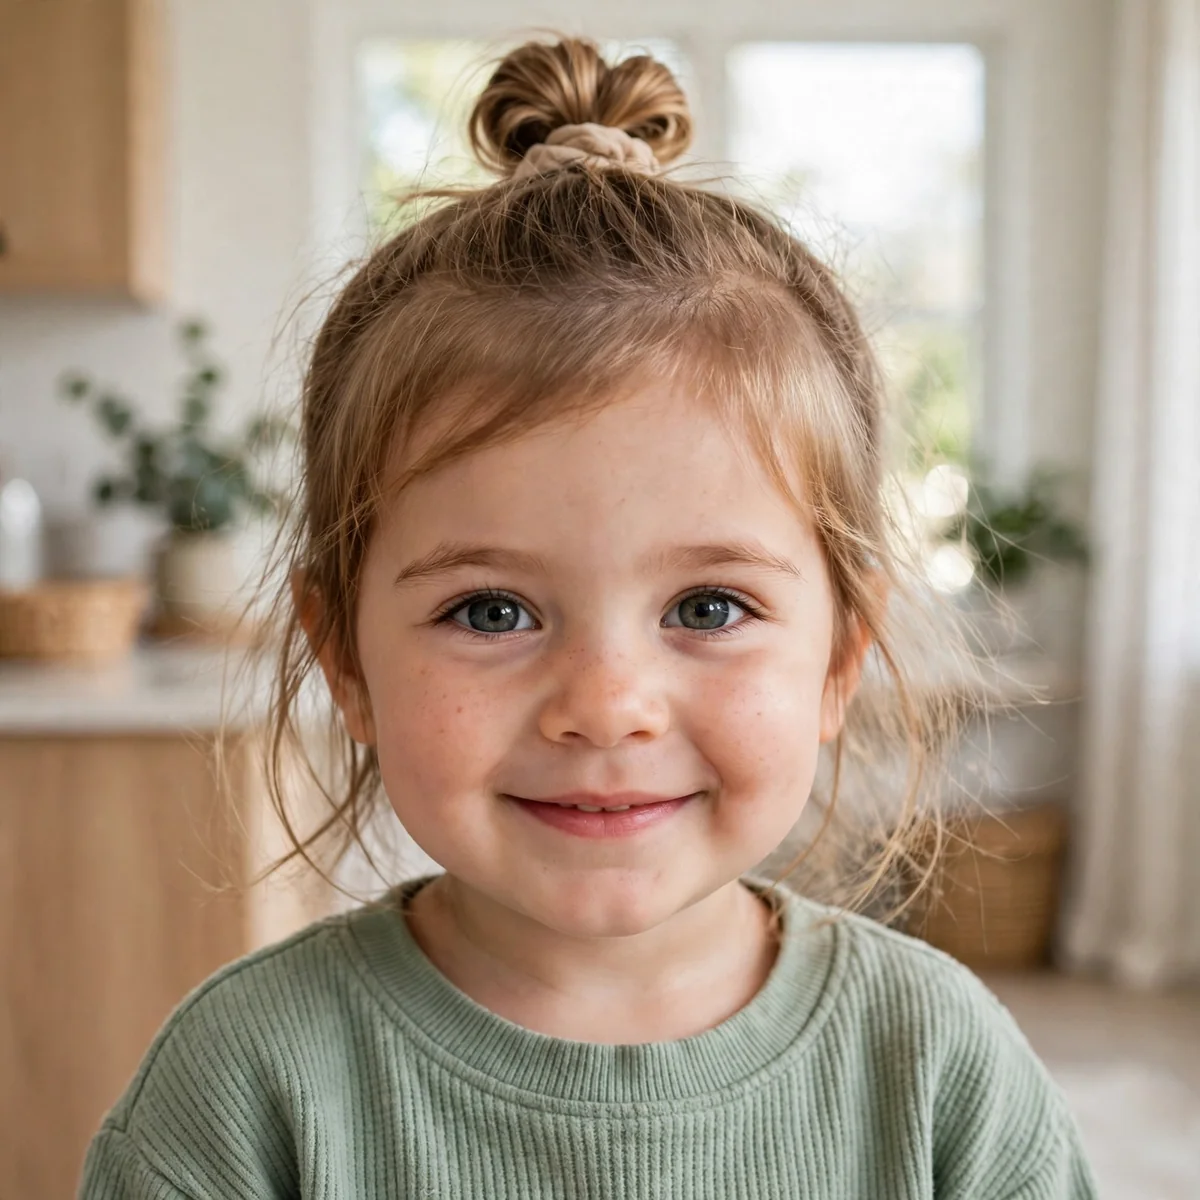
23. Face Framing Layers with a Top Knot
What it is: A small bun on top with loose face framing layers falling at the sides. It is cute, quick, and perfect for hot days.
Best for: Medium to long hair and busy mornings. It also suits girls who like their hair up but still want softness around the face.
Ask your stylist: “Please cut face framing layers that fall softly when her hair is in a top knot. Start them at her chin.”
Style it: Twist the hair into a small top knot and pull out two loose pieces at the front.
Trim note: Trim every 10 to 12 weeks. The top knot hides growth well.
24. Face Framing Layers with a Half-Up Bow
What it is: The top half of the hair tied up with a bow, and the rest left down with face framing layers. It is the classic party look for little girls.
Best for: Parties, photos, and holidays. It also suits medium to long hair.
Ask your stylist: “Please cut face framing layers that frame her face when the top half is tied up. Start them at her cheekbones.”
Style it: Tie the top half up with a bow and let the layers fall free at the front.
Trim note: Trim every 10 weeks. Keep the layers even on both sides.
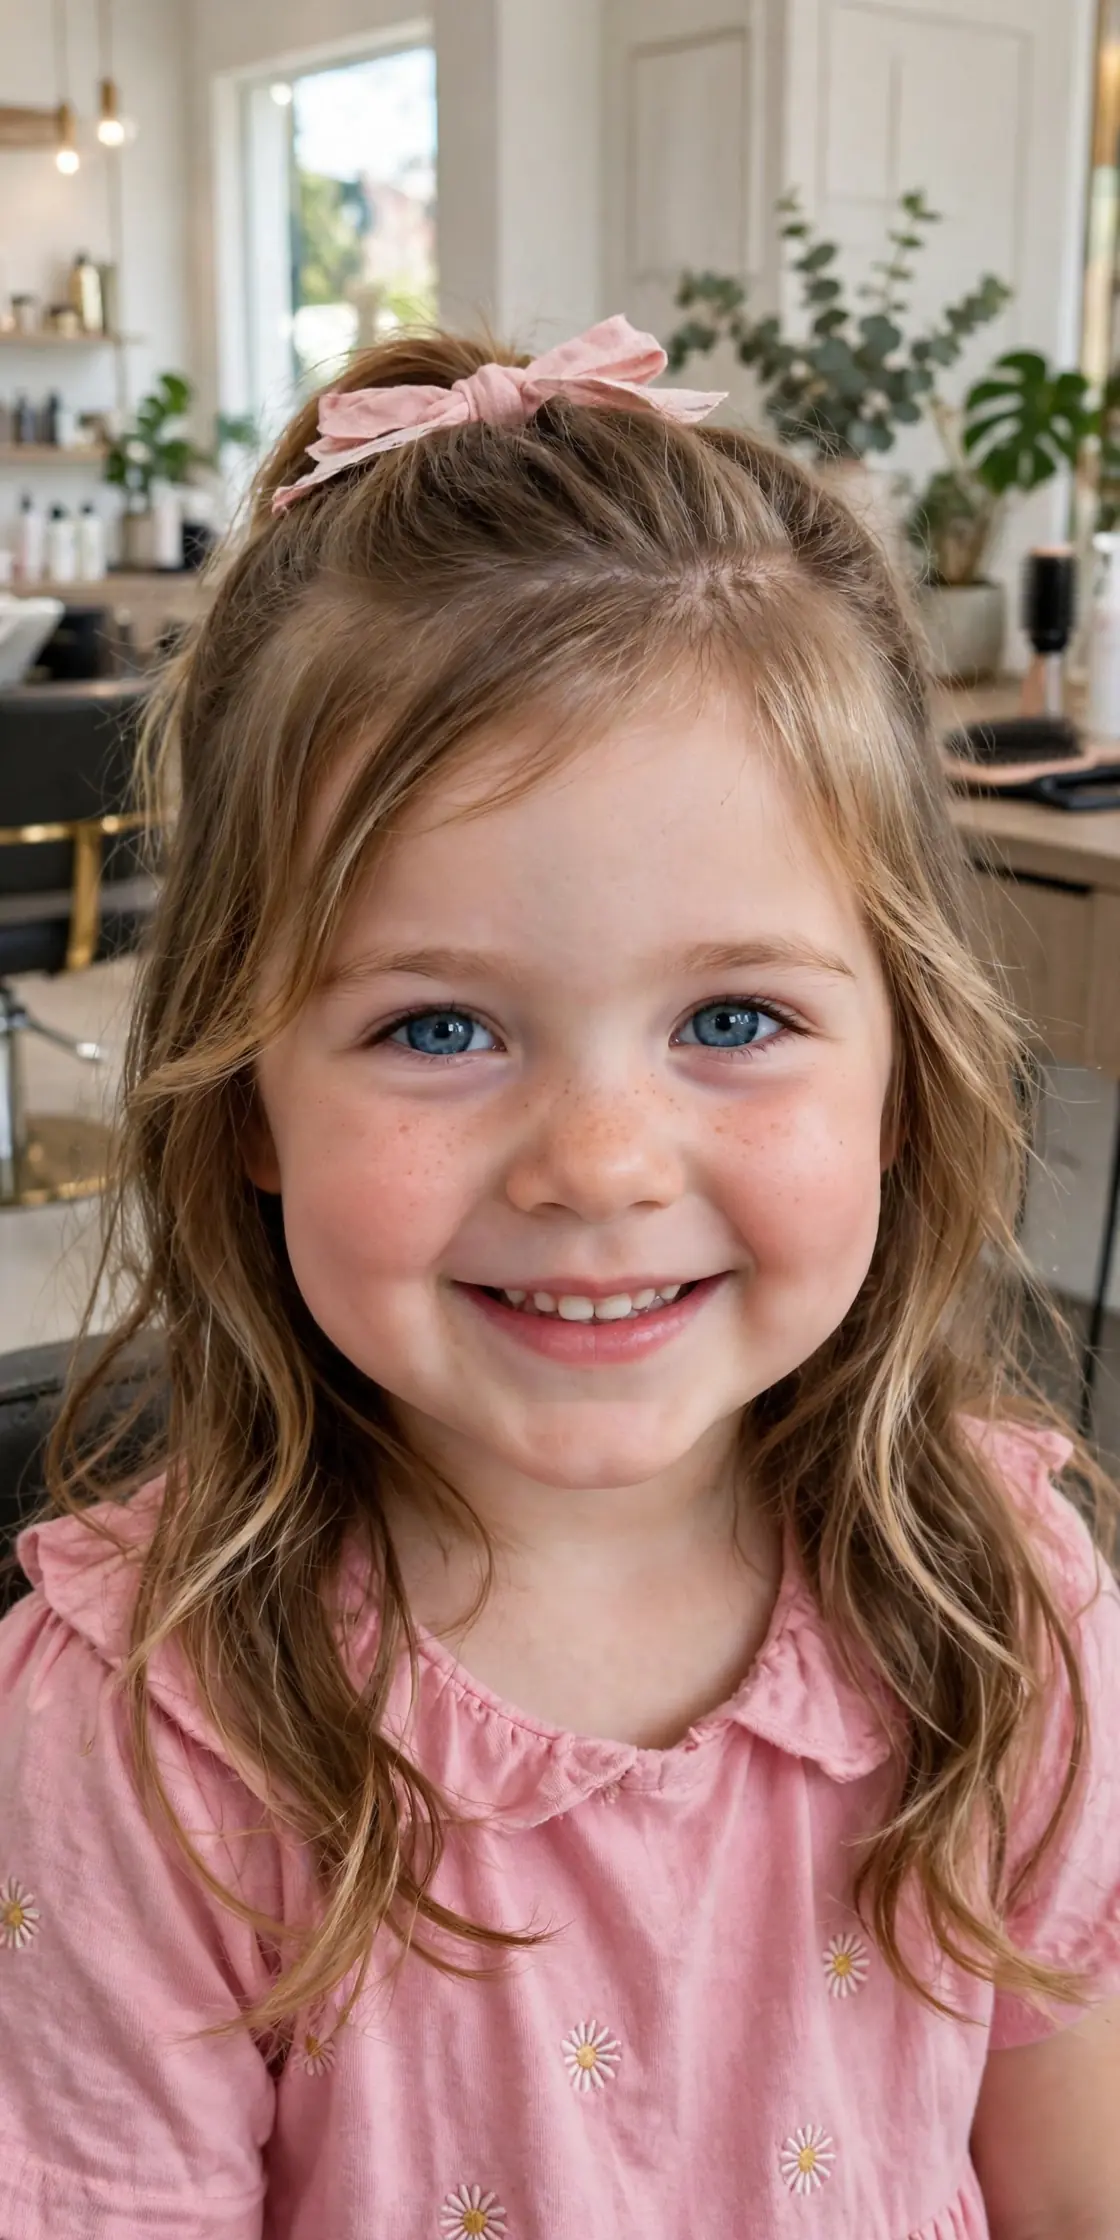
25. Face Framing Layers with Cute Clips
What it is: Face framing layers held back with small, colorful clips. The clips add fun, and the layers keep the look soft.
Best for: Short to medium hair and girls who love accessories. It also suits school, where clips keep hair tidy.
Ask your stylist: “Please cut face framing layers that sit nicely with small clips. Keep them long enough to clip back.”
Style it: Clip one side back with a small snap clip. Leave the other side loose for a sweet, uneven look.
Trim note: Trim every 10 weeks. Clips hide growth, so the cut lasts well.
Special Moments and Easy Parts
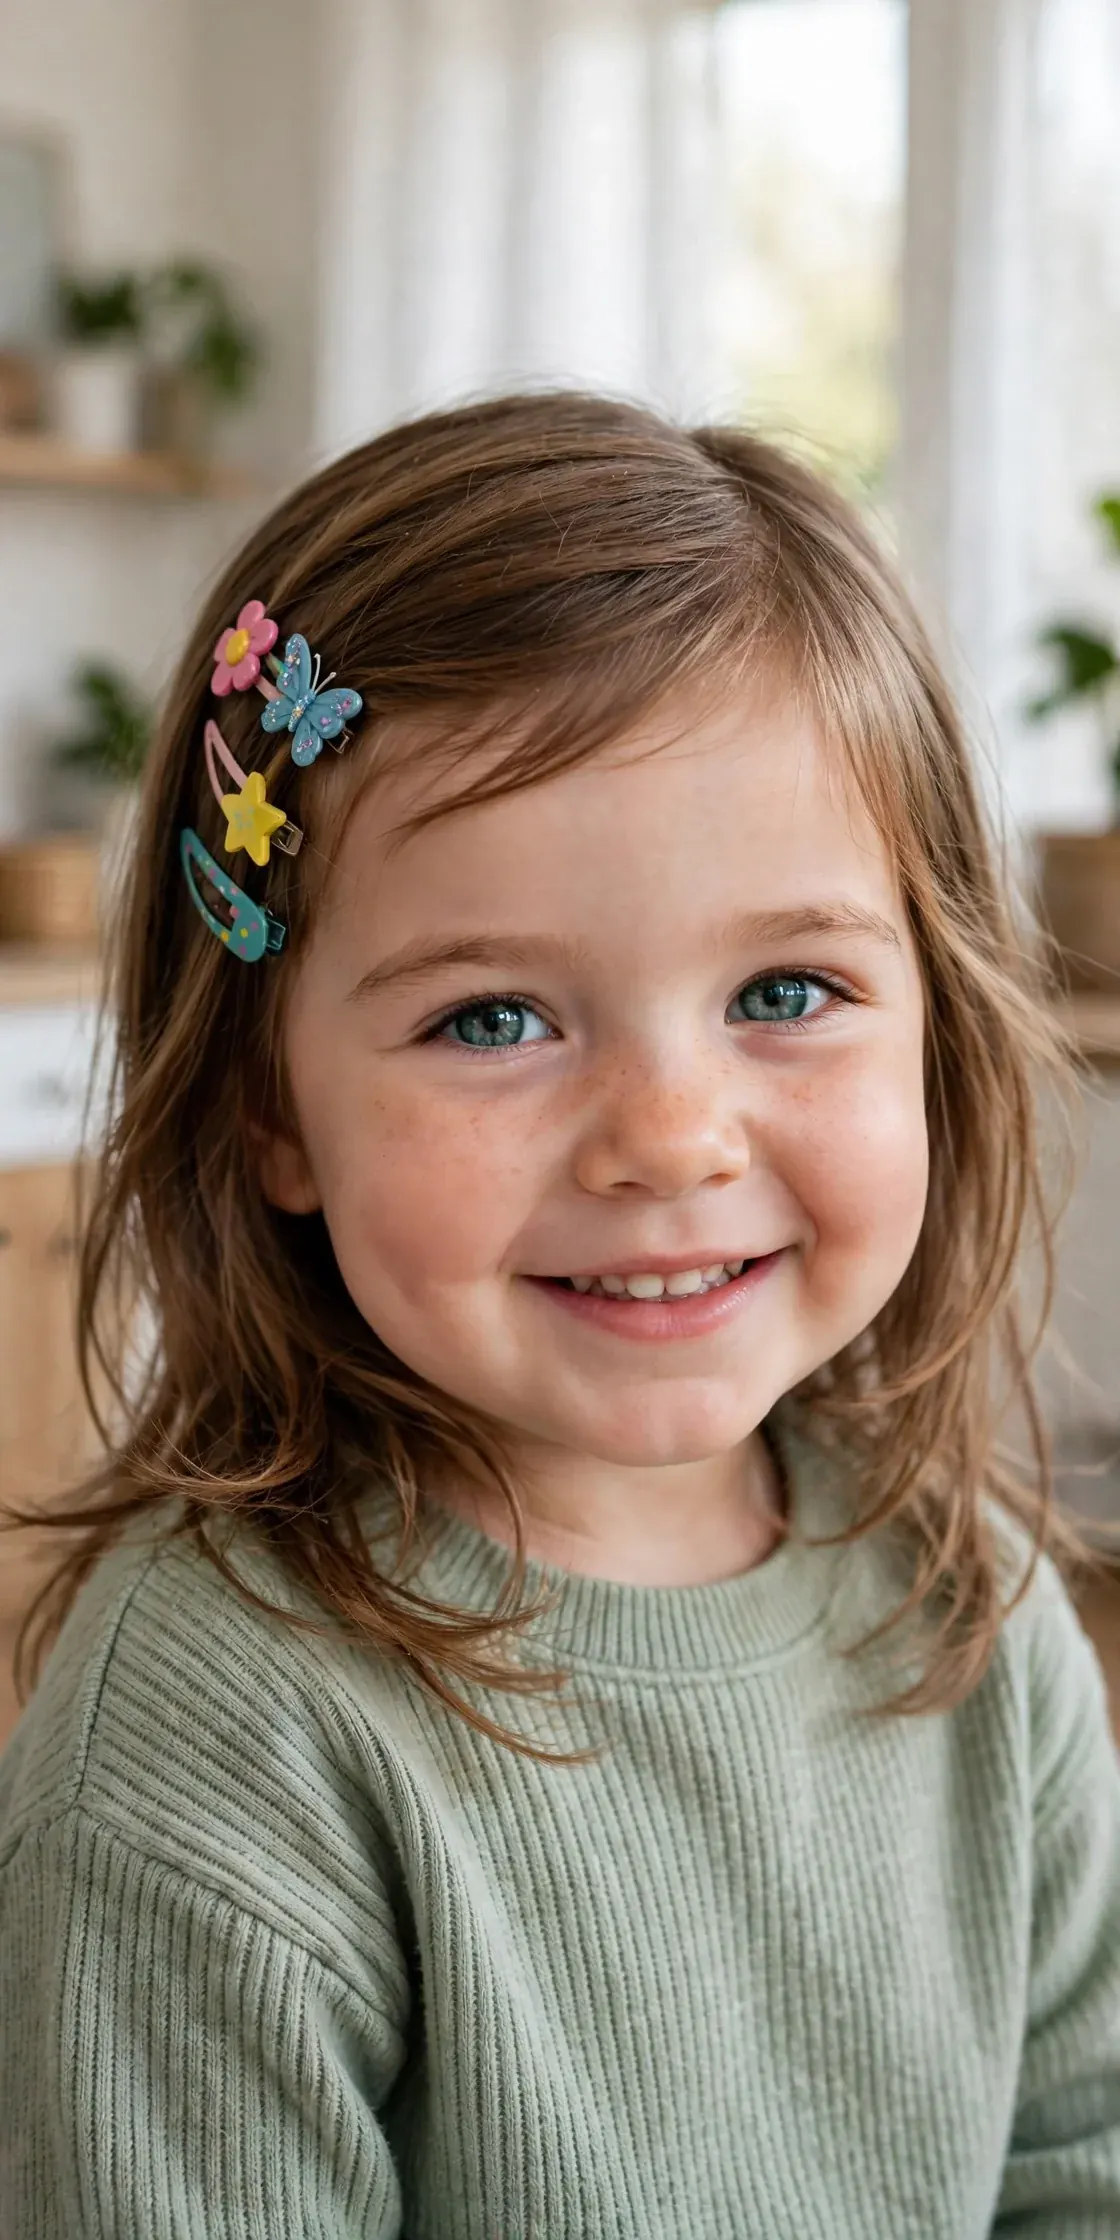
26. Face Framing Layers for Birthday Photos
What it is: Soft, bouncy layers with gentle curls at the ends, made for the camera. The layers catch the light and frame her smile in every photo.
Best for: Birthdays and family photos. It also suits medium to long hair.
Ask your stylist: “Please cut soft face framing layers for her birthday photos. Add gentle curls at the ends for the big day.”
Style it: Curl the ends lightly with a low-heat tool or soft rollers. Brush the layers forward for the photo.
Trim note: Book the cut a few days before the party, so the layers settle in.
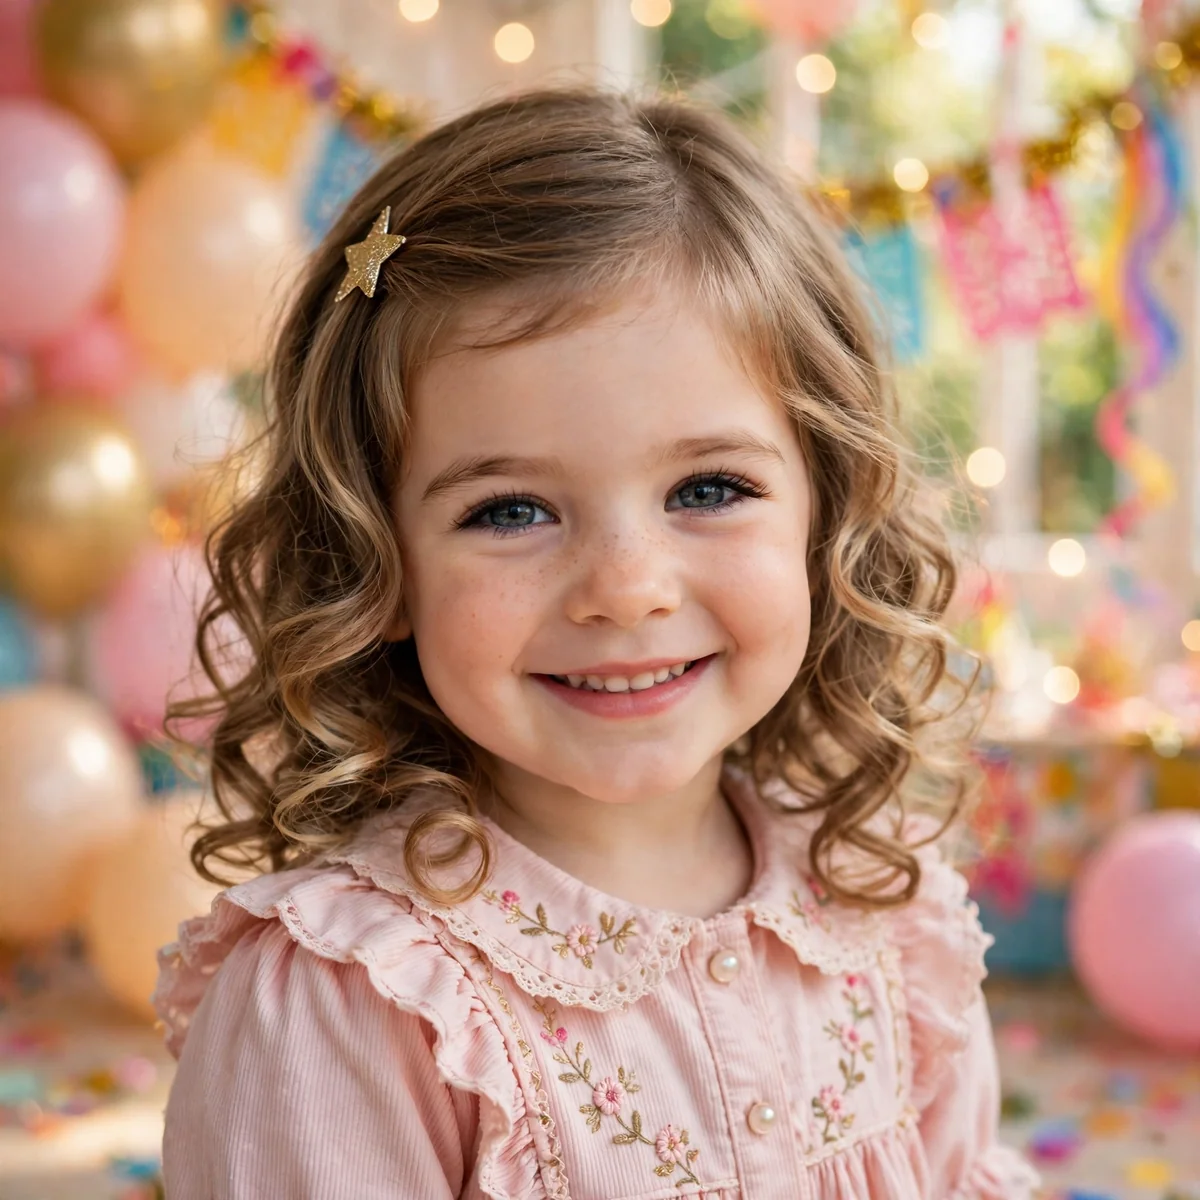
27. Face Framing Layers for School Picture Day
What it is: A neat, tidy cut with face framing layers that sit perfectly in a photo. It looks polished but still natural.
Best for: Picture day and school events. It also suits medium hair that needs to look neat fast.
Ask your stylist: “Please cut neat face framing layers for school picture day. Keep them tidy and even on both sides.”
Style it: Brush it smooth the morning of the photo. A tiny bit of leave-in cream tames flyaways.
Trim note: Book the trim one week before picture day, not the day before.
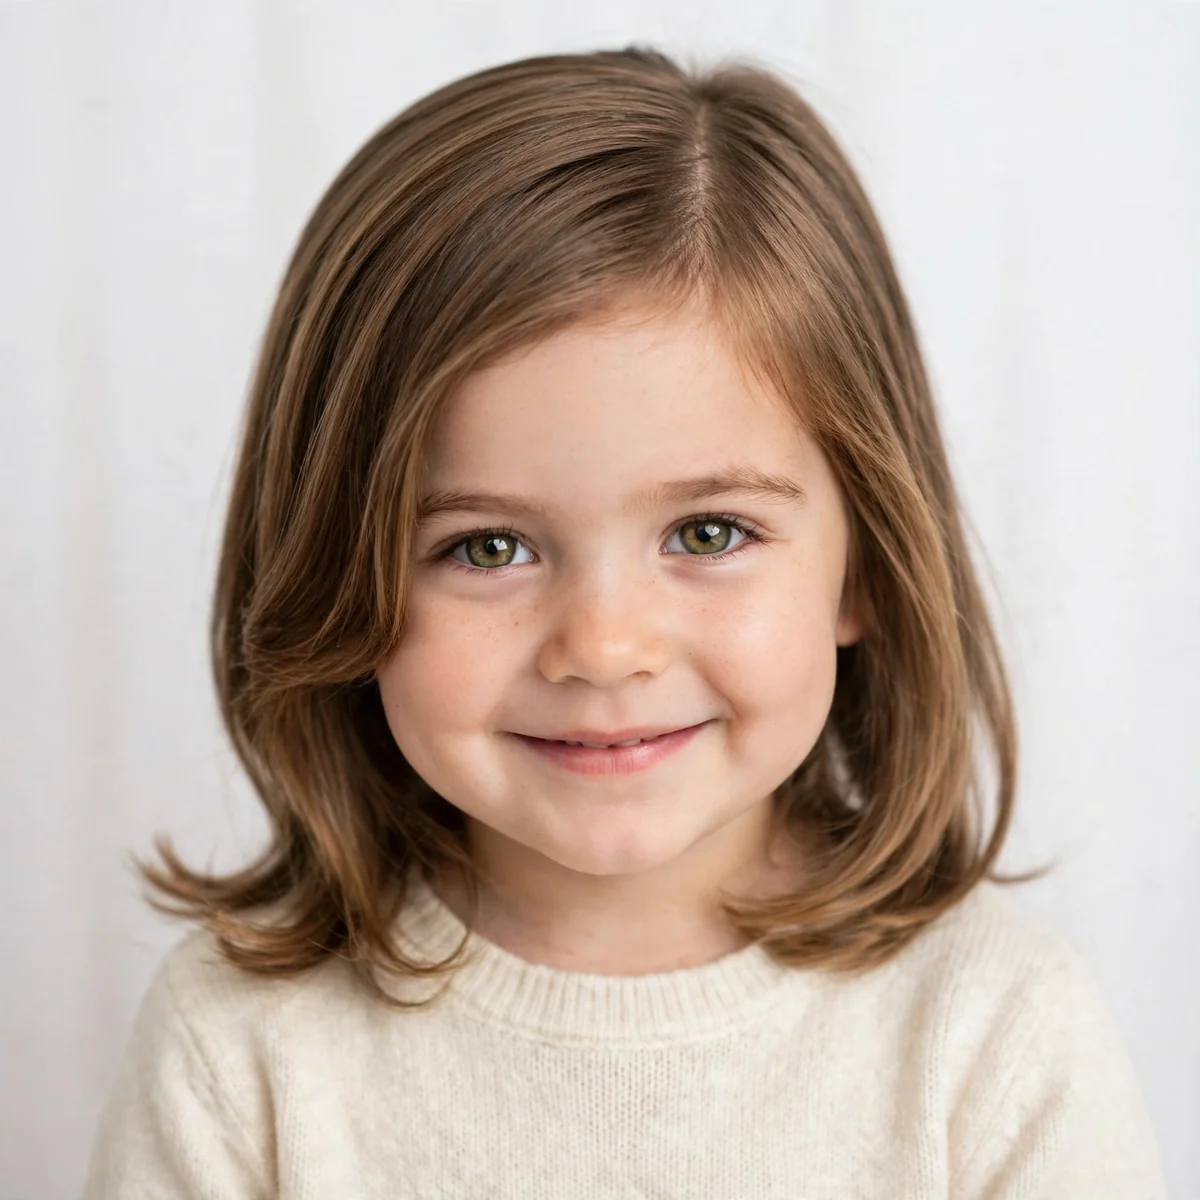
28. Face Framing Layers with a Side Sweep
What it is: Front layers swept softly across the forehead to one side. It gives the cut a gentle, playful fringe feel without real bangs.
Best for: Straight and wavy hair. It also suits girls who want bangs but are not ready for the upkeep.
Ask your stylist: “Please cut face framing layers that sweep softly to one side across her forehead. Keep the sweep light and wispy.”
Style it: Sweep the front pieces to the side with your fingers. One clip holds them for playtime.
Trim note: Trim every 8 to 10 weeks. The sweep grows into her eyes if left too long.
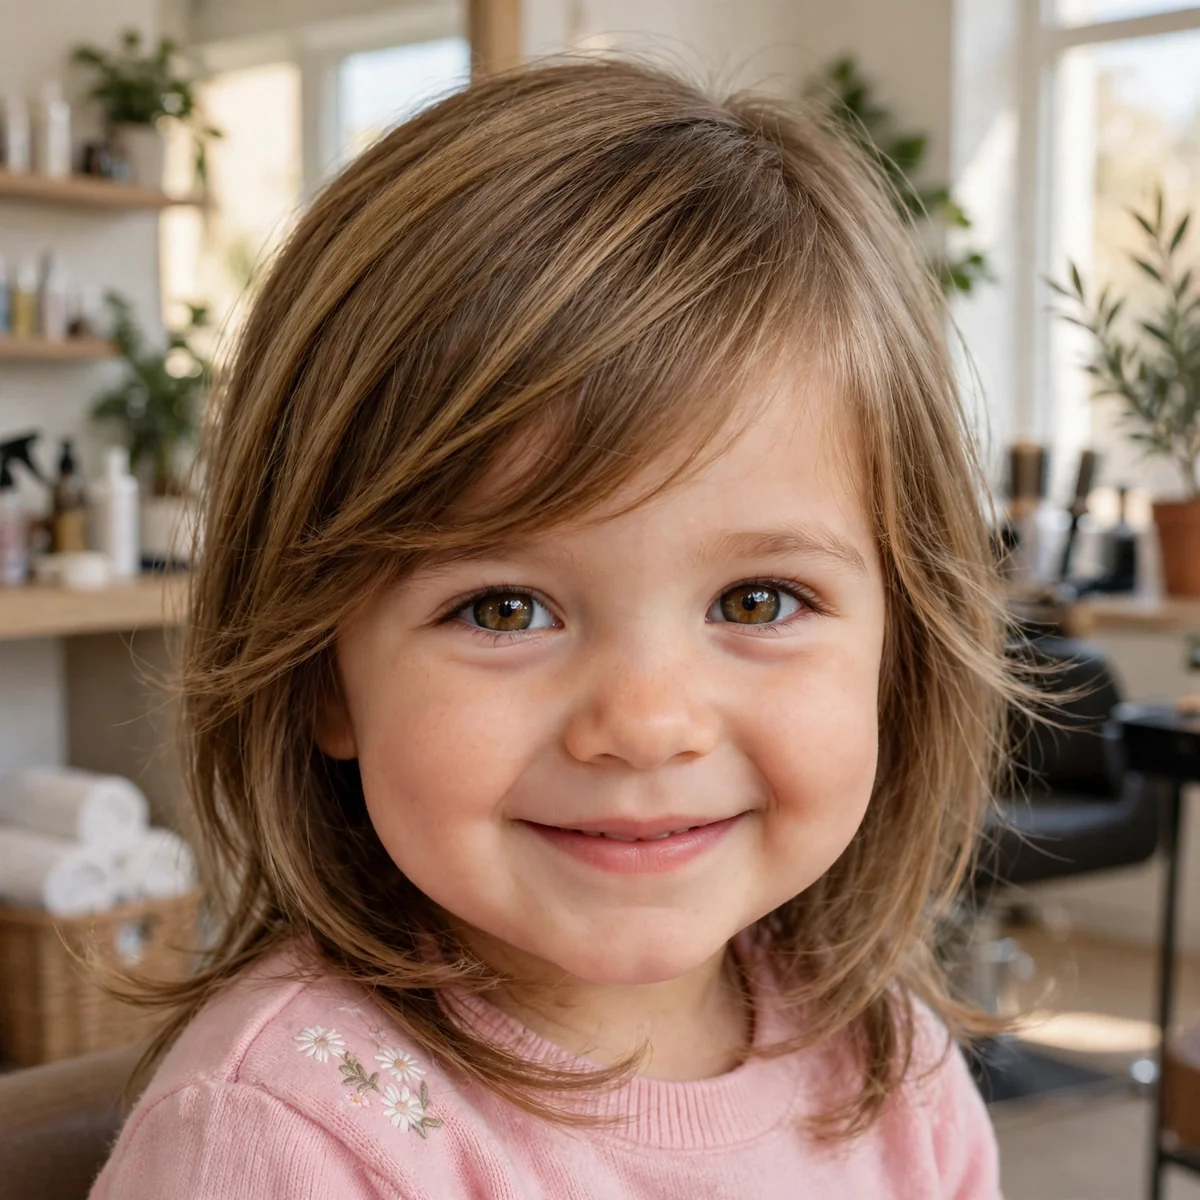
29. Face Framing Layers with a Middle Part and Curls
What it is: A middle part with bouncy curls and face framing layers on both sides. The curls bounce around her face and look full of joy.
Best for: Curly and wavy hair. It also suits girls whose curls need shape at the front. Toddler girl shag haircuts offer another curly-friendly shape.
Ask your stylist: “Please cut face framing layers with a middle part for her curls. Cut each curl dry so the layers sit evenly.”
Style it: Scrunch curl cream into damp hair and let it air dry. The middle part keeps the curls balanced.
Trim note: Trim every 12 weeks. Curls hide growth, so the cut lasts longer.
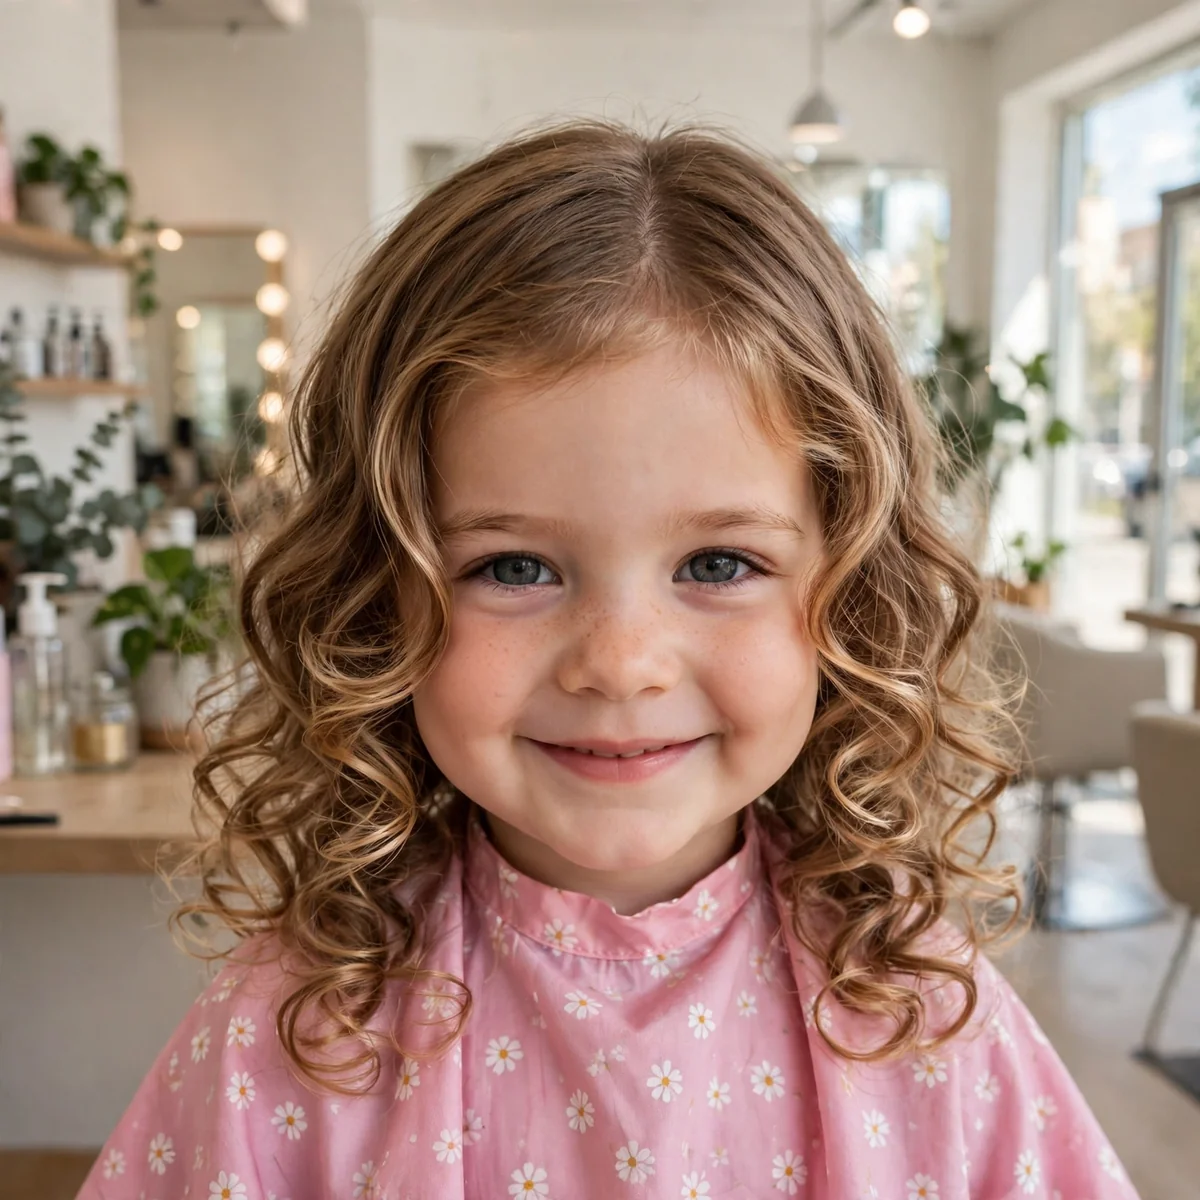
30. Face Framing Layers for Easy Grow-Out
What it is: Long, soft layers that blend into the rest of the hair as they grow. This is the lowest-care style on the list, made for parents who want fewer salon visits.
Best for: Every hair type and every face shape. It also suits girls who are growing their hair long.
Ask your stylist: “Please cut long, soft face framing layers that will grow out easily. Start them at her jawline and blend them well.”
Style it: Wear it down or in a ponytail. The layers look good either way, with no styling at all.
Trim note: Trim every 12 to 14 weeks. This style forgives a late visit.
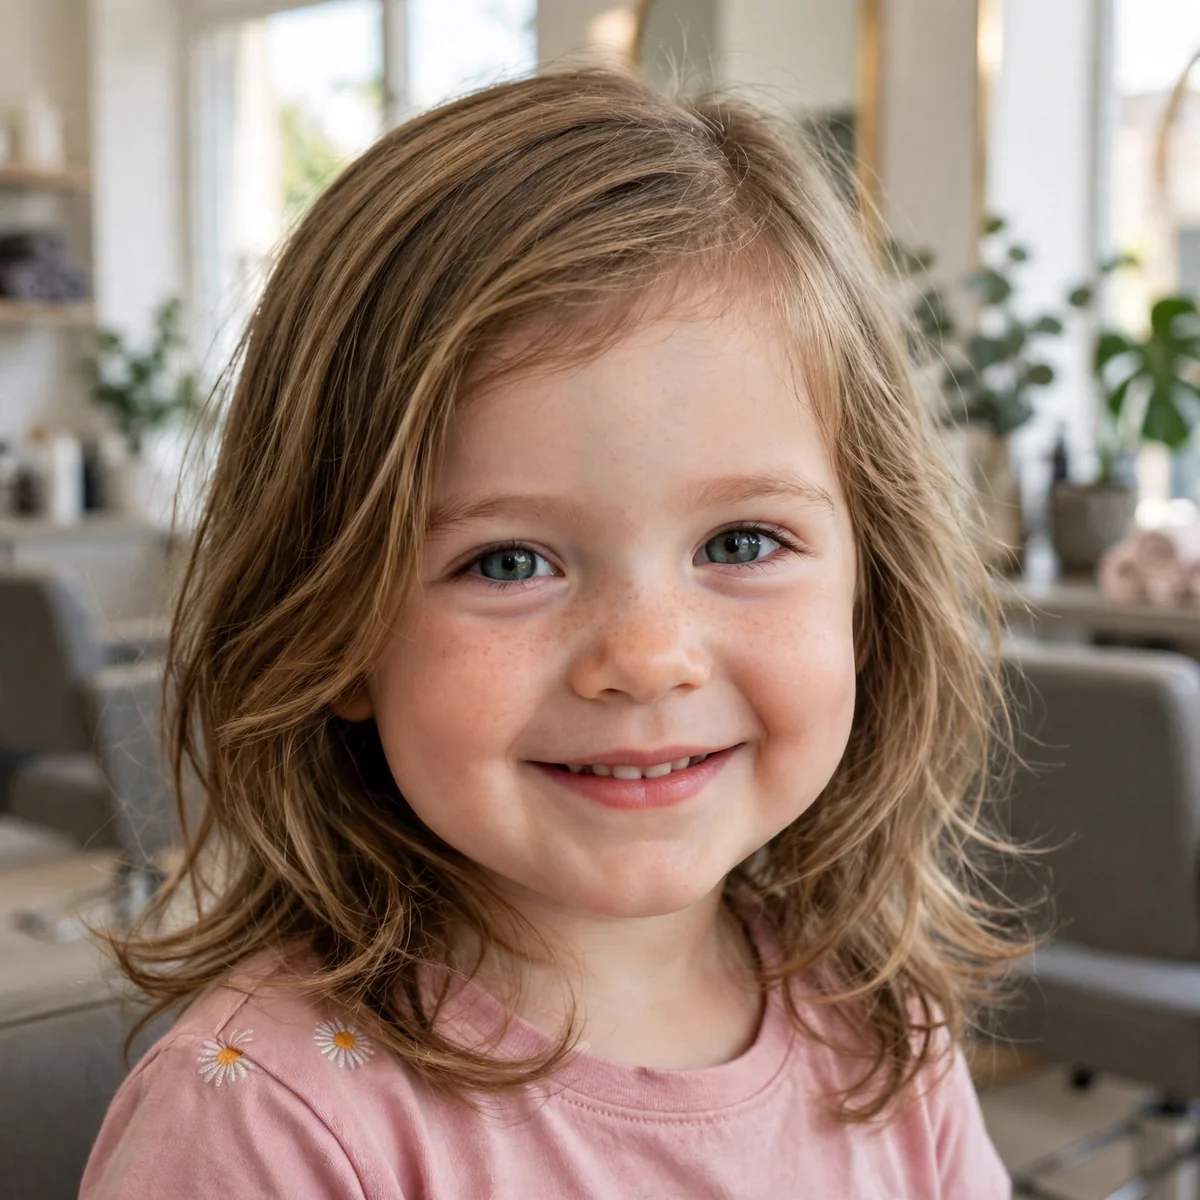
The 2-Minute Morning Routine
Mornings with a toddler are busy. This routine takes two minutes and works with any of the 30 styles above. Keep a spray bottle and a soft brush by the door.
Minute one: mist her hair lightly with water. Brush it gently from the ends up to the roots. This wakes up the layers without a full wash.
Minute two: push the face framing layers into place with your fingers. Add a clip if she needs one for school. Then let her go play. That is the whole routine.
On wash days, add a small drop of leave-in conditioner. It keeps the layers smooth and stops tangles. Skip heavy oils and sprays. Toddler hair needs very little product.
If she wakes with bed head, mist the front pieces only. Smooth them with your fingers and go. The back does not need to be perfect for a school day.
How to Style Face Framing Layers in 6 Steps
Styling toddler girl hairstyles with face framing layers is simple. You need a spray bottle, a soft brush, and a little leave-in cream. Follow these six steps.
- Mist the hair lightly. Spray water over the front pieces and the top. Damp hair is easier to shape than dry hair.
- Brush gently from the ends up. Start at the ends and work up to the roots. This stops tangles without pulling.
- Part the hair. Use a center part for curtain styles or a side part for a sweep. A clean part makes the layers fall evenly.
- Shape the front layers. Pull the face framing pieces forward with your fingers. Let them fall on their own past her chin.
- Add a tiny drop of leave-in cream. Rub it between your hands first. Smooth it over the front pieces to tame flyaways.
- Finish with a clip or bow if you like. Clip one side back for school, or leave both sides loose for photos. That is all it takes.
Never use hot tools on a toddler’s hair every day. A warm dryer on the lowest setting is fine now and then. Air drying is best for her hair and her scalp.
Calm-Toddler Chair Protocol: A Stress-Free Salon Visit
Many toddlers fear the salon chair. A calm visit starts before you leave home. Tell her what will happen in simple words. Show her a photo of a little girl getting a haircut.
Bring her favorite toy or snack. Let her hold it during the cut. A busy hand means a still head. Ask the stylist to go slowly and to show her each tool first.
Seat her on your lap if the salon allows it. A lap feels safer than a big chair. Some salons have booster seats shaped like cars. Ask for one when you book.
Keep the visit short. Face framing layers are a quick cut. A good stylist can finish in 15 to 20 minutes. Praise her the whole time and promise a small treat after.
If she cries, stay calm. Do not force the cut. Ask the stylist to pause and let her settle. A short break beats a scary memory. You can always finish another day.
7 Mistakes to Avoid with Toddler Face Framing Layers
1. Cutting the layers too short. Short front pieces cannot tuck back. They fall in her eyes. Always start long. You can go shorter next time.
2. Cutting wet hair too short. Wet hair looks longer than it is. It springs up as it dries. Ask the stylist to cut dry, or to leave extra length.
3. Making the layers choppy. Harsh, choppy layers look messy on a toddler. Ask for soft, feathered ends that blend into the rest of her hair.
4. Skipping the start-point talk. If you never say where the layers should start, the stylist must guess. Always name cheekbone, chin, or jaw before the cut.
5. Using adult styling products. Adult sprays and gels are too strong for a toddler’s scalp. Use kid-safe, tear-free products only.
6. Brushing curls when dry. Dry brushing turns curls into frizz. Always brush curly hair when it is damp, with a little cream.
7. Waiting too long between trims. Split ends travel up the hair. A small trim every 10 to 12 weeks keeps the layers soft and healthy.
Trim Cadence and US Cost Table
How often should you trim? It depends on the style. Short bobs need trims sooner. Long layers can wait longer. Use this table as a guide.
| Style Group | Trim Every | Typical US Cost |
|---|---|---|
| Short bobs (styles 2, 6, 7, 8, 9) | 6 to 10 weeks | $20 to $35 |
| Medium cuts (styles 1, 3, 4, 5, 10) | 10 weeks | $20 to $35 |
| Long hair layers (styles 11 to 15) | 10 to 12 weeks | $25 to $40 |
| Texture cuts (styles 16 to 20) | 10 to 12 weeks | $25 to $40 |
| Party and photo styles (styles 24, 26, 27) | Before the event | $25 to $45 with styling |
| Easy grow-out (style 30) | 12 to 14 weeks | $20 to $35 |
Prices change by city and salon. Kids salons often charge less than adult salons. Many offer a first-haircut package with a photo and a small keepsake. Ask about it when you book.
A trim is cheaper than a full cut at most salons. If you only need the face framing pieces tidied, ask for a front trim. It takes five minutes and costs less.
The Grow-Out Plan: What Happens Next
Face framing layers grow out better than almost any toddler cut. The front pieces blend into the rest of the hair as they get longer. There is no harsh line to fix.
Month one: the layers sit just where the stylist left them. The shape is fresh. You may need one clip on the shorter side.
Month two: the pieces reach past her chin. They tuck behind her ears with ease. The cut still looks neat with no visit.
Month three: the layers blend into the overall length. The hair looks like one soft length with gentle shape. This is the time to book a trim if you want to keep the frame.
If you want to grow the layers out fully, just wait. By month four or five, they are part of the length. No awkward stage, no strange shape. That is the beauty of this cut.
To keep the grow-out smooth, trim the very ends every 12 weeks. A tiny dusting of the ends stops split ends. It does not change the style at all.
Kid-Safe Products for Face Framing Layers
Toddler hair needs gentle care. Look for tear-free shampoo made for kids. It should be free of harsh sulfates and strong scents. A small amount goes a long way.
A light leave-in conditioner is the one product worth buying. It smooths the front layers and stops tangles. Pick a spray made for kids and use just one or two spritzes.
For curly girls, a curl cream made for kids keeps the rings soft. Rub a pea-sized amount between your hands. Smooth it over the curls while the hair is damp.
Skip hairspray, gel, and adult styling creams. They build up on fine hair and can bother her scalp. A soft brush and a little water do more than any spray.
For more short-hair care ideas, see toddler girl short layered haircuts and toddler girl pixie haircuts. Both cover gentle care for little girls.
Home Trim Guidance: Fixing Face Framing Strands Safely
Sometimes a front piece grows into her eyes between salon visits. A tiny home trim can help. But go slowly. You can always cut more. You can never add it back.
Only trim the face framing strands, never the whole cut. Work with dry hair so you see the true length. Comb the strand straight down in front of her face.
Hold the strand between two fingers. Snip a quarter inch at a time, straight across. Then check both sides in the mirror. The two sides must match.
Match the landmarks. If the left piece ends at her chin, the right piece should too. Step back and look at her whole face. The layers should frame both sides evenly.
Use sharp, small scissors made for hair. Never use craft scissors or kitchen scissors. They crush the ends and cause split ends.
If she will not sit still, stop. A moving child and sharp scissors do not mix. Book a quick front trim at the salon instead. It takes five minutes and costs very little.
For general haircut care and how hair grows, see the Haircut and Hair care pages on Wikipedia. They explain the basics in plain words.
How to Pick from These 30 Toddler Girl Haircut Ideas
Thirty choices can feel like a lot. Start with her hair type, then her length. That narrows the list to five or six styles in seconds.
If she has fine hair, look at styles 1, 6, 7, and 16. A toddler girl haircut for fine hair needs light layers and a shape that adds fullness. If she has thick hair, look at styles 9, 13, and 17. A toddler girl haircut for thick hair needs layers that remove weight at the front.
If she has curls, look at styles 20 and 29. A curly toddler girl haircut needs a dry cut and layers shaped curl by curl. If she loves long hair, look at styles 11, 12, and 13. Toddler girl long hair layers keep the length and add soft shape at the front.
If she loves bobs, look at styles 2, 6, 7, 8, 9, and 10. A toddler girl bob with layers is neat, sweet, and easy to wash. Show her two or three photos and let her point to the one she likes best.
Every little girl haircut on this list is a face framing haircut for kids at heart. The layers sit at the front, the back stays simple, and the grow-out stays gentle. Face framing layers for little girls work because they flatter her face without fuss. And face framing layers for toddlers are kind to busy mornings, which is what parents need most.
Frequently Asked Questions
What age do face framing layers work for toddler girls?
Face framing layers work from about age 2 up. At age 2, keep the layers long and soft, starting at the jaw. At age 3, a chin start works well. At age 4, cheekbone layers add pretty shape. The key is to keep the pieces long enough to tuck back. A good stylist will match the cut to her age and her patience in the chair.
What is the difference between face framing layers and bangs?
Face framing layers sit at the sides of the face and fall down past the chin. They never cover the forehead. Bangs sit across the forehead and need trims every few weeks to stay out of her eyes. Layers are lower care and grow out more gently. Bangs give a bolder look but need more upkeep.
Do face framing layers work on curly toddler hair?
Yes, they work very well on curls. The trick is to cut the layers curl by curl while the hair is dry. Never cut curls straight across when wet. Dry curls spring up as they dry, so a wet cut ends up shorter than planned. A curly toddler girl haircut with face framing layers keeps the curls neat and shaped around her face.
Will the layers grow out unevenly?
No, face framing layers grow out more evenly than most cuts. The front pieces blend into the rest of the hair as they get longer. By month three, they look like part of the overall length. A tiny trim every 10 to 12 weeks keeps the shape fresh. If one side grows faster, a quick front trim evens it out in minutes.
How often should I trim my toddler girl’s face framing layers?
Trim short bobs every 6 to 10 weeks. Trim medium and long styles every 10 to 12 weeks. The easy grow-out style can wait 12 to 14 weeks. A trim is quick and cheap at most kids salons. If only the front pieces need work, ask for a front trim only.
Can I trim the face framing strands at home?
Yes, for a small tidy-up only. Work with dry hair and snip a quarter inch at a time. Match both sides to the same landmark, like the chin. Use sharp hair scissors, never craft scissors. If she will not sit still, stop and book a quick salon trim instead.
Conclusion
Face framing layers are the sweetest, easiest cut for a toddler girl. They soften her face, add shape to any hair type, and grow out gently. You get a styled look with almost no morning effort.
Pick a start point that suits her face. Choose a style from this list that fits her hair and her life. Then show the photo and the script to your stylist. You will leave the salon with a cut you both love.
And remember, the best little girl haircut is the one she feels happy wearing. If she loves it, you picked right. Save your favorites from this list and enjoy every sweet, fresh photo.
📌 Pin now, read later — save these styles for your next salon visit!

Reviewed by Daniel Morgan
Daniel Morgan is the Founder and Editorial Director of Barber’s Groom. He oversees the editorial review of the guides on this site, checking each one for accuracy, clarity, and practical value before it reaches readers.